Tuesday, September 27, 2011

The Very Hungry Caterpillar

This post is about cabbage moths. If seeing pictures of bugs will cause you to lose your breakfast, you might want to just skip this blog. It's not pretty. :/

caterpillar egg

Have you noticed those cute little white butterflies flitting around your brassica family plants? (These would be cabbages, broccoli, cauliflower, and my personal favorite, brussel sprouts.) Those are cabbage moths and they are not so cute when they start multiplying.

tiny caterpillars

The nasty caterpillars with their voracious appetites will devour your plants and with them, your hopes and dreams for having fresh roasted brussel sprouts with your Thanksgiving dinner!

cabbage moth damage

If you want to save your sprouts without resorting to pesticides, I recommend an intensive search and destroy mission several times a week.

big caterpillar

These are the tools that make it bearable for me. I can't wait for the day when I can delegate the task of caterpillar decimation to the Littles. Cannot wait!

garden snips

How to kill the cabbage moths:
  • If you don't like touching squishy things, glove one hand and have garden snips ready in the other.
  • Carefully inspect each leaf. Brush off the tiny little eggs hiding underneath the leaves. Brush off any thread sized caterpillars or cocoons you happen to find.
  • When you find those bigger caterpillars, they must be squashed. I use the garden snips to do the job. *shudders* It is not pleasant, but it must be done.
  • Repeat every couple of days. Vigilance is crucial!!
Do any of you, kind readers, have any tips for me on how to save my sprouts?

You DID catch the children's book reference, right?


Just had to be sure. :) I'm a big Eric Carle fan as are my Littles, though I can never read this one in quite the same way.

Kitchen Day

In the spirit of "Keeping it Real"...

Dirty Dishes Take Over

I give you "Dirty Dishes Take Over".

Yes, this is my kitchen. I wish I could say this only happened once a year. I wish I could say this only happened once a month. You see, I have a problem. I love to cook, but I don't love to do dishes. It is my least favorite chore. I'll fold nine loads of laundry with a smile on my face, even when I have to fold up those pesky fitted sheets. But the dishes... Ugh.

I could get away with procrastination of this sort when it was just Preacher Man and I and I could even sort of manage to let things slide when there were only three of us. But cooking more things from scratch, serving three meals a day + snacks (we seriously eat a lot!), and adding more mouths to feed BUT not adding any more dishwashers = "Dirty Dishes Take Over".

Kitchen Day is on Tuesdays. I wish I could say that I spent most Kitchen Days doing some extra baking or making freezer meals. So far, Kitchen Day has been spent getting the kitchen CLEAN! Some of these are chores like wiping out the fridge and cabinets, cleaning the microwave, etc... Last week, my big accomplishment on Kitchen Day was to finally catch up and get every last blessed dish washed. (That had not happened in at least four days.)

Times have been tough lately, and to cope I am making fun of myself, but really, I'm ok with things sliding into temporary chaos like that. This just lets you all know that I really am a human being.

But in the spirit of trying to be helpful, which above all, I'm always trying to do, I'll share what has helped me stop procrastinating and just get those dishes washed!

It's too simple really, but here it is:

Wash the dishes (all of them!) after every meal.

Every meal.

(I do allow myself exceptions, but I'm usually wishing later that I hadn't.)

It's so easy to say, "Oh there are only a few dishes here, I'll just do them later." The problem is that later they have piled up all around the kitchen such that I can't even function let alone fix a meal! Later too easily becomes tomorrow. Besides, when you wash them right away, the job is so much easier! There is less stuck on food and general nastiness. The job really is so much more easy and pleasant when it is only a sinkful of dishes. And I'm much more likely to invite a certain Littles to come splash in the water alongside me when I'm cheerfully washing up a few dishes and not dealing with the mess shown above.

And this is when I must be the grown up that I am and work at it until this habit becomes second nature.

How do you keep up with the dishes at your house?

Monday, September 26, 2011

The Untiring Servant

Meditations for Monday

I scratched out a note for a blogging idea a couple of weeks ago and it reads:
"Jesus - the untiring servant"

I don't remember what I was thinking when I wrote that, but when I read it today, I was thinking more along the lines of this:
"Jesus - the untiring servant?"

Meaning, even Jesus got tired.

I've been tired lately. And it has been more than just the way I've been tired because I am a mother and mothers are always tired. It has been a deep spiritual ache accompanied by struggles with my health that have brought on chronic exhaustion. No, I'm not pregnant. That would be a much more pleasant reason to be struggling than what I am dealing with. But today as I looked at my list of blog ideas, I was struck by Jesus' humanity and it gave me comfort.

Jesus was the Son of God and the Son of Man. He carried on a very intensive ministry for years. Just because He is Deity does not mean that His body did not have the same physical needs and limitations that the rest of us do. He needed daily bread. He needed rest. He needed time alone. He needed comfort. He was not an untiring servant.

Consider His temptation in the wilderness for forty days. The Bible tells us that He was hungry, but I imagine He was pretty tired as well. We know that afterward angels came to minister to Him.

Consider Jesus on the Mount of Olives before He gave Himself up to the soldiers who came to arrest Him:

Luke 22:39-45 -

And he came out and went, as was his custom, to the Mount of Olives, and the disciples followed him. And when he came to the place, he said to them, "Pray that you may not enter into temptation." And he withdrew from them about a stone’s throw, and knelt down and prayed, saying, "Father, if you are willing, remove this cup from me. Nevertheless, not my will, but yours, be done." And there appeared to him an angel from heaven, strengthening him. And being in an agony he prayed more earnestly; and his sweat became like great drops of blood falling down to the ground. And when he rose from prayer, he came to the disciples and found them sleeping for sorrow, and he said to them, "Why are you sleeping? Rise and pray that you may not enter into temptation."

Just before beginning His ministry, Jesus endured 40 days of the Tempter throwing everything he possibly could at Jesus. Throughout His life, Jesus endured tremendous pressure and sorrow. At the end of His life, He endured separation from His Father while bearing the weight of all of the sins of the world. Jesus endured betrayal and loss.

Jesus endured.

And the real reason for comfort - Jesus ENDURES!

Jesus crushed Satan's head when he rose on the third day. Death was swallowed up in victory and Jesus reigns in heaven at the right hand of the Father.

Jesus endures forever!

And Jesus is NOW the untiring servant, mediating for us, listening to our prayers, understanding our every trial and temptation day and night until God calls us home to join Him at His throne.

I feel like I can endure now, at least for today, and it is because He is my strength!

Psalm 73:23-26

Nevertheless, I am continually with you;
you hold my right hand.
You guide me with your counsel,
and afterward you will receive me to glory.
Whom have I in heaven but you?
And there is nothing on earth that I desire besides you.
My flesh and my heart may fail,
but God is the strength of my heart and my portion forever.

Saturday, September 24, 2011

Manicotti

Welcome friends!
Be sure you check out my time saving technique for stuffing the shells.

manicotti

This is a nice potluck meal, freezer meal, Sunday lunch, or meal to take to a friend because you can make up the dish ahead of time, pop it in the freezer or fridge, and it only takes about 30 minutes to bake! I suggest doubling the recipe and making a pan to give away or stash in your freezer.

Manicotti or Stuffed Shells

Ingredients:
- 12 large manicotti shells (or about 24 jumbo shells)
- 4 c. shredded mozzarella, divided
- 2 c. ricotta cheese
-1/2 c. grated parmesan
- 6 tbs. chopped fresh basil (or 2 tbs. dried basil)
- 26 oz. jar spaghetti sauce, divided (I use a quart of homemade.)

Optional ingredients - you can make the filling anything you want it to be... you can use cottage cheese instead of ricotta. Spinach, hamburger or sausage are all nice additions.

Directions:
1. Preheat oven to 350*. Grease a 13x9" baking dish. Cook pasta according to package directions. Drain, rinse with cool water. Let pasta dry on clean towels. (Just make sure they aren't linty!)

2. Pour a bit of spaghetti sauce into the bottom of the pan. (Just enough to completely cover.)

3. For the filling: In a medium bowl, stir together 3 c. of mozzarella with the ricotta, basil, and parmesan. (This is the time to mix in any optional fillings.)

4. Stuff the shells with this mixture. *** See hints below! ***

5. Arrange the stuffed pasta over the sauce.

6. Pour remaining spaghetti sauce on top of pasta. Sprinkle with remaining mozzarella.

7. Bake for 30 minutes. (May broil a couple of minutes to brown the cheese on top.)

Serves: 8

Salad, breadsticks or garlic bread all make nice additions.

*** Hints for stuffing the pasta ***
The jumbo shells are very easy to stuff with a teaspoon. Be generous with your stuffing.

This technique is shown in the picture above: The manicotti is a hundred times easier to stuff if you cut down the length of the pasta with kitchen scissors, stuff, then fold the sides of the pasta back into its original shape. Lay it seam side down in the pan and no one can tell that you've taken this short cut, and I promise you it will take you a fraction of the time of trying to pipe the filling into the shells! (I know from experience!)

freezing casseroles

Freezer dinners to take to a friend - I cover the pans in foil and write the baking instructions right on it with a sharpie.

I like to buy the disposable aluminum pans to use when I am making a meal for someone. I realized how nice they were when I was on the receiving end of some meals delivered this way. After the meal is eaten, the pan can be thrown away and they also get the gift of not having to scrub a messy pan!

Joining the Four Moms Freezer Meal linkup.

"Be With Me Lord"

This was a typo... full hymn post coming tomorrow.

Sorry 'bout that!

Wednesday, September 21, 2011

The Poorman's Meal


Have you seen this darling woman's videos on YouTube? Mrs. Clara is in her 90's and shares the recipes her family ate during the Great Depression. She shares some wonderful ideas for cheap eating and I love hearing her tell her stories.

I'm all for healthy eating, but we sometimes eat less than healthy foods because they are just plain cheap and we are trying to stretch our grocery budget just a leeeeeetle bit more. One of those less-than-healthy foods we eat on occasion are hot dogs. I can get them for $.99/lb and the Littles love them. To make a really cheap meal, we'll do "Beanie Wienies" - homemade baked beans with hot dogs cut up in them. Last night for dinner, we ate "chili dog chili", which was basically homemade chili stretched with cut up hot dogs and a little cheese on top. I remember when we first got married, Preacher Man and I would have chili dogs for our cheap meal. It came out to a $.50/person/meal.

When we eat such meals, I try to always add some fresh cut up veggies to balance things out just a little. Sometimes you just have to fill the bellies, you know?

One thing I have noticed that is funny - when we are eating as cheaply as possibly, I run short on bowls. Most of the time these days we are eating 3 meals a day in bowls - oatmeal for breakfast, beans and rice for lunch, soup, etc... for dinner... Doesn't it seem like cheap food tends to be served in a bowl?

So what is your family's "Poorman's Meal"?

Sunday, September 18, 2011

Break Thou the Bread of Life

Sunday Hymn Post

Break Thou the bread of life, dear Lord, to me,
As Thou didst break the loaves beside the sea;
Beyond the sacred page I seek Thee, Lord;
My spirit pants for Thee, O living Word!

Bless Thou the truth, dear Lord, to me, to me,
As Thou didst bless the bread by Galilee;
Then shall all bondage cease, all fetters fall;
And I shall find my peace, my all in all.

Thou art the bread of life, O Lord, to me,
Thy holy Word the truth that saveth me;
Give me to eat and live with Thee above;
Teach me to love Thy truth, for Thou art love.

by Mary Lathbury


John 6:35 - Jesus said to them, "I am the bread of life; whoever comes to me shall not hunger, and whoever believes in me shall never thirst."

Friday, September 16, 2011

Pumpkin Chocolate Chip Cookies

Potluck Saturday

pumpkin chocolate chip

My favorite fall cookie. These are requested... no, demanded every year on our group camping trips! I'll admit, they are different than anything else I've ever had, so I wasn't taken with them on the first bite, but by cookie #2, I was ADDICTED!

1 Cup Butter
3 Cups Sugar
2 Cups Pumpkin (one can)
2 Eggs
5 Cups Flour
2 Tsp Baking Powder
2 Tsp Baking Soda
1 Tsp Salt
2 Tsp Cinnamon
1 Tsp Allspice
2 Tsp Vanilla
2 Tsp Nutmeg
1 Pkg Chocolate Chips

Mix the dry ingredients in a large bowl and the wet ingredients in a separate bowl. Then combine and add in the chocolate chips. Mix all together and bake at 350 for 9-14 min. (depending on the size you make them) They are done when bottoms have browned and middle is no longer gooey. (It can be hard to tell...keep a watch after about 9 minutes!)

Makes 7 dozen

I have noticed that these don't expand very much, so I can fit 20 cookies (4 rows x 5) on my half-sheet cookie sheets. Thought I'd pass that on because it saves time with such a huge recipe!

Thank you to Jessica Barr for this recipe. It has become a favorite fall tradition in our family!

The Alphabet Tree

A spontaneous homeschool lesson...

alphabet tree

...on the book The Alphabet Tree by Leo Lionni.

Leo Lionni is a wonderful author of children's books. Our Littles particularly enjoy Swimmy, Inch by Inch, and Fish Is Fish. I keep an eye out for his books at yard sales and at the library. I had a special time with Big Littles this past week after we read The Alphabet Tree. I asked him, "would you like to make your own alphabet tree?" Of course, the answer was, "YES!"

I am learning that every art project I do with my children is much better when it is all THEIR work (and not me trying to make it "pretty" to grown up eyes), so I had him do most of the work. I cut out a simple leaf shape from construction paper, but had him draw the tree and trunk and paste them on where he wished. I would have liked it if there were more leaves filling it out, but when he was done, he was done and I didn't want to tamper with his work by adding more.

The wonderful thing is that this particular book can be used for a wide range of ages. The storyline begins with a tree full of letters. The letters learn that they can group themselves into small words. The small words learn that they can group themselves into bigger words. Then they learn that they can form both short and long sentences.

Big Littles knows all of his letters, and this was a good review for him. We made his name with the leaves, but for now, I kept it as simple as that. An older child could use this project to practice putting together words and even sentences.

I didn't plan this lesson... I really don't plan any lessons at this point, I just try to seize the moments as they come. What spontaneous learning moments have you had lately?

Canning Salsa

Salsa Ingredients

This is my tried and true salsa recipe. It is really delicious and a jar of salsa makes a great gift! I try to make at least two batches every year so we have plenty to eat and share. When you are ready to make this, make sure your kitchen is well-ventilated. The fumes from all of the peppers and onions are quite strong!

For basic information on home canning, see this post: Home Canning Basics

Ingredients:
- 10 lbs. tomato, chopped
- 6 med. onions, chopped
- 3 c. assorted bell peppers, chopped & seeded
- 12 jalapeno peppers, chopped & seeded**
- 5 chili peppers, chopped & seeded**
- 10 garlic cloves
- 1 1/3 c. white vinegar
- 1/3 c. chopped cilantro
- 1/4 c. salt
- 1 1/2 tsp. black pepper
- 1 1/2 tsp. cayenne pepper
- 1 tsp. cumin
- 1/4 c. white sugar**
- 1/4 c. brown sugar**
- 2 tbs. lime juice
- 3 cans tomato paste

Directions:
Combine all ingredients in a large stock pot. (Use latex gloves when preparing hot peppers.) Bring to a boil, then reduce heat. Simmer for about an hour stirring occasionally, and paying attention towards the end to be sure it isn't sticking to the bottom. Ladle into hot jars leaving 1/4" headspace. Cap and process for 15 minutes in a water bath canner. Remove jars, let cool, and enjoy!

Number Of Servings: between 12 - 15 pints

**Note - this recipe is great for northern/Siberian tomatoes like "Early Girls", which tend to be very acidic. In our current home with a more temperate climate with different tomato varieties, this recipe ends up being way too sweet to me. I currently adjust the recipe to add half again the amount of hot peppers, and I leave out all of the sugar. It all depends on your tomatoes and personal preferences, but this recipe is a good starting point.

Thursday, September 15, 2011

Don't Put All of Your Tomatoes in One Basket

cracked tomatoes
Lessons Learned in Gardening

I've used various gardening strategies over the years and consider my thumb to be at least a shade of green, but this year of gardening was a tough one. It was difficult for everyone, and even the professionals struggled. The weather was particularly uncooperative and there were many extremes going on. In the picture above, you will see what happened to my tomatoes when they received a deluge after weeks of a dry spell. They filled with water, and burst, every one!

But the problem was not just the weather. I made several key mistakes this year and I am writing about them now so I remember what NOT to do in the coming years. Maybe you can learn from my mistakes too.

#1 - PLANT A VARIETY
As I said in the title, "Don't put all of your tomatoes in one basket!" My grandpa told me years ago that it seemed like every year there was a vegetable or fruit that did particularly well and there was usually one that did poorly. He advised that I preserve extras of the ones that do well to cover the next year in case the harvest was poor. He was wise about this!

Early in the season, I decided to make the majority of my garden devoted to the more expensive vegetables that we like to buy like lettuce, tomatoes and peppers. This meant that I would have to forfeit space for other vegetables, so I planted very few green beans, no potatoes, and few carrots. I joked that I had planted a "nightshade garden" because I had so many tomatoes and peppers in it and I wondered how that would play out. Well, it was a poor idea and I should have planted more variety. Putting most of my stock into tomatoes, which were terrible this year, meant that I had very little from the garden at all this year. We've had enough peas and green beans to eat for dinner every few days, and some good peppers, but nowhere near the yield I should have gotten out of this space.

#2- TEND THE TOMATOES
As I said, tomatoes were a disaster, and probably would have been poor no matter what because of the weather. But part of the failure was mine. I planted them, plunked a cage over the top, and expected them to thrive as they have in the past. Not so this year. (Rather reminds me of children. You can't just plunk a cage over them and expect them to raise themselves. Oh no, they require loving tending. In fact, there is a book out there on the very subject with some very interesting thoughts.) So after a season of extreme weather, this is what my tomatoes looked like a week ago:

Photobucket

I wince when I look at that picture. The vines are long and spindly and doubled over their cages leaving the fruit vulnerably on the ground. The vines are weak, so much so, that I have been having to pick my tomatoes before they fully ripened lest they fall off the vine and become infested with pests. I should have tended them better, making sure the branches grew within their supports and tying up the largest stems as needed.

#3 - BIGGER TOMATO CAGES
Early in the season, I told Preacher Man we needed more tomato cages. He picked up the four tier ones that cost more than I wanted to pay. We debated exchanging them for the smaller ones, but decided to keep them since the savings would hardly be worth the gas of the special trip it would require. The tomatoes that grew in the larger cages are the only ones that remained healthy and are still standing today. These big plants need the large cage supports and the tomatoes that were in the 3 tier cages are the ones lying all over the ground. From now on, all of the tomatoes will go in the larger cages and we will use our old small ones for peppers and brussel sprouts.

#4 - NO MORE VOLUNTEER SQUASH
I let that butternut squash wind all through my garden and it utterly took over. The massive vines weakened my tomato plants and also made it impossible for me to get through to weed around them or tend the vines. As exciting as volunteers are to me, I told Preacher Man to remind me of my folly and to make me tear them out. It just isn't worth it.

I'm just trying to live and learn here. Every year of gardening is different and that is what keeps things interesting. As we wind up this year's harvest, I'm already excited about making plans for next year and I still have hope for my brussel sprouts!

What have you learned from this challenging year of gardening? Are you reaping a good harvest or have your plants succumbed to the poor weather?

Wednesday, September 14, 2011

Putting a Song in Their Heart

Songs to teach your child for every week of the year!
My 52 picks -

Songs Every Child Should Know

  1. Twinkle, Twinkle Little Star
  2. Mary Had a Little Lamb
  3. Baa, Baa, Black Sheep
  4. Eency Weency Spider
  5. Starlight, Starbright
  6. I've Been Working on the Railroad
  7. Ring Around the Rosy
  8. The Farmer in the Dell
  9. Skip to My Lou
  10. Rain, Rain, Go Away
  11. Old McDonald Had a Farm
  12. London Bridge
  13. Row, Row, Row Your Boat
  14. This Old Man
  15. Hush Little Baby
Folk Songs Every Child Should Be Familiar With
(When they are grown, they may not know all of the words, but I hope they will have sung these songs and will recognize the tunes.)
  1. All the Pretty Little Horses
  2. Sleep, Baby, Sleep
  3. Bluebird, Bluebird, Through My Window
  4. What'll We Do With the Baby?
  5. Great Big House in New Orleans
  6. one of the John Henry songs
  7. Erie Canal
  8. Goodbye Old Paint
  9. Froggie Went A-Courtin'
  10. (My Cat Said) Fiddle-I-Fee
  11. Shenandoah
  12. Mary Wore Her Red Dress
  13. Sally Go 'Round the Sun
  14. Polly Wolly Doodle
  15. Here We Go 'Round the Mulberry Bush
Bible Songs
(Children should also learn adult hymns, but including them would make the three times as long!)
  1. This Little Light of Mine
  2. Jesus Loves Me
  3. Jesus Loves the Little Children**
  4. My God is So Big
  5. The Wise Man
  6. Peter, James, and John in a Sailboat
  7. Roll the Gospel Chariot
  8. The B-I-B-L-E
  9. I've got the Joy, Joy, Joy, Joy...
  10. Oh Be Careful Little Eyes...
  11. Who Made the Big, Round Sun?
  12. Read Your Bible, Pray Every Day
  13. The Lord's Army
  14. Can You Count the Stars?
** I change the words to say "red, brown, yellow, black and white".

Patriotic/American Songs
  1. The National Anthem
  2. God Bless America
  3. America, the Beautiful
  4. America (My Country 'Tis of Thee)
  5. This Land is Your Land
  6. Yankee Doodle
  7. Simple Gifts
  8. Battle Hymn of the Republic
I know I must have missed some favorites. What are your favorite songs from childhood or your children's favorite songs?

Sunday, September 11, 2011

"Peace, Perfect Peace"

Sunday Hymn Post

Peace, Perfect Peace
by Ed­ward H. Bick­er­steth, Jr.,

Peace, perfect peace, in this dark world of sin?
The blood of Jesus whispers peace within.


Peace, perfect peace, by thronging duties pressed?
To do the will of Jesus, this is rest.


Peace, perfect peace, ’mid suffering’s sharpest throes?
The sympathy of Jesus breathes repose.


Peace, perfect peace, with sorrows surging round?
On Jesus’ bosom naught but calm is found.


Peace, perfect peace, with loved ones far away?
In Jesus’ keeping we are safe, and they.


Peace, perfect peace, our future all unknown?
Jesus we know, and He is on the throne.


Peace, perfect peace, death shadowing us and ours?
Jesus has vanquished death and all its powers.


It is enough: earth’s struggles soon shall cease,
And Jesus call us to Heaven’s perfect peace.

Saturday, September 10, 2011

African Chicken

Potluck Saturday

african chicken

Traditionally, we have spaghetti on Sundays, but I discovered a great alternative for Sunday dinner - African Chicken. Even though we live so close to where we meet for worship, when we get home, everyone is exhausted and starving. Sunday dinner has to be something that I can pull together in 20 minutes or less, or something I can put in the crockpot about 5 hours before serving. It's a bit tricky to find just the right thing. This recipe is of the crockpot variety.

1 1/2 c. chicken broth
2 ribs celery, diced
2 onions, diced
2 bell peppers, diced (red looks extra pretty)
8 chicken thighs or 4 breasts cut in half
1/2 c. extra crunchy peanut butter
crushed red pepper

Combine the broth, celery, onions and peppers in the bottom of your crock pot. Spread peanut butter over each piece of chicken** and put the pieces in the crock pot. Sprinkle red pepper on top to taste. Cook on low for 5-6 hours.

(Adapted from the Fix-It and Forget-It Cookbook.)

Serve over rice. I also recommend gently stirring in the peanut butter before serving. It looks rather unappealing caked onto the chicken, but melts into the broth very nicely.

I think it would serve about 8 with rice and a side or two. A simple green salad would be nice, as would most any green vegetable, though crisp-tender green beans are what is on my mind right now.

**In order to prevent contamination of your entire jar of peanut butter, scoop out what you need into a small bowl for spreading.

Friday, September 9, 2011

This is Not a Cup Cozy

cup cozy

Preacher Man wanted me to make him a cup cozy for his beloved double walled ceramic travel coffee cup - aka, "This is not a paper cup." I traced out a pattern to sew him one and I still have plans to do so... sometime... but he was in a hurry to get one and I have been short on time this summer. So I got creative and did some up-cycling.

cup cozy pieces

Yes, his cup cozy was once worn on his feet. Admittedly, this bothered him at first, but he has gotten over it. He likes it and it does the job.

Another recent upcycling project was making these little tote bags for the Littles to carry to church. I made it out of a wool skirt that got moth eaten and the ribbons were taken from a couple of used gift bags. The bags were very simple to make - took about 45 minutes for both and I made them spur of the moment on a Saturday night because I'm crazy like that.

Bible Books Bags

The boys love their little bags and it has helped me downsize what we keep in the pew, which was desperately needed. Big Littles (pre-school) gets a picture Bible, a little New Testament, and a notebook with pencil. Little Littles (almost a toddler) gets three little Bible picture books, a little New Testament and a notebook with pencil. When the sermon starts, each child is handed a bag, and I actually get to hear a little bit of the Preacher Man for a change!

Changing old habits is difficult, but when I have a need, I try so very hard to look around the house with a creative eye before I head out shopping for something. Have you "upcycled" anything lately? I'd love to hear about it!

Thursday, September 8, 2011

Packing Your Husband's Lunch...

...Some Family Lore

Photobucket

The Four Moms are doing a link-up today on packing a lunch for your husband
. I don't pack a lunch for my husband, because Preacher Man works from home. We are blessed to enjoy having him around for breakfast, lunch, and dinner most days! I realize this is definitely not the norm, so if you are looking for REAL tips on how to pack a lunch for your husband, I suggest you read the posts from the other ladies because I saw some fantastic suggestions.

Instead, I'll share some family stories about packing a lunch for the man of the house. These stories go back several generations and provide wonderful amusement at family gatherings, and maybe they will give you a giggle today. These are the stories as I remember them, which may or may not have been embellished upon as they were told and retold over the years. ;)

#1 - I'll begin with an embarrassing story about me and Preacher Man in the early days of our marriage. (Maybe tattling on myself first will assuage the wrath of the still living relatives I'm about to tell on!) See, Preacher Man has not always worked from home, and it used to be my practice to fix him a tasty lunch for work. I usually gave him leftovers. He likes them, and they were very tasty meals, much nicer than the soggy-sandwich routine. After a while I got a request that I not send so many beans please because he was getting rather uncomfortable on the job and was getting teased by his co-workers.

Moral: Take your husband's preferences into account when packing his lunch. (And don't forget the bean-o!)

#2 - A certain sweet new bride was not at all familiar with the concept of "Man Food". Her idea of lunch was saltine crackers spread with cream cheese or a sandwich with a slice of bologna. Brand new husband did not want to hurt his new bride's feelings, so he cheerfully ate his dainty lunches, meanwhile remaining in a state of continual hunger. One day, brand new husband went to the community fridge in the break room and pulled out the familiar brown paper bag. He sat down to eat and inside the bag was a fabulous sandwich - hoagie roll piled high with roast beef and all of the trimmings. "Wowee," he thought, "my sweet new bride must think I'm pretty special! She really went all out today!" And he ate the sandwich with great relish. Just as he was finishing up the crumbs, a co-worker came in and pulled a brown bag from the fridge and sat down to eat. He pulled out a bologna sandwich and said, "HEY! What happened to my sandwich?!"

Moral: Label the brown paper bag when you pack his lunch and remember to pack Man Food and plenty of it!

#3 - One winter's evening, Husband and Wife were playing checkers or dominoes, I can't remember which. Husband made a particularly nasty move, and I have heard the story two ways - either he was cheating or he made it so Wife could not win the game, but in doing so, he could not win either - the cut off your nose to spite your face type of thing. Wife was pretty steamed that Husband would do such a thing. Now husband's job was hard, physical, out-of-doors labor, so in winter Wife packed him a thermos full of soup. When Husband took out his thermos the next day to eat his lunch, there was nothing inside but a tack.

Moral: Don't be tacky with your wife. Revenge is a dish best served cold.

(Above story is meant to be funny, and does not represent Church Mouse's opinion on how to handle a cheating husband... at least when it comes to dominoes.)

Want some ideas for Man Lunches? Hungry Mama Food makes pretty good Hungry Man Food too! Preacher Man especially loves Meatball or Meatloaf Sandwiches!

Tuesday, September 6, 2011

A Picture From Our First Day of School

Back to School... Back to School... Back to School...

It's the buzz I've been hearing for about a month now. Big sales, new backpacks, clothes, lunch boxes, books, curriculum, lesson plans... Today, being the day after Labor Day, is the traditional first day back to school, and it is an exciting time for many. I also see our first day of school as being exciting, but the picture is a little different than most.

Preacher Man and I have a philosophy of education that is very unlike what is going on in public and private schools. We are excited about home schooling. We are both natural teachers and we live a learning lifestyle ourselves. I feel like my real education was just beginning as my formal schooling ended. Once I learned how to learn, it became my habit to passionately research, satisfying my desire for wisdom and knowledge. It is the way I live my life and this is the way we teach our Littles.

Children are born persons. They are persons even in the womb where they begin to learn the sounds and sensations of the world they will soon enter. Each child is a unique individual and is a gift and a blessing from God Himself, made in the very image of The Creator.

The first definition listed in the dictionary for the word school reads, "an institution for educating children." This would make the institution of the family the first "school" for a child, and the mother and father the very first teachers. Unlike the situation in most public and private schools, Mama and Daddy are the child's teacher year after year, and really, this is true whether you send your child to public school or teach them at home. A child's parents are his most important teachers.

For us, all of life is school. The most important thing that we teach is to "Fear God and keep His commandments" and we use Deuteronomy 6:4-9 as our model for how to do it -

Hear, O Israel: The LORD our God, the LORD is one. You shall love the LORD your God with all your heart and with all your soul and with all your might. And these words that I command you today shall be on your heart.

You shall teach them diligently to your children, and shall talk of them when you sit in your house, and when you walk by the way, and when you lie down, and when you rise. You shall bind them as a sign on your hand, and they shall be as frontlets between your eyes. You shall write them on the doorposts of your house and on your gates.

When does this teaching begin?

On the first day of school.

first day of school

Isaiah 28:9-10 - To whom will he teach knowledge, and to whom will he explain the message? Those who are weaned from the milk, those taken from the breast? For it is precept upon precept, precept upon precept, line upon line, line upon line, here a little, there a little.

Sunday, September 4, 2011

Cloth Diaper Tutorial 2

I like to use "pocket diapers". Pockets are convenient to use, wash well, and dry quickly. Pockets need to be stuffed with some sort of absorbent material, and one of the most common pocket diaper inserts are made of micro terry like these. It is nice and convenient to buy them, but it is really very easy to sew your own and you will save a LOT of money by doing so!

How to Sew Microfiber Inserts for Cloth Diapers


I buy the 8 pack of microfiber towels in the automotive department of Wal-mart. They cost about $5. I once found a similar pack at Big Lots for $4! I've also seen great deals at Home Depot. With my method, I get 6 inserts out of that. This beats the $1.99 each I paid at the Fuzzi Bunz store by a long shot, and they are super easy to make! Using this method, you will have four layers of microfiber, which I find is perfect for normal everyday use. These are very comparable in thickness and absorbency to the ones I bought, and they dry in a reasonably short amount of time. These fit perfectly in size medium Fuzzi Bunz, Swaddlebees pockets, and Swaddlebees Econappies or Blueberry OS diapers on the largest setting. They could easily be trimmed shorter to fit size small diapers, though the width should be just fine. I really prefer having them sewn up because they are easier to hang to dry and easier to stuff. I also like that they do not bunch up in the diaper with an active baby/toddler.

1) I make these "assembly line" style. It goes very fast! Before cutting or sewing, I prep them by washing them once with my regular diaper wash. I also trim off the little tags.

2) Trifold two of your towels, keeping the size of the panels as even as possible. This will be the layer hidden inside, so choose the color you like the least for cutting up.


3) Cut both of your trifolded diapers into even thirds.


4) Lay your six uncut towels flat and center an extra panel in the towel.


5) Fold over the sides, trying to keep your panels as even as possible.


6) Now you are ready to sew!


7) Set up your machine to use a "zig-zag stitch" with your choice of thread and bobbin color. Stitch the short ends first. It really works best to sew just to the inside of the edges of the towels. You want to make sure you are sewing through all of the layers of the towel so you won't have gaps where gunk can get through and build up.


Finished stitching:


8) Now sew down both sides of the towel using the same technique.


You are all done!


Other Cloth Diaper Tutorials:
How to Re-waterproof PUL in Pocket Diapers
How to Replace Leg Elastic
How to sew a waterproof pail liner

Pin It

Cloth Diaper Tutorial 1

This post will not be useful for everyone, but I've had a few requests for this tutorial and I hope that by putting it out there on the web it will be useful to some of my readers, old and new.

How to Re-Waterproof PUL on Pocket Diapers


A picture is worth a thousand words, right? After buying about 18 diapers in poor condition that leaked after only a few uses (I was so ignorant in those days!), I was determined to find a way to refurbish them. I could only find vague references to how to waterproof the PUL again, so after some trial and error (i.e. - 1 failed diaper and 17 successes), I am posting my method here in hopes that someone else can benefit. The spray is in an orange can labeled "Silicone Water Guard" and you can find it in the camping section at Wal-mart. It cost about $4 a can as of 2009. This can lasted for 1 pail liner (required a TON of spray) and 18 diapers. Not too bad really.

For the record, I have used this method on Fuzzi Bunz sized diapers and Swaddlebees Econappis. These two brands are my very favorite because they are easily repaired, both with the waterproof spray and by replacing the leg elastic.


Trace a pattern for your diaper on lightweight cardboard - cereal boxes work great! Turn diaper inside-out.


Stuff the cardboard in the diaper. Watch the sides - keep fleece underneath the cardboard, PUL on top. Find your waterproofing spray - available at Wal-mart in the camping/sporting goods section.


Go outside on a sunny day. Lay out a sheet of wax paper underneath each diaper. Spray a light coating on all PUL surfaces.


Let the coating sit for just a minute, then tip the diapers on their sides to allow any excess spray to run off the side into the grass. Fold your wax paper in half (keeping any excess spray on the inside) and lay the diaper on top to dry.


After a couple of hours, when the spray seems to be dry, remove the cardboard and hang the diapers outside to dry a little longer. Allow them to dry for at least 24 hours before washing or using them.


Turn your diaper right side out again and you should have a nicely re-waterproofed diaper!

Some FAQ's -
Q - What is PUL?
A - Polyurethane Laminate Wiki

Q - How do you know when the PUL needs re-waterproofing?
A - It's most obvious when you can see visible cracking in the PUL. Before trying the spray, I try running them through the dryer on high heat to reseal the PUL. This has worked with my newer diapers just fine. With the diapers that needed the spray, the wet was going right through the center, not just the edges around the legs. Other diapers that have leaked around the legs were just in need of stripping or needed changing sooner.

Q - Do I need to hang them outside to dry?
A - No, but they tend to be "fumey" for a few hours, so I recommend it. If you hang them indoors, use a well-ventilated room. Sometimes I hung them in the basement to dry.

Q - Do they drip after you hang them?
A - No, they shouldn't drip at all while hanging - they only seem to drip when you first spray them if it puddles up a bit - that's why I let the excess run off.

Q - Do I need to wash them before using them?
A - I don't think you really NEED to wash them before using them, though I prefer to do it. (The fleece doesn't come into contact with the spray at all.) If you have a baby with eczema, sensitive skin, or prone to diaper rash, I would just in case.

Other Cloth Diaper Tutorials -
How to sew microfiber inserts for pocket diapers

How to replace leg elastic
How to sew a waterproof pail liner

Pin It

Savior, Thy Dying Love

Sunday Hymn Post

Savior, Thy Dying Love
by Sylvanus Phelps

Savior, Thy dying love Thou gavest me.
Nor should I aught withhold, dear Lord, from Thee.
In love my soul would bow, my heart fulfill its vow,
Some offering bring Thee now, something for Thee.

O’er the blest mercy seat, pleading for me,
My feeble faith looks up, Jesus, to Thee.
Help me the cross to bear, Thy wondrous love declare,
Some song to raise, or prayer, something for Thee.

Give me a faithful heart, likeness to Thee.
That each departing day henceforth may see
Some work of love begun, some deed of kindness done,
Some wanderer sought and won, something for Thee.

All that I am and have, Thy gifts so free,
In joy, in grief, through life, O Lord, for Thee!
And when Thy face I see, my ransomed soul shall be
Through all eternity, something for Thee.


Friday, September 2, 2011

Preserving the Harvest

Canning Tomatoes

Proverbs 6:6-8
Go to the ant, O sluggard; consider her ways, and be wise. Without having any chief, officer, or ruler, she prepares her bread in summer and gathers her food in harvest.
Over the years I've had many people ask me questions about canning. I did this write up several years ago to summarize the process for someone who is interested in getting started. I taught myself how to do this by reading books. If I can do it, you can do it!

I'm planning to post some canning recipes in the coming weeks, including, my salsa recipe, how to do crushed tomatoes, and apple pie filling. I typically do jam earlier in the year, but I'm happy to share those recipes too. Got any requests?

- - - - - - - - - - - - - - - - - - - - - - - - - -

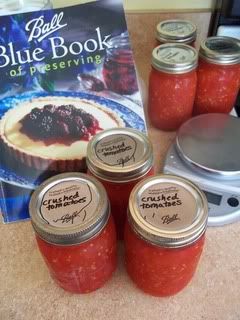
First off, if you just want to dabble in making some jam or making some salsa, then my instructions should be sufficient. If you are serious about learning the whys and what-fors, then I strongly recommend purchasing the Ball Blue Book of Preserving. You can find it at Wal-mart for less than $10 and it should be at any library. It has detailed instructions, recipes, and step-by-step pictures for dummies like myself! In fact, almost all of the equipment I discuss can be found at Wal-mart, some grocery stores, and many hardware stores.

Secondly, ANYBODY can learn to do this! I taught myself just from reading books, and it is very simple and enjoyable. A gift of homemade jam, salsa, or even vegetables is always well received!

Third, canning is a very scientific process. If you are a cook like me that likes to dabble around and change half the recipe, you must restrain yourself when you are preparing foods for canning. Changing the amount of sugar, vinegar, lemon juice, etc... in a recipe must never be done! It is pretty safe to dabble with amounts of salt and spices, but leave any main ingredient alone! Also, if a recipe gives guidelines for peeling, chopping, pureeing, etc... you must follow these instructions. Any changes you make can affect the processing and can result in failure and unsafe food. So, basically: FOLLOW THE DIRECTIONS! :)

Fourth, make sure you have plenty of time to prepare your foods, and to process them. You don't want to be hurried through this, and sometimes things will take much longer than you expect. If you've never done a canning project before, devote an entire morning or afternoon to it. With Littles, I do canning after they are put down for bed and Preacher Man is there to jump in to take care of them if they wake up. After you prepare the recipe, the filling and processing of the jars MUST immediately follow.

Fifth, HAVE FUN and don't get too stressed out about it!

- - - - - - - - - - - - - - - - - - - - - - - - - -

HOME CANNING BASICS -


TWO METHODS: (all recipes should specify which method to use)
1) Steam Pressure Method: Requires the use of a pressure canner, which is an expensive piece of equipment. If you don't have one, check around, maybe some ladies at church would let you borrow theirs. Steam pressure canning is for low-acid foods, including almost all vegetables. The steam pressure is needed to raise temperatures high enough to kill all of the bacteria and toxins. I will not be posting any steam pressure recipes here. If you wish to try canning vegetables, I would carefully read your instruction book for your pressure canner, and check out the Ball Blue Book for more info.
2) Water Bath Method: Used for high-acid foods, including most fruits, tomatoes, and anything in a vinegar brine, such as pickles or sauerkraut. A water bath canner is actually pretty inexpensive. It's a large pot that comes with a rack that holds the jars. They are generally available in pint and quart sizes. Unless you have a large family, a pint processor is all you should need. Sometimes you can find these at garage sales.

Note for dummies like me: don't try to process quart size jars in a pint size canner. To make them fit you have to remove the rack and have the jar sitting in direct contact with the bottom of the pot, which causes jar explosion. Don't make my mistake!

You *can* use a large stock pot for canning if you are careful to have a folded up kitchen towel at the bottom of the pot that keeps the jars from coming into direct contact with the base of the pot. You will also want to make sure your pot is deep enough that you can cover the jars with with water.


EQUIPMENT: In addition to a canner, you'll need...
Stuff you probably have around your kitchen -
- a stockpot or two to prepare food for canning
- a pair of tongs (helpful in removing jars and lids from the canner)
- a wet rag
- several towels to set hot jars upon
- a plastic spatula
- a potato masher helps preparing jams and anything needing mashing
- a timer
- spoons for stirring, a ladle

Specialty, yet ESSENTIAL equipment -
- home canning jars free of chips and cracks - jars can be cleaned and reused - I find these at garage sales frequently!
- lids - you MUST use a new lid for every jar you process, so be sure to have plenty!
- bands - these can be reused, just don't use any that are bent or rusty
(wash all of the above in hot, soapy water just before using)

Specialty, non-essentials -
- jar lifter - designed to lift and carry canning jars - very handy!
- Jar funnel - unless you want to make a terrible mess ladling food into the jars, get one, they are designed to fit inside canning jars and have a large opening

- - - - - - - - - - - - - - - - - - - - - - - - - -

Here is what you do:

STEP 1 - PREPARING JARS: In addition to washing the jars, lids, & bands, jars must be heated for 10 minutes just before filling. (Always put hot food into hot jars!) Submerge the jars, lids & bands in your water bath canner or in a saucepot with a towel folded in the bottom (so the jars are not in contact with the bottom of the pot). Bring the water to a simmer, keeping them simmering until you are ready to use them. (Sometimes it is handy to have a separate smaller pot to heat the lids & bands. This makes it easier to fish them out when you need them. Don't boil the water, just simmer. Boiling can cause the seals to fail.)

STEP 2 - PREPARE THE FOOD according to the recipe. (If it is going to take you a really long time to prepare the food, you can wait until you are nearly done before turning on the heat for the jars, lids & bands.)

STEP 3 - FILLING JARS: Your food is hot, your jars are hot, you're equipment is all handy, and you're ready to go! Don't get into too big of a hurry at this point. Work on one jar at a time. Remove a jar, a lid, and a band from the water bath. Put the funnel on top of the jar and fill with the specified amount of food. Recipes should all specify the amount of headspace you need to leave between the top of the food and the lid. As a general rule, leave 1 inch for low-acid foods like vegetables and meats, 1/2 inch for high acid foods like fruits and tomatoes, and 1/4 inch for juices, jams, jellies, pickles, and relishes. Use the lines on the outside of the jar to help you measure. Take care not to fill the jar too full, and make sure that you've also got it full enough - remember it's an exact science! Next, you need to remove the air bubbles. Run a non-metallic spatula or a plastic knife inside the jar between the food and the side of the jar, pressing back against the food to release trapped air. Add more liquid if needed to have the proper headspace. Next, wipe around the rim of the jar with your damp cloth and make sure it is clean so you can get a good seal. Set the lid on top, and screw on the band just until it is firm and snug, but not too tight. Using the jar lifter if you have one, place the jar onto the canner rack in the canner. Repeat this process until you have prepared all of the jars.

STEP 4 - PROCESSING JARS: Lower the rack into the boiling water and make sure all of the jars are covered with a least 1 inch of water and put the lid on the canner. Bring the heat up to medium-high, and when the water comes to a full, rolling boil, start the timer for as long as the recipe specifies. After the time is up, turn off the heat, and remove the canner lid. Let the canner cool for 5 minutes and then remove jars. Set the jars upright on a towel or cutting board to cool, leaving space between the jars for air to circulate. Do not tighten the bands further. Let the jars cool naturally for 12 to 24 hours. You will hear a "ping" sound when each lid seals! This is a good sign! After 12 hours, if you tap on the top of the lid and it does not give, then it has a good seal.

If you have a jar that did not seal, you can 1) go through the process again and take better care this time 2) put it in the fridge and use the jar first


STEP 4 - STORING JARS: Your jars can be stored for up to one year in a cool, dark place, such as a cabinet or basement. The ideal temperature range is 50*-70*. Label the jars with the type of food canned as well as the date. Before storing the food, you can remove the bands for other use. Enjoy the bounty of the harvest for the rest of the year!

Thursday, September 1, 2011

Thankful for Summer Produce

Photobucket

We have had some goooooood eating lately! I get such a thrill when I pick something from the garden and get to cook and eat it within a matter of hours. I also love the freedom that it gives me in my cooking. I freely add fresh herbs (basil, cilantro, oregano, chives, thyme), chop in some kale, throw in some fresh diced tomatoes, and add fresh green beans to whatever I am making. Being able to cook and eat this way makes me feel as rich as a queen!

fresh tomato pasta 2

linguine with fresh tomatoes, basil and oregano

For the most part, we eat seasonally, meaning we eat produce when it is ripe and in season locally. This means we enjoy buying fruits and vegetables at their lowest price, highest content of nutrition, and at their best flavor. It also means I thoroughly enjoy each food in its time. I'm not buying strawberries right now, but that is ok because I enjoy them in May and June. Right now I'm enjoying the delicious local peaches that are in season and am looking forward to the apples that are just around the corner.

Every couple of days, we enjoy eating crisp, fresh green beans cooked Italian style. They are DE-LI-CIOUS! Here's how I fix them:

Photobucket

Italian Style Green Beans
Saute a red onion in olive oil over medium heat until it starts to turn golden brown. Add a clove or two of minced garlic. Then add some fresh, young green beans (trim the ends first) and stir fry them. Cook until crisp-tender. They should not be mushy and should be bright green. Add in a diced fresh tomato and season with some salt and pepper and some fresh chopped herbs. (I like basil.)

You can do zucchini the same exact way.

Have you ever noticed that the best way to start a dish is to saute some onions and garlic? Yum!

Yesterday I told Preacher Man I could eat this every day. I could, but I won't, because when green beans are no longer in season, I'll be in love with fresh roasted brussel sprouts again. :) God is good and I am thankful that He has given us foods to enjoy in season!

Moses' blessing for Joseph's children in Deuteronomy 33 -
Blessed by the LORD be his land, with the choicest gifts of heaven above, and of the deep that crouches beneath, with the choicest fruits of the sun and the rich yield of the months, with the finest produce of the ancient mountains and the abundance of the everlasting hills, with the best gifts of the earth and its fullness and the favor of him who dwells in the bush.

Related Posts Plugin for WordPress, Blogger...