Showing posts with label Crafts. Show all posts

Thursday, July 5, 2012

Making a Tea Wreath

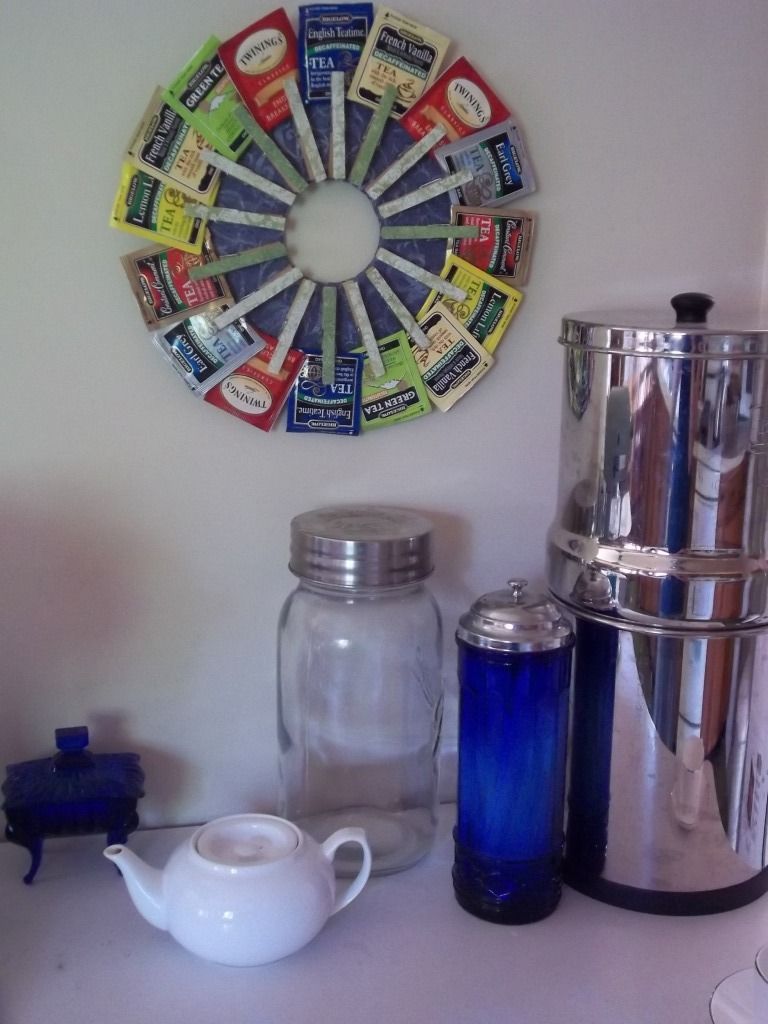
my new tea wreath
I wanted to share a simple project that can help you in your efforts to create a hospitable home.  I originally saw this idea on Pinterest, and immediately thought of making it for my mother-in-law.  It was a big hit, and it is in use nearly every Sunday when they have a home full of guests and tea drinkers.  It is a pretty way to display the teas you have available, and I find it helps guests feel more comfortable fixing a cuppa for themselves, especially if you leave some teacups nearby and a kettle ready on the stove.

There is a very helpful tutorial from kojo designs here that can walk you through the very simple process of making a wreath for yourself or for a gift.  
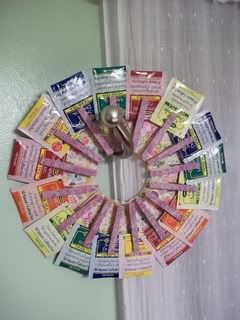
my MIL's tea wreath
This was a very fast project and required few materials.  You'll need some large pieces of cardboard, glue, hot glue, about 16 wooden clothespins, and some pretty paper.  You can hang it from a ribbon or just hang it by the hole in the middle. 

When I have babies that need lots of nursing and diaper changing, it is a challenge to be able to be able to meet all of the needs of my guests myself.  It's also a bigger challenge with a large group.  I like to have things out and available as much as possible and encourage my guests to help themselves to whatever they like, and having my teas on display helps in that way.

Thank you Pinterest

Pin It

Thursday, May 10, 2012

If Walls Could Talk...


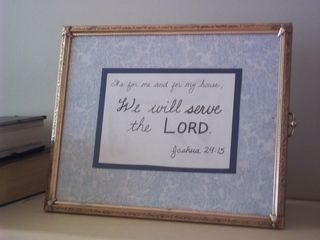
I wanted to share some more ideas for frugal decorating.  On Tuesday, I shared the monogram with buttons that I made, and today I'm sharing an inexpensive, personalized, yet beautiful way I create wall art with a very important message for our family.

It all started when I wanted to put some Bible verses up on our walls, and I looked into custom vinyl wall clings, but was rather daunted by the price and was disappointed by the limited selection.  I started collecting old frames at garage sales to create my own scripture art and I have enjoyed making these for our home and for gifts.  Each of these finished pieces costs me about $1.25 - $1 for the frame is the going garage sale price around here and about $.25 for the scrapbook paper.  I watch for when the paper goes on sale for about $.25 per sheet, and I almost never use an entire sheet.  The extra paper is useful for making homemade cards or for other framing projects.    

Now I am picky, but I am not a perfectionist.  But part of the beauty is having these verses on the walls in Mama's handwriting.  I practiced my handwriting for fun as a child, so I can write with a pretty steady hand, but if you don't like your handwriting, you can use your computer and printer.  I still think scrawled handwriting is much more charming than the computer though, so don't worry if it doesn't look just perfect.

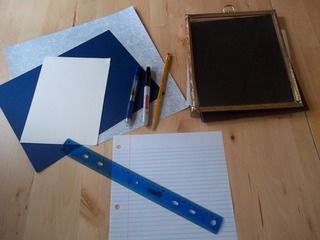
1.  Gather your supplies:


  • scrapbook papers 
  • white or cream printer or stationary paper
  • lined notebook paper
  • sharpies
  • pencil
  • frame
  • ruler
  • pink pearl eraser (not shown)
  • rubber cement (not shown)


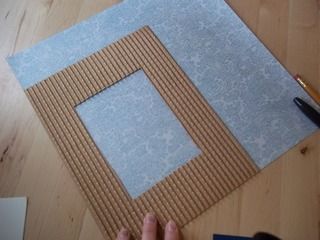
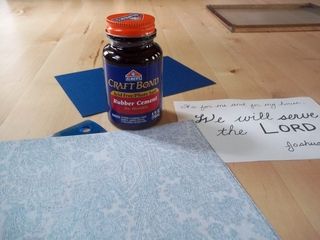
 2.  Using the glass of the frame or another insert for a guide, trace the size you will need for your frame on the scrapbook paper.


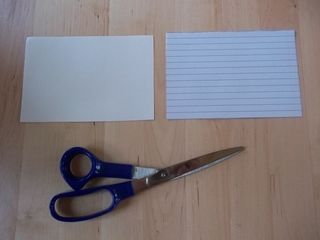
3.  (I eyeball everything, but measure if this drives you crazy!)  Cut out a piece of white or cream thin paper for your quote.  While you are at it, you may as well cut out two because chances are good you will mess up at least once.


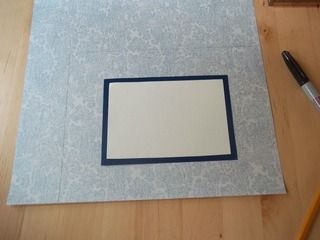
4.  Eyeballing it again... sometimes I like to have an extra layer to make the borders "pop".  I used my cream colored paper to measure... I decided how much border I wanted and then doubled it before tracing the lines.  This made it so when I re-centered the cream paper, I would have the original amount of border I wanted.


5.  Lay everything out so you can see if it looks the way you like it.  Don't glue anything yet!!


6.  Now cut out several sheets of lined notebook paper the same size as your cream colored paper.  Make sure the lines are nice and straight because these will be your guide. 


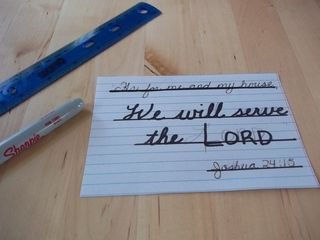
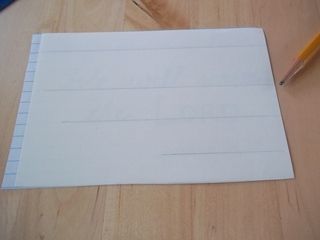
7.  Use the lined paper to sketch out some ideas.  You can see that it took me a while to settle on what I liked.  I even had to do some extra practice on my W.


8.  When you settle on one that you like, copy over the words with a sharpie and this time try to get everything lined up just the way you like it.  *Using a ruler* (it's very important), draw a line through where the bottom of the letters will hit.


9.  Put your cream paper over top and using your pencil and a ruler, lightly draw those lines.


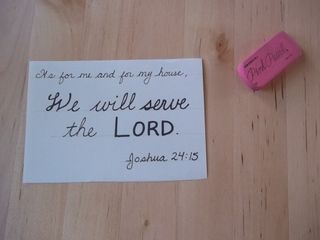
10.  Now you can finally write out the final product.  When you are satisfied, and you are sure the ink is dry, use your pink pearl eraser to erase those pencil lines.  (Don't use an inferior eraser!!  It will ruin your work with eraser streaks!  If you don't have a pink pearl, test your eraser on scrap paper before you use it!)


11.  Now you can glue the layers on.  Rubber cement is my favorite!


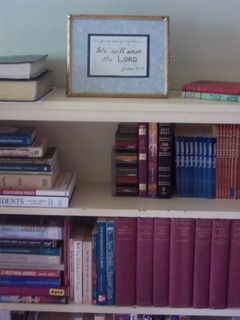
There you go!
Joshua 24:15 - "As for me and my house, we will serve the Lord"

A few more examples I've done:


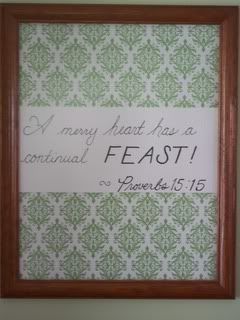
Proverbs 15:15 - "A merry heart has a continual FEAST!"


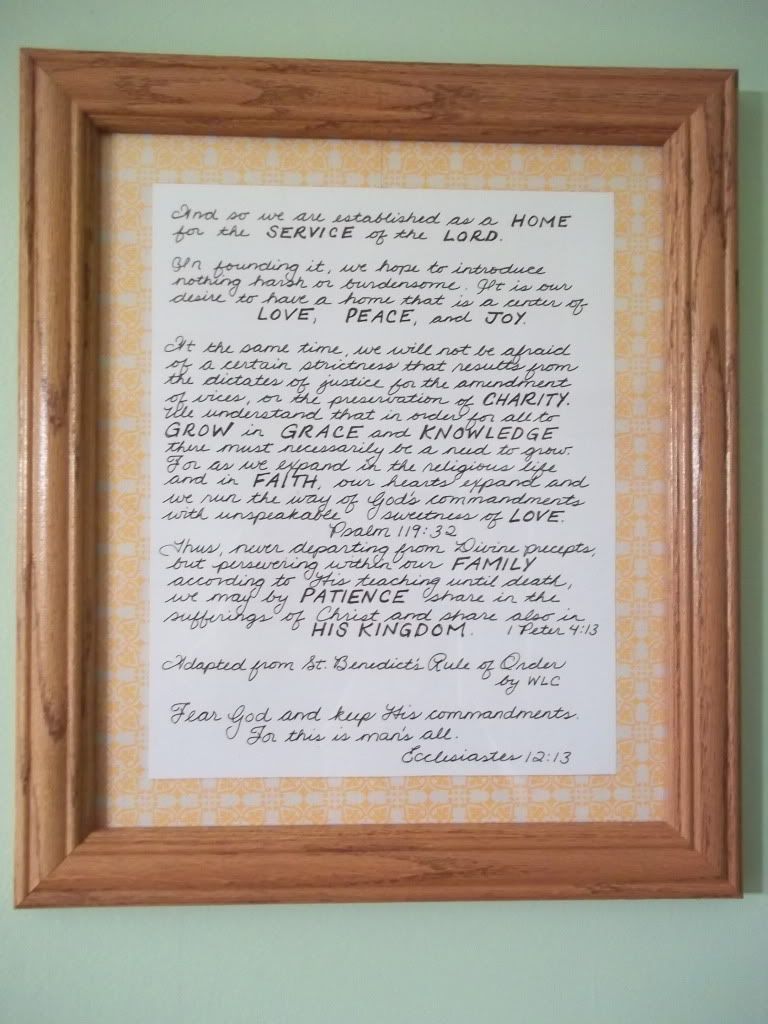
 This is our family mission statement (of a sort) adapted by my dear DHM from The Common Room from the sixth part of her series, "Benedict's Rules of Order for Housewives".


Nehemiah 8:10 - "The joy of the Lord is my strength"

I have also done the hymn, "Be Present At Our Table, Lord" for a friend's dining room.  I would like to do one for ours some day.

Another excellent resource is the free Bible Verse Printables made by April at The Flourishing Abode.  She has a wonderful modern style for her typography and I admire what she does.

What are the most important verses you have (or would like to have) on the wall?

Pin It

Tuesday, May 8, 2012

B is for Button

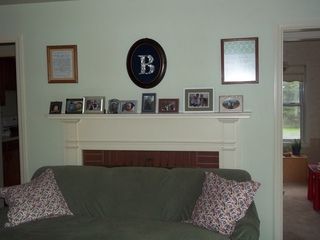
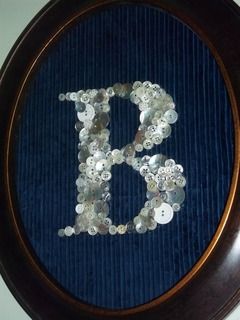
Did you notice the "B" on our mantel during the House Tour?  Here it is again:


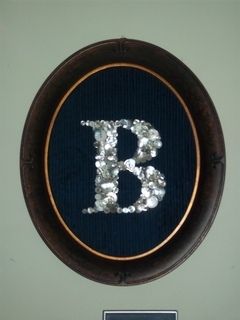
I'm just really tickled over my B.   It was inspired by a pin on pinterest with a monogrammed E.  The link was a dud, so I had to just wing it.  I have since found a wonderful tutorial for a similar project here, you would just want to substitute the letter of your choice.  I considered taking pictures and doing a tutorial myself, but I was doing this project at night while the Littles slept and the lighting was terrible.  Plus, the first one I made really looked awful, so I was just figuring it out as I went along.  I'll try to give you some tips so if you want to make one it will be a much smoother process.


  • I chose the font I liked best for the letter B and enlarged it to 700 pt.  I printed it, cut it out, and traced it on the fabric with a white fabric pencil.  Worked just fine.  
  • Instead of gluing the fabric to the glass, I used the glass as a pattern to cut out the oval shape from heavy cardboard, and I hot glued the fabric to the cardboard... just around the edges.  The glass really wouldn't work with the layers of buttons, so now there is an extra piece of oval shaped glass on my husband's workbench.  I wonder if it will ever find a use?  
  •  I dug around in my scrap fabric stash and found a lovely light blue cotton with a feathery print to use and soon discovered that the white buttons just didn't show up on the pretty print at all.  So I dug around some more and found this heavy whaled corduroy in deep navy.  It almost looks like velvet.  It is PERFECT!  So, bottom line, use dark fabric with white or light buttons, and light fabric with dark buttons for the best results.
  • On the original pin, the buttons were all lying flat and even, but I found that I much preferred the look of layering the buttons to create an interesting texture and a look that was more filled in.   

  • My buttons were all collected over the years.  Many of them were ripped off of my husband's old dress shirts.  I also had a number of mother-of-pearl buttons that I bought in a package for a dress that I made.  These have a gorgeous iridescent sheen, and greatly add to the look.  You definitely want buttons of all shapes and sizes, and having a number of tiny buttons is very useful to enhance the level of detail.
  • My frame was half price at Hobby Lobby, and was the only purchase I made for this project.  It cost me $12.  I had my heart set on an oval frame for this spot in the living room, and after scouring thrift stores and garage sales for a while, I decided to just go buy what I really wanted, and this was it.  I could have made this project for $1 if I'd broken down and used a yard sale frame.  Well, such is life.  I don't think I'd be as enraptured with my B if I had used a rectangular frame.  
Up close...
When Big Littles saw this on the wall he said, "Oh look... B for button!"  Well... ehmmmm... not exactly!  If you know me, you know what the B is for.  ;)

Pin It

Thursday, December 1, 2011

Trimming the Tree

During my childhood, I remember always having birds at the top of our Christmas tree. I've been feeling a bit wistful for those birds this year and wanted to re-create that a bit for our little family. Preacher Man gifted me half an hour child free at Michaels so I could satisfy my creative monsters as my friend April loves to say.

I fell in love with the glittery cardinals.

Tweet Tweet

They are flashier than what I typically buy, but it is Christmas, after all, and once on the tree, they are a perfect fit!

Here's what I did:

Tree Topper Materials

I bought:
  • 2 glittery cardinals
  • a package of cinnamon pinecones - some are painted gold and there are some pretty glittery red berries in the pack too
  • a small grapevine wreath for the foundation
  • a little pick with gold berries
  • a length of berry garland
  • I also used some hot glue and some heavier gauge beading wire that I had on hand. Green floral wire would be better, but I didn't have any, and the silver works just fine.
Wrapping the wreath

1. Wrap the berry garland around the grapevine wreath, tucking in the ends so they don't show.

Wiring It In

2. Preacher Man suggested that I wrap the garland with the wire because the branches of the garland were sticking out too much. I just tucked the ends of the wire deep into the wreath, and gently wrapped around the little branches to reign them in.

Ready to Hot Glue

3. Decorate!! I stuck the gold berry pick deep into the wreath, attached my little cardinals, and glued on the pinecones and glittery berries. Place things on the wreath strategically to cover bare spots and wire ends. Be sure to leave the middle of the wreath open so there is room for the top point of the tree to poke through.

Voila!

On the tree 1

I think they are just too sweet! The Littles love them too!

On the tree 2

This year's tree, all decked out. Last year, I got creative to make a babyproof Christmas tree, and I loved so many of the things I did, that I'm bringing them back again this year. These paper ball ornaments are absolute favorites! The Littles love hanging the pretty copper and silver cookie cutters on the tree as ornaments, and I still think the lace looks lovely as a garland.

I'm saving cards to make some of these ornaments this year, and I hope to bundle up the Littles to hunt for some acorns so I can make these lovelies to mix with my cinnamon pinecones.

What holiday crafts are you undertaking this year?

Pin It

Friday, September 9, 2011

This is Not a Cup Cozy

cup cozy

Preacher Man wanted me to make him a cup cozy for his beloved double walled ceramic travel coffee cup - aka, "This is not a paper cup." I traced out a pattern to sew him one and I still have plans to do so... sometime... but he was in a hurry to get one and I have been short on time this summer. So I got creative and did some up-cycling.

cup cozy pieces

Yes, his cup cozy was once worn on his feet. Admittedly, this bothered him at first, but he has gotten over it. He likes it and it does the job.

Another recent upcycling project was making these little tote bags for the Littles to carry to church. I made it out of a wool skirt that got moth eaten and the ribbons were taken from a couple of used gift bags. The bags were very simple to make - took about 45 minutes for both and I made them spur of the moment on a Saturday night because I'm crazy like that.

Bible Books Bags

The boys love their little bags and it has helped me downsize what we keep in the pew, which was desperately needed. Big Littles (pre-school) gets a picture Bible, a little New Testament, and a notebook with pencil. Little Littles (almost a toddler) gets three little Bible picture books, a little New Testament and a notebook with pencil. When the sermon starts, each child is handed a bag, and I actually get to hear a little bit of the Preacher Man for a change!

Changing old habits is difficult, but when I have a need, I try so very hard to look around the house with a creative eye before I head out shopping for something. Have you "upcycled" anything lately? I'd love to hear about it!

Friday, July 22, 2011

Look What Preacher Man Made!!

zoomed jewelry frame

It's a frame to hold my earrings! Isn't it great? I wear mostly french hook earrings and I made most of these myself. This earring holder is PERFECT! I love that I can see all of my earrings at once and that I don't have to hunt for a matching pair.

It helped the top of my dresser to go from this overflowing mess:

messy jewelry

To this:

cleaned up jewelry

And this:

jewelry frame

How did he make it you ask?

back of jewelry frame
  1. Take a $1 garage sale wooden picture frame and cut window screen to fit it.
  2. Attach it to the back with a staple gun.
  3. Cover up the rough edge - Preacher Man glued on cut up cereal box. I suggested that in the future we could use felt.
  4. Attach a picture hanger and put it on the wall.
  5. Insert earrings!
Wouldn't this make a great gift? Especially with a pair of handmade earrings attached? You could paint the frame if you wish, but this one didn't need it.

Friday, December 17, 2010

Craft: EASY Ornaments Using Recycled Cards

Photobucket

Isn't this gorgeous? I made half a dozen of these in an afternoon with Big Littles meddling with stuff and Little Littles pulling up on my legs and playing by my feet! I has so much fun making them too!

The pictures are fairly self-explanatory, but I thought I'd pass on a few tips I figured out... the slick card material doesn't work as well as matte paper as it slides around pretty easily when done. If you are having trouble fanning them out, gently squeeze the top and bottom brads. You can store these flat! For this reason alone, I'm seriously considering converting from all of our old glass ornaments!! :)

To make a single ornament, you will need: a Christmas card to cut into strips, scissors, two brads, some ribbon for hanging, a hole punch

If you want to make it a project for your kids, you can draw lines on the back of the paper to help them know where to cut. I think it could work for ages 6+.

Now I've been saving pretty cards for years but it seems that the tradition of sending out holiday cards is going the way of cassette tapes and pagers. :( If you are short on suitable cards, you can use plain paper, or get some of that pretty scrapbooking paper. I also think they would make a very nice gift for mailing, as they can be kept flat and you can give the recipient instructions on how to fan them out into an ornament. Don't you think grandma would just love to get some homemade ornaments from her grandkids?

Here are the pictures of the process, step by step:
Photobucket

Photobucket

Photobucket

Photobucket

Photobucket

Photobucket

Thursday, December 9, 2010

"Stained Glass" decorations

Photobucket

This is one of those crafts where a picture is worth a thousand words, so here I give you a picture tutorial! It is so simple to do, a three year old will enjoy the lesson in fine motor, while an older child will enjoy learning about blending colors. Older children can do the prep work, but with preschool children, you will need to prepare the craft yourself.

You will need:
- tissue paper in many colors cut up into squares. (You do save and recycle tissue paper, right? Here is a great use for it!)
- construction paper
- scissors
- clear contact paper
- markers (if you wish to write a Bible verse or message on it)

Photobucket

If you do not have a stash already, cut up some tissue paper into squares. The easiest way to do this is to cut long strips of folded tissue paper, and then snip off the squares. You can store these in a flat packed ziploc, but it is easier to have them in a large bowl while working on the project.

Photobucket

Draw the shape you desire on a piece of construction paper. Cut out the inside. Leave plenty of border around the shape to help stabilize the picture. Now would be the time to write any sort of verse or message on the front.

Photobucket

Cut out a piece of contact paper the same size as your construction paper. Peel off the back and lay flat with the sticky side up. Carefully lay your cut out design with the message side down on the sticky part of the contact paper. If you are doing this in advance, you can re-stick the paper part you peeled off back on the sticky area to keep it clean.

If you turn it over, it will look like this:
Photobucket

Ready to decorate?

Photobucket

Lay your project on the table with the sticky side up. Start pressing tissue paper squares down flat onto the sticky area. Be sure to cover every little corner. Overlapping pieces is fine... even encouraged! The colors will blend together in such a pretty way.

Photobucket

That's it! Now you can hang it in a sunny window, and enjoy it until you are ready to make a new one. We make these for all seasons, and they make nice crafts to send in a card for a shut-in. They also make a good "Coat of Many Colors" if you are talking about the story of Joseph. Other simple shape ideas: hearts, flowers, an umbrella (make the handle from a separate piece of construction paper), a butterfly... possibilities are endless.

Happy crafting!

Linking up with the Four Moms - Quick and Easy Holiday Crafts
Related Posts Plugin for WordPress, Blogger...