Showing posts with label Frugalities. Show all posts

Wednesday, March 13, 2013

Simple Gifts

This blog might step on some toes.  It definitely would have stepped on mine a few years ago, so take it with a big old handful of salt and use what is relevant for you.  Differing opinions will not bother me, you have my word!

Simple.  Everyone wants simple. 

But simple does not make very much money, does it?  And money is what makes the world go 'round. 
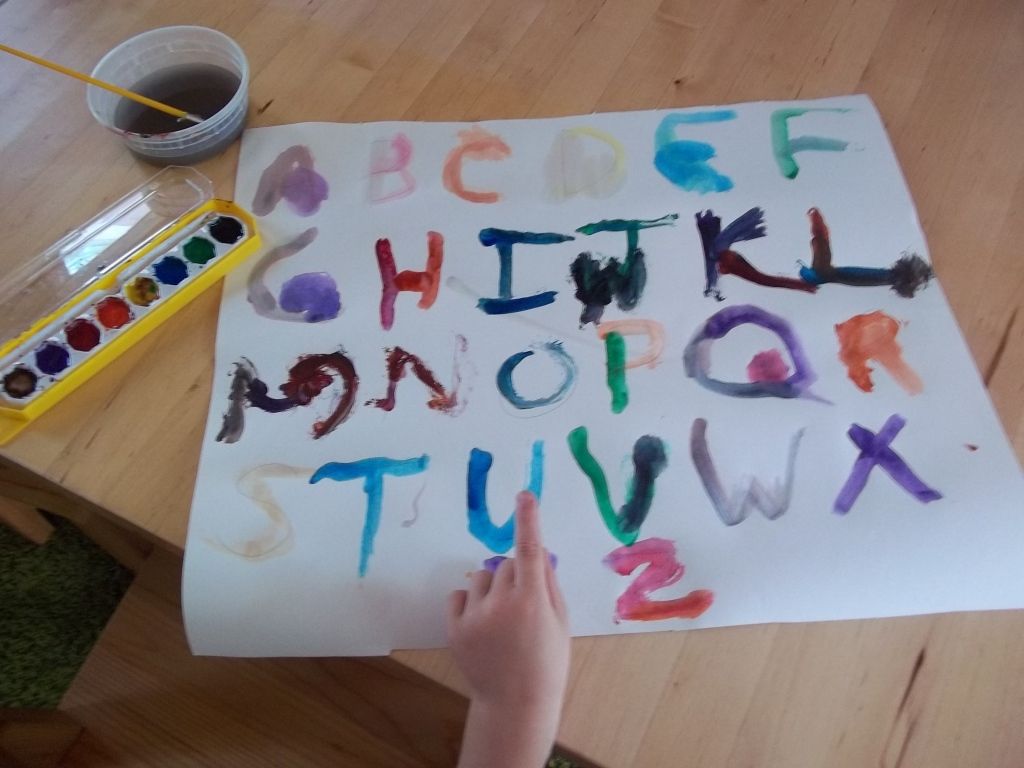
Specifically in regards to homeschooling and teaching Bible (and we ALL do it - remember, you are your child's first teacher even if you send your child to public school), I've been drawn more and more to simple. 

Full confession:  I have a bachelors in music education, taught children's Bible classes since I was 16, and I was a music and pre-school teacher before I became a stay at home mom.  I LOVED making beautiful bulletin boards, handwork, decorating my classroom, etc...  I poured a lot of time, work and much to my husband's chagrin, money, into teaching other people's children.  And if I am being completely honest with myself, most of that work was not for my students.  It was for me.  Much of it really didn't enhance the actual learning of the students very much.  (There are a few exceptions, but sadly, very few.) 

I like coloring, cutting, pasting, laminating and making things pretty.  So there. 

And I still do!  But as a homeschooling mom, I don't get very much by way of daily prep time for that kind of thing.  And because of the situation in our local church where my kids are the only children that attend our small, just-getting-started group right now, I am their perpetual Bible class teacher.  This has caused me to re-evaluate just what is important and just what really enhances their learning and what is just... fluff.  Pretty fluff.  But still fluff. 

My time is valuable.  Their learning is important.  I have needed to be more discerning to make the most out of what we have.

All those adorable Pinteresty things for homeschooling and Bible class... how many of those projects are really only for the teacher/mom?  Be honest.  And there is nothing really wrong with that.  But I just don't have that kind of time any more.

I need to sleep and take my vitamins.  I need to get outside with my children.  I need to read them piles of books and cook them healthy food.  My husband needs lovin' time.  I need to wash the dishes and do laundry.  A couple of times a week, I really just need to get a shower. 

I'm a thirty-something-year-old mama and I need to keep things simple. 

And simple works.  It really does. 

We don't do crafts in Bible class.  We have a simple timeline posted on a wall.  We have a bookshelf with Bibles and a stack of white copy paper on it.  I have the ESV Family Bible and a set of Betty Lukens felts for a visual aids.  If we didn't have that, a whiteboard and some markers would do.  We have a box of crayons.  And my boys are learning at a tremendous rate!

This is our simple Bible class "program" for two boys, ages 5 and 3:
  • We pray
  • Sometimes we sing Bible songs that go with the lesson.  Nothing complicated though.
  • We go through the Bible and read a Bible story.  We work in chronological order.  
  • We find our Bible story in our simple timeline.
  • Sometimes we look at things on maps if it is relevant to the story.
  • We review the story with the felts.
  • The boys "narrate" the story back to me as they draw key events with crayons on the plain paper.  
Most people would say our classroom is bare.  But it is simple.  It is without distraction.  Preparing a lesson every week is practically no work for me, which is important since I have been teaching without a break for about 3 years and don't expect to stop any time soon.  (Just FYI - I only teach on Sundays.  Midweek we meet with the adult class, since we do so much Bible teaching at home also.)  Simple only seems to enhance their learning.

And it is the same for homeschooling.  Mostly it is about the books, and when it comes to Bible, it is about THE Book.  We don't spend a lot and we don't need a lot.  But you won't be able to find this sort of thing at a convention or in a catalog. 

Your most valuable resources are things you already have:  your Bible and your mind

Pin It

Thursday, January 10, 2013

Tips for Keeping a Clean Bathroom part 2

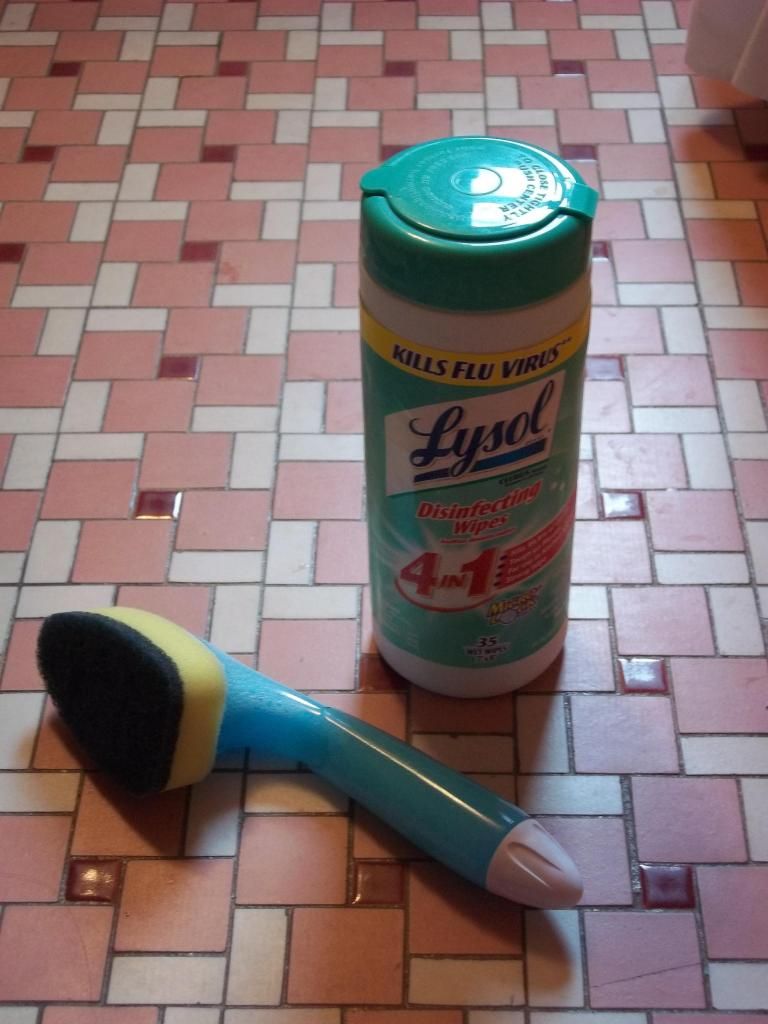
That is not Lysol in that can!
Almost two years ago, I posted My Tips for Keeping a Clean Bathroom where I encouraged my readers to try keeping a spray bottle of vinegar and a stack of rags in each bathroom for simple, quick clean-up.  I still think this is a wonderful method, but I have found a few more simple cleaning techniques I'm excited to share that have really helped me keep up a clean bathroom.

First, I combined a few different ideas from Pinterest to create my own disinfecting wipes.  I used an old Lysol container and put in pieces of my husband's old undershirts that I cut up.  (I cut the body of the shirt into quarters for these wipes.)  About 10 of these wipes fit in the container.  I mixed up a cleaning solution in a jar that consisted of the following:
  • 1/2 c. vinegar
  • 1/2 tsp. Dawn dish soap
  • about 15 drops of essential oils (I like orange and tea tree oil.)
I poured this mixture over the wipes, shook them up, and I had wipes ready to go for cleaning the entire bathroom.  They even worked nicely on the mirror!  (If yours seem a little dry, you can always add a little bit of water.  If they are too wet, you can squeeze out the excess liquid in the sink before using them.)  These 10 wipes lasted me about a month, and then I just laundered them and made up a new solution.  I have such a small bathroom and it has no cabinets, so this one little container hides in there very well.

The second idea is for cleaning the tub. I use coconut oil in my boys' bath water in the winter and this tends to make my tub get dirty in a hurry.  It is so much work trying to scrub out the bathtub, that I tend to put it off way too long.  I bought a little dish scrubber (shown above) and filled it with equal parts Dawn dish soap and vinegar.  I keep it right in the shower on the hanging rack.  About once a week while I'm taking a shower, I shake it up and do a quick once over on the tub and tiles.  This takes less than a minute and has been keeping my tub nice and clean.  I'm thrilled to give up the task of scrubbing out the bathtub every month!

Do you have any tips for keeping the bathrooms clean?

Pin It

Saturday, December 22, 2012

Comfort and Joy

This is a meal that never fails to leave a sense of satisfaction.  I had major tomato soup/grilled cheese cravings when I was pregnant with my second child.  I grew up eating Campbell's in a can but I finally took the plunge and tried a homemade version and I LOVE it!  It is so easy, I can't believe I didn't do this sooner!

Tomato Soup
  • 2 Tbs. butter
  • 1 small onion, diced
  • 1 clove of garlic, minced (or 1 tsp. garlic powder if I'm in a hurry)
  • 1/4 c. flour (or cornstarch or arrowroot powder)
  • 28 oz. can whole canned tomatoes
  • 1 c. chicken stock
  • 1 tsp. dried oregano
  • salt and pepper to taste
 Saute the onion in the butter over medium heat until it starts turning golden brown.  Add the garlic.  After about a minute, quickly stir in the flour and try to incorporate it all into the butter.  Cook and stir it for about a minute and dump in your canned tomatoes and chicken stock.  Season with the oregano, salt, and pepper.  Use a stick blender to puree your soup and let it cook on the stove to meld the flavors for 15 minutes or so. 

(I LOVE my stick blender for soups, but if you don't have one, you can transfer your tomatoes to a regular blender or food processor.  It's just much messier that way.)

Grilled Cheese
I fee like I hardly need to share a recipe, but I guess not everyone knows how to make it... I know I didn't when we first got married!  The first time I made it, I burned the outside and the cheese was still cold!  Butter the outside of two slices of bread and lay the butter side of one of them down on a heated griddle or skillet.  Quickly add your cheese - our favorite is good old cheddar or pepper jack.  Top with the second piece of bread, butter side up.  Once the bread turns golden brown, flip it over to toast the other side.  Once it is done, let it sit on a cutting board for a minute before cutting your sandwich into triangles. 

Also yummy when you add sliced lunch meat, or thinly sliced fresh tomato.  Really, the possibilities are endless.

Do you have a favorite comfort food? 

Pin It

Saturday, December 8, 2012

Tortilla Night

Mini Tacos

We've started a tradition of having "Tortilla Night" in our home (almost) every Friday night.  We have a Bible study as a family and open up our home to friends and neighbors to join us for dinner and the Bible study, and people are welcome to arrive whenever they can.  My husband sends out e-mail invitations/reminders every Tuesday and we don't ask for an RSVP.  Ever since we started, we've always had at least one other family join us, and sometimes up to four, though many just come for the Bible study.  I got the idea from a large family that did this back in our previous home congregation and we've been happy to carry on here in upstate New York.  (This family orders pizza for everyone, but we have a dairy allergy in our family that makes pizza complicated, so just do whatever floats your boat.)

I thought it might be helpful to explain some of how we make this work and perhaps you will get some ideas that will be useful in your efforts to "practice hospitality".

Logistics -
Doing the same routine every week is very helpful for me.  After a few weeks, my mind has gone to "autopilot" and Fridays fall into a predictable routine.  I keep a check list on a post-it note on the fridge for all of the foods and utensils I need to set out (I'll go into that in the next section).  Thursday is my "kitchen day" giving me a chance to do some extra food prep and Friday is my house cleaning day, which means I give the bathrooms a good cleaning and do some extra dusting/glass cleaning if I am able.  I am intentional about not making my house spotless... we are simply opening up our home and welcoming others to join our family, we are not hosting an "event".  I have the children clear away toys while I fix dinner, but I do not stress about the appearance of our home.

During the Study -
I keep a large basket of Bible books, notebooks, and pencils for the children to use while we have our study.  My children are expected to sit quietly while we study and get involved as they are old enough to do so.  My husband leads the study and usually does different Bible stories.  Right now we are spending a few weeks talking about King Saul and his character. 

The Food -
As food allergies, special diets, and plain old finickiness are on the rise, I find the food we serve for "Tortilla Night" to be the perfect solution.  I keep all of the ingredients in separate bowls served buffet style - hot foods on the stove and cold foods on a side table.  Everyone can chose what they like and ingredients are available for taco salads, bowls, soft tacos and burritos.  I haven't found another meal that better suits the wide variety of needs for our guests and because the food is fresh and tasty, everyone enjoys it too!  (It's also not an expensive meal, which is good since we are doing this regularly.  I can buy many of the ingredients at Aldi which saves a lot of money!)

This is what I generally serve:
  • Homemade Refried Beans (recipe follows) - though I use canned in a pinch
  • Taco Meat (1 lb. ground beef with 2 Tbs. homemade taco seasoning)
  • Shredded Cheese
  • Rice (recipe follows)
  • Avocado or Guacamole
  • Diced Tomato
  • Lettuce
  • Chipotle flavored Salad Dressing - I buy this, but have a homemade recipe I want to try soon
  • Diced Green Pepper
  • Diced Red Onion
  • Salsa and Hot Sauce
  • Tortilla Chips
  • Flour and Corn Tortillas
  • Sour Cream 
Do I have every ingredient every week?  No, but this is the list I go from when making a grocery list and getting things ready.  I often make the meat and/or rice in bulk and freeze it and this saves a lot of time.  I buy salad in the clamshell containers so I'm not prepping lettuce (plus it lasts so long this way!)... in other words, I look for ways to save time so Friday prep is not so overwhelming.  I also set out cups, a pitcher of water, cloth napkins, silverware and plates/bowls so people can feel free to help themselves.   I don't worry about fixing dessert, so if someone wants to bring something, I tell them they can bring something sweet to share.

Some recipes:
My old standby recipe for refried beans and Spanish rice is here and we still use this method sometimes.  The beans are not as smooth and the prep for both of these is more last-minute.  I've since found a new refried bean recipe that we really love and a friend gave me a rice cooker.  Try out the different recipes and decide what you like the best.

Refried Beans - all in one pot!
  • 3 c. dried pinto beans
  • 1 medium onion, diced
  • 3 garlic cloves, minced
  • 1 tsp. chipotle powder (Penzey's)
  • 1 tsp. chili powder (Penzey's) 
  • 1 1/2 tsp. salt
Sometime the day before you want to serve your beans, sort and soak the pinto beans in enough water to cover by a couple of inches.  In the afternoon before our meal, I drain the beans and rinse them in a colander, then put them right back in the pot.  Add the onion, garlic cloves, chipotle powder and chili powder.  Cover with water by about an inch and bring to a boil.  Once it is boiling, I put the lid on and lower the heat to about medium so the beans are gently bubbling.  Cook them for at least an hour - long enough for them to get nice and soft.

Now comes the tricky part... you want enough liquid to keep the beans moist, but don't want them too runny.  You might need to drain off some of the cooking liquid at this point and I recommend reserving it in case you want to add some back in.  Use a stick blender to puree the beans and once they are all nice and smooth, mix in the salt, and check for flavor and texture.  If they are too runny, you can just cook them on the stove for a while with the lid off and if they are too dry, you can add back some of your cooking liquid.  Keep warm until ready to serve.   

Cilantro Lime Rice in the Rice Cooker

  • 2 Tbs. butter
  • 2 tsp. garlic powder
  • 1/2 tsp. salt
  • 2 scoops of white or brown rice (the scoop that comes with the rice cooker)
  • 1/4 c. lime juice
  • water that comes up to the "2" line of your rice cooker
  • 1 Tbs. cilantro (I have also used the kind in the tube when I can't find nice fresh stuff and it works very well.)
Put all of the ingredients except the cilantro in your rice cooker and turn it on.  When the cook cycle is finished, stir in the cilantro and let your rice cooker keep everything warm until ready to serve.

For a stove top version see the original recipe here.

Do you have any regular ways that you open up your home to show hospitality?  What do you do to make things go smoothly?  Got any favorite foods your guests have enjoyed?

Pin It

Wednesday, October 24, 2012

Just a Little Tip for the Kitchen


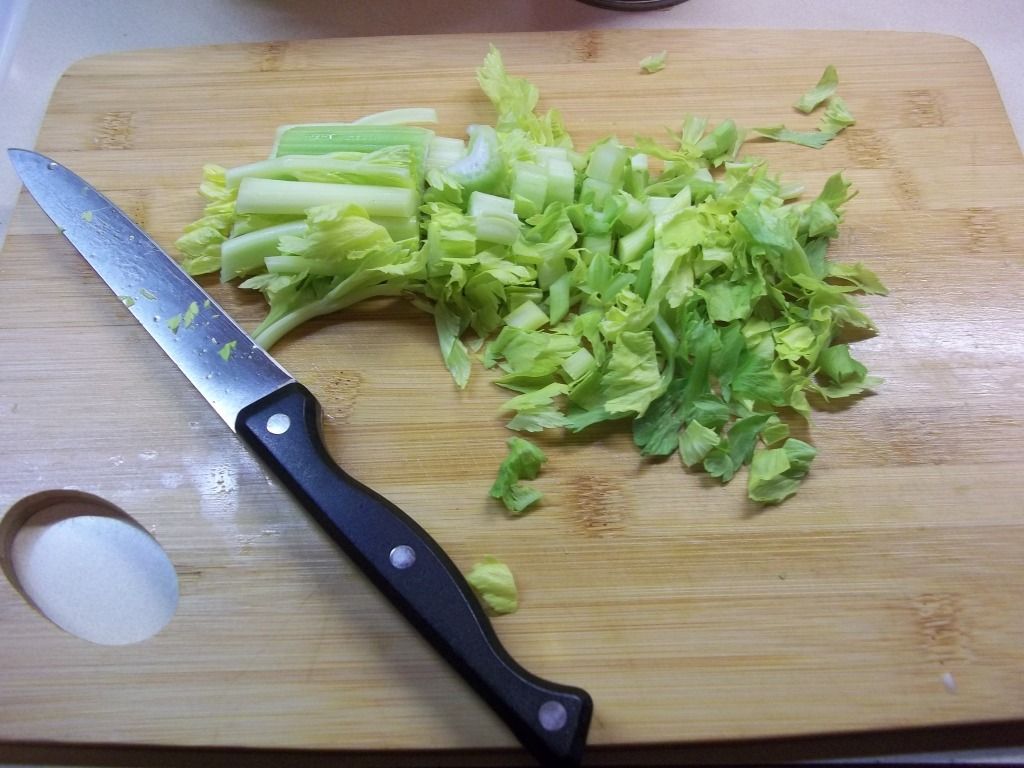
Do you cook with celery leaves?  It not, do give it a try!  I especially like to chop them up and add them to soup.

Here are three soups in particular where I use celery leaves when I add the celery:
Chicken Noodle, Minestrone, and Pasta Fagioli

Got any little tips for ways to cook with something that would otherwise be thrown away?

Pin It

Wednesday, July 18, 2012

Homemade Vanilla

Why am I writing about making homemade vanilla in July?  Because if you want some amazing homemade vanilla ready for your holiday baking, you really need to start it now!

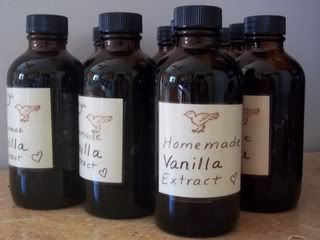
This has been one of our easiest and most successful ventures for gift-giving.  I highly recommend giving it a try.  I was amazed by the reactions, "YOU MADE THIS!?!?"  No one ever guessed how easy it was!

You just need two things:
* Vanilla beans
* Vodka  (or bourbon, but I really prefer the vodka and it is cheaper)

On the beans:
I made the vanilla in bulk because we were planning on giving it as a gift.  You can pay an outrageous price for vanilla beans at the grocery store, or you can order cheap, extract grade beans on e-bay.  I recommend the latter.  I had a wonderful experience with this seller, and the beans were just perfect for this use.  (Extract grade beans are just not "perfect looking" or are too short for regular sale.  The vanilla flavor is just as potent!)  I bought a 1/2 pound of beans that cost me less than $20 with shipping.   

On the vodka:
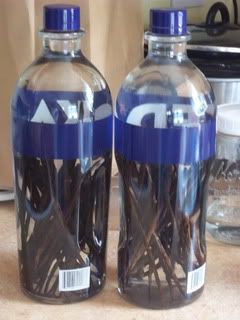
This was the most difficult part of the entire project for me... bringing myself to go into a liquor store!  Once I finally mustered the courage and lectured my children within an inch of their lives that they were not allowed to touch ANYTHING, I went in, found the nearest store employee and said, "I'm making vanilla extract and I need to buy a gallon of vodka."  The look she gave me was hilarious.  She said, "Weeeeell, it doesn't come in gallons, but I can show you what we have."  :)  So she pointed out the bottles you can see just below:  Cheap vodka in glass bottles so I can keep using the bottles for extract.  I bought two 1.75 liter bottles and they cost me $20 each.

Then came the easy part!  I poured out just a little bit of vodka... just enough to make some penne vodka, which ended up tasting pretty nasty.  Then I divided up the beans between the bottles.  Set it on a shelf in a cool dark room and let it sit for a few months.  (3 is the minimum for some good strong stuff.)  THAT IS IT!

Some instructions will tell you to cut up the beans, but you really don't need to do that.  Ina Garten (the “Barefoot Contessa”), makes her own vanilla, and doesn’t scrape her beans.  She leaves them whole to marinate, and once the vanilla is ready, she can scrape out the beans as desired to use for baking so they serve double duty.  I haven't done this yet myself. She also just refills her bottle with vodka as she uses it.  I keep a small bottle of my extract in my baking cabinet, and the large one in cool, dark storage.  When I need to refill my vodka, I can just buy some cheap vodka in a plastic jug to refill it and that only costs me about $14.  Maybe my beans will need replacing some time down the road, but they are still going strong for now.

For gift giving, we ordered a case of these glass bottles from Amazon.  With shipping, it came out to about another $20 for a dozen.


Now for some math:
$20 for the beans + $40 for the vodka + $40 for the glass bottles = $100 for 24 bottles of vanilla.
This equals $4.16 for each 4 oz. bottle of vanilla extract.  If you made a second round, the cost would go down as you would save the $20 for the beans and about $12 on the vodka, so each bottle would only cost you about $2.66 for a 4 oz. bottle. 

So we're talking about a pretty big upfront investment here, and I get that.  You can definitely do this project on a smaller scale, but it is surprisingly easy to find this many people that can use a nice gift of vanilla extract.  Think holiday gifts for friends, co-workers, family and neighbors, wedding gifts, housewarming gifts, thank-yous to the friends that let us stay in their home...  We only bought a dozen jars the first time and they went quickly.

And now for a funny, courtesy of Preacher Man...
In our old house, we kept the vanilla on my canning shelves in the basement.  The basement is also where our washer/dryer were located.  Preacher Man used to tease me endlessly about needing to go to the basement so often.  He would wink at me and say, "doing laundry, eh?  Are you sure you aren't taste testing the vanilla again?"  :P  

Pin It

Friday, July 13, 2012

Water Play for Summer

I'm all about simple fun for the summer.  We don't have a pool or a slip & slide, but we have our own kind of fun with water!

Watering the flowers is one of the most anticipated events of the day.  It keeps them occupied for about 20 minutes.  Which for my children is AMAZING!
Playing with string is another favorite.
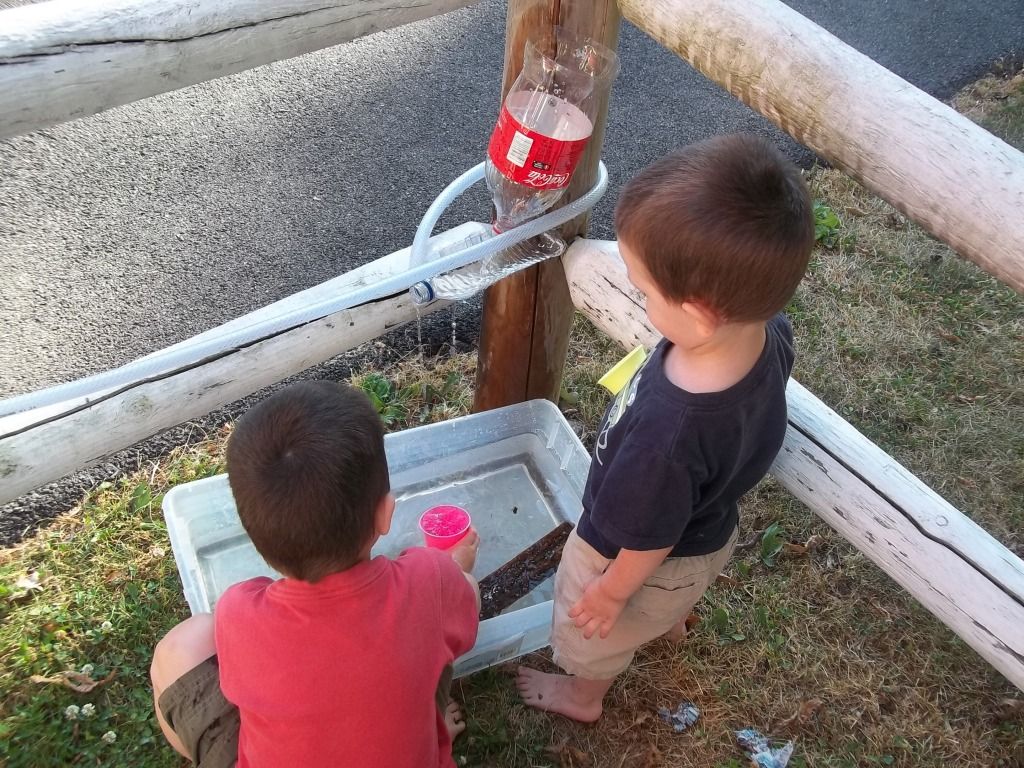
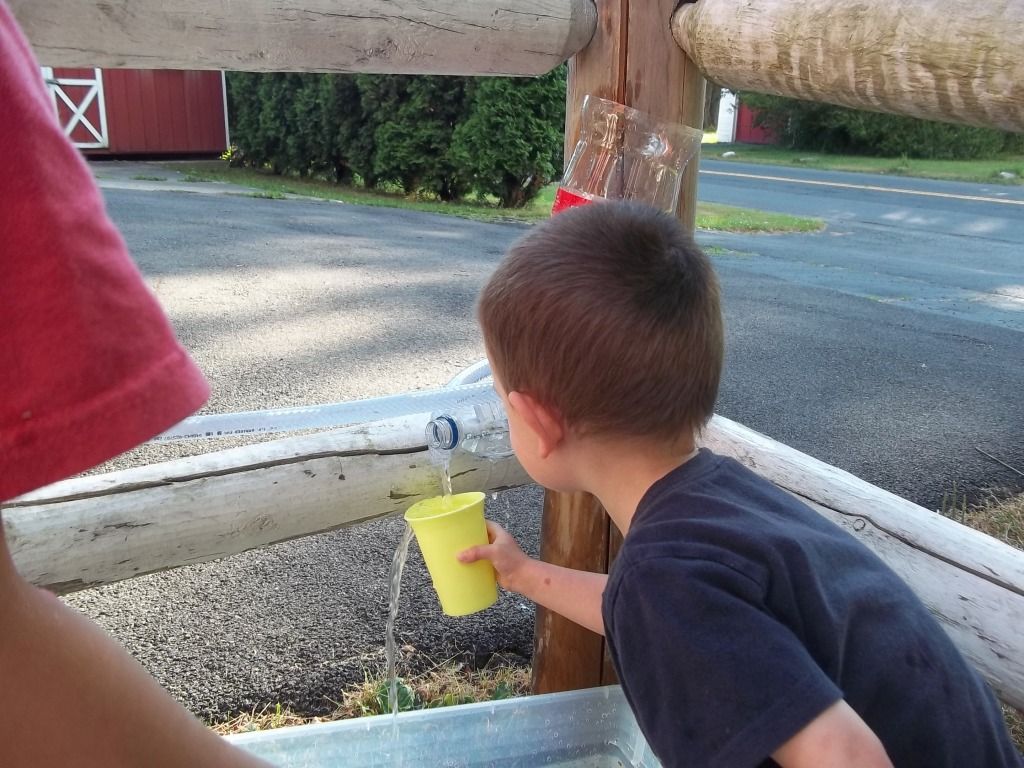
But the most favorite activity for summer evenings is the Water Wall!

Basically, it is a bunch of tubing, funnels, cups, old bottles, tubs, etc... set up for water play.  Soap bubbles are optional.  We got the fancy little water wheel at a yard sale for $.50.  Preacher Man changes it up from time to time.  This is so fascinating to them!  I got this idea from The Common Room

What kinds of water play do your kids enjoy in the summer?

Pin It

Thursday, July 12, 2012

Homemade Kitchen Scrubbie

Easy...
Frugal...
Making something useful out of something you were going to throw away so you don't have to buy that thing you needed...


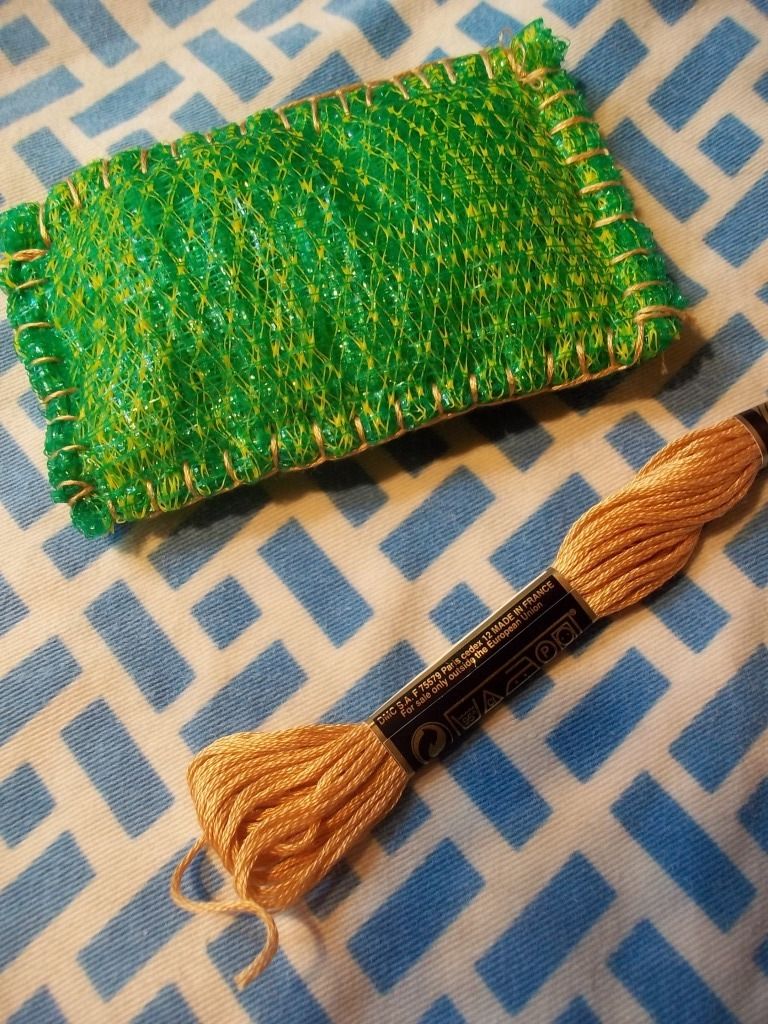
It's a dish scrubbie made out of those mesh plastic-y bags that onions, lemons, and limes come in.  Instead of throwing them away, you neatly fold them up, stitch the edges, and you have something useful!

It isn't every day that I see a frugal idea like this.  I thought it was a fabulous idea, but I wanted to test it out before I showed it to all of you.

I originally saw the idea on Pinterest, but if you go over to Mooberry Farm Homesteading, Julie will show you how to make one.  For all my crafty interests, I've never done crochet, so here is my take on her idea:
Instead of crocheting the edge, I just did a blanket stitch around the edge with some embroidery floss (all 6 strands with a large-eyed needle).  I already had scraps of floss, and it takes so little, this is truly a "something for nothing" project.  I used the floss because I thought the 6 strands would make it stronger than regular thread.  I also put in an extra stitch in each corner for strength.  So far, it is holding up quite well, and mine is getting heavily used at the kitchen sink.  I think these would also be great for scrubbing the sink/bathtub.  They have a nice, gentle scrubbing quality, and they won't scratch.  When it starts to fall apart, just throw it away and you have lost nothing more than a bit of your time.

Speaking of time, all in all, I spent about 15 minutes sewing up the edge while watching my children play.  15 interrupted minutes.  Probably would have taken less than 10 without, but the nice thing is that you don't have to think very hard, you just do.  I like mindless handwork for that reason.
 
Pin It

Wednesday, June 13, 2012

Hard Water

When we moved to our new house, my glassware came out of the dishwasher looking like this:

ACK!

I did some googling and discovered that my problem was either a filmy coating from hard water or etching from soft water.   Since this happened instantly and not gradually over time, my guess was that I had hard water.  Just to be sure, I did the vinegar test.  I simply sprayed some plain white vinegar on a rag and rubbed the cloudy film away.  This confirmed that I indeed had mineral buildup from hard water.

What is hard water? 
Hard water is water that has high mineral content.  It is generally not harmful to one's health.  A result of hard water is a lack of suds when soap is agitated in water, so the harder your water, the more soap you will generally need to use to get things clean - things like your hair, your laundry, and your dishes.

Next, I needed to know just how hard.  Often when you buy a dishwasher or washing machine, the manual will recommend how much soap to use based upon the hardness of your water.  Our landlord left the manual for the dishwasher with us... the manual from 1990!!! 

We have city water, so I googled the name of our city + "water quality report" and I looked for the most recent year.  It gave me a number of 161 mg/L.  I found a chart online that helped me translate this because my dishwasher manual only listed grains per gallon:

Water Hardness Scale
Grains per gallon
mg/L
Classification
less than 1.0less than 17.1soft
1.0 - 3.517.1-60slightly hard
3.5 - 7.060-120moderately hard
7.0 - 10.5120-180hard
over 10.5over 180very hard

So there you have it.  We have water on the higher end of the "hard" classification, so we would need quite a lot of soap to do the job.  According to my dishwasher manual, we need about 3 Tbs. of detergent.  I have found that I get the best results when I fill both the pod for the wash and the open pod for the pre-wash.

All of that detergent gets expensive, doesn't it?

Not thanks to a homemade detergent recipe I found on Pinterest!!  Hop on over to "Being Creative to Keep My Sanity" for a great dishwasher detergent recipe that works well for hard water.

I was amazed when I saw that I already had most of the ingredients and that is what encouraged me to just give it a try.  I already use many of these things for making my own laundry soap or other cleaners.  You will need:
  • Borax*
  • Washing Soda
  • Citric Acid (found with canning supplies)
  • Epsom Salts
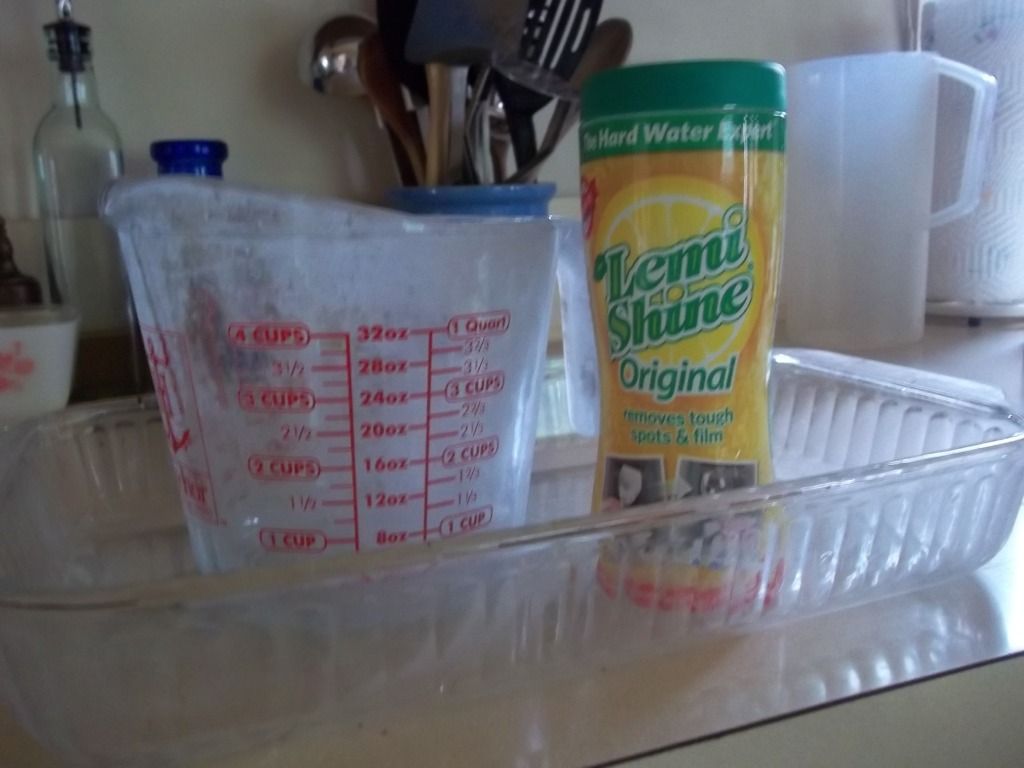
  • LemiShine rinse aid (in my picture above)
I cut the recipe in half to try it out and I think I will do that next time as well for a few reasons.  First, a full recipe won't fit in my storage container.  Second, once mixed, moisture will get into the powder and it will become very hard.  I pull out a table knife each time to chip away what I need.  I don't mind it too much as I'm spending my time, not my money, and it doesn't cost much of my time.  Third, it lasts a long time, so even cut in half, I don't need to make it very often.  I don't know how long because I've only been doing this for about two months, but I still have well over half left and as I said, I have to use a lot of detergent for each wash.

In order to cut the recipe in half I used a kitchen scale because I have one.  I think you could successfully eyeball it if you need to do so.  If you are unsure of the amount of citric acid, I did the math and a half recipe = about a quarter of a 7.5 oz. container. = 12 Kool Aid packets.
Because of the level of hardness of our water, I used the entire container of LemiShine in my recipe, so adapt for your water accordingly.

So I was a little skeptical at first, but my dishes are coming out wonderfully clean and the soap is all dissolving well.  (It didn't always when I used store bought dishwasher detergent.)

If you have soft water, the DHM of The Common Room has been using this recipe with success for quite some time.

*A note on Borax - Borax is a wonderful all natural cleaner, but that does not mean it is safe for children!  It is toxic if ingested and can burn eyes and skin, so you will want to keep your borax and your dishwasher powder stored safely away.  Store bought dishwasher powders are also toxic, so hopefully you have been doing this anyway. 

Pin It

Thursday, May 10, 2012

If Walls Could Talk...


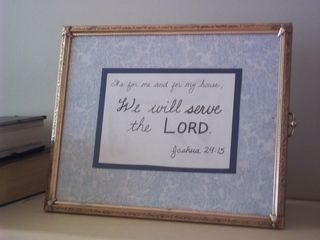
I wanted to share some more ideas for frugal decorating.  On Tuesday, I shared the monogram with buttons that I made, and today I'm sharing an inexpensive, personalized, yet beautiful way I create wall art with a very important message for our family.

It all started when I wanted to put some Bible verses up on our walls, and I looked into custom vinyl wall clings, but was rather daunted by the price and was disappointed by the limited selection.  I started collecting old frames at garage sales to create my own scripture art and I have enjoyed making these for our home and for gifts.  Each of these finished pieces costs me about $1.25 - $1 for the frame is the going garage sale price around here and about $.25 for the scrapbook paper.  I watch for when the paper goes on sale for about $.25 per sheet, and I almost never use an entire sheet.  The extra paper is useful for making homemade cards or for other framing projects.    

Now I am picky, but I am not a perfectionist.  But part of the beauty is having these verses on the walls in Mama's handwriting.  I practiced my handwriting for fun as a child, so I can write with a pretty steady hand, but if you don't like your handwriting, you can use your computer and printer.  I still think scrawled handwriting is much more charming than the computer though, so don't worry if it doesn't look just perfect.

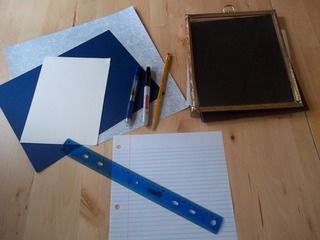
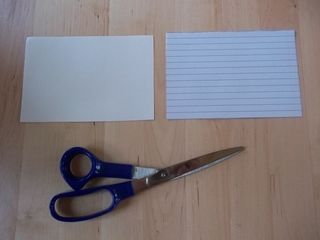
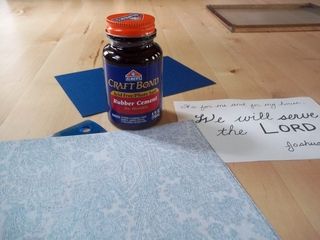
1.  Gather your supplies:


  • scrapbook papers 
  • white or cream printer or stationary paper
  • lined notebook paper
  • sharpies
  • pencil
  • frame
  • ruler
  • pink pearl eraser (not shown)
  • rubber cement (not shown)


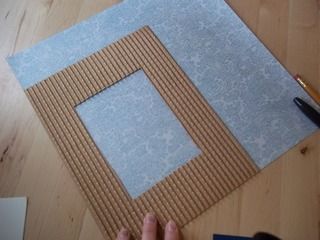
 2.  Using the glass of the frame or another insert for a guide, trace the size you will need for your frame on the scrapbook paper.


3.  (I eyeball everything, but measure if this drives you crazy!)  Cut out a piece of white or cream thin paper for your quote.  While you are at it, you may as well cut out two because chances are good you will mess up at least once.


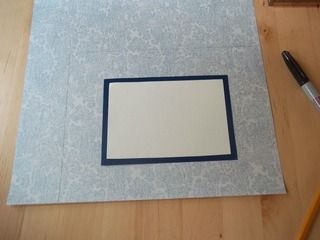
4.  Eyeballing it again... sometimes I like to have an extra layer to make the borders "pop".  I used my cream colored paper to measure... I decided how much border I wanted and then doubled it before tracing the lines.  This made it so when I re-centered the cream paper, I would have the original amount of border I wanted.


5.  Lay everything out so you can see if it looks the way you like it.  Don't glue anything yet!!


6.  Now cut out several sheets of lined notebook paper the same size as your cream colored paper.  Make sure the lines are nice and straight because these will be your guide. 


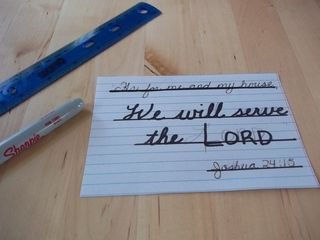
7.  Use the lined paper to sketch out some ideas.  You can see that it took me a while to settle on what I liked.  I even had to do some extra practice on my W.


8.  When you settle on one that you like, copy over the words with a sharpie and this time try to get everything lined up just the way you like it.  *Using a ruler* (it's very important), draw a line through where the bottom of the letters will hit.


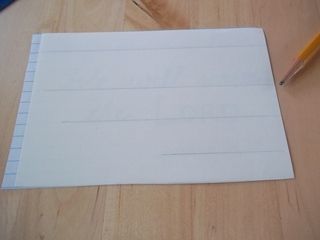
9.  Put your cream paper over top and using your pencil and a ruler, lightly draw those lines.


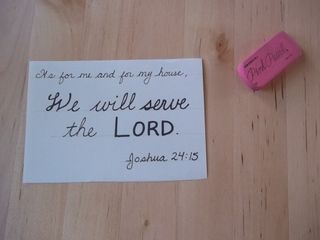
10.  Now you can finally write out the final product.  When you are satisfied, and you are sure the ink is dry, use your pink pearl eraser to erase those pencil lines.  (Don't use an inferior eraser!!  It will ruin your work with eraser streaks!  If you don't have a pink pearl, test your eraser on scrap paper before you use it!)


11.  Now you can glue the layers on.  Rubber cement is my favorite!


There you go!
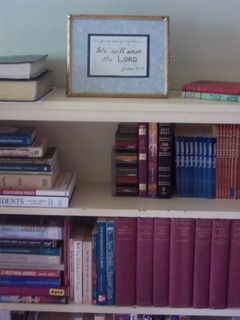
Joshua 24:15 - "As for me and my house, we will serve the Lord"

A few more examples I've done:


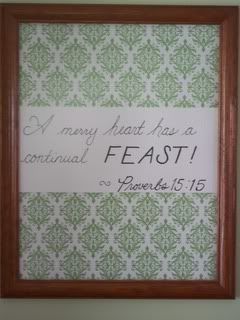
Proverbs 15:15 - "A merry heart has a continual FEAST!"


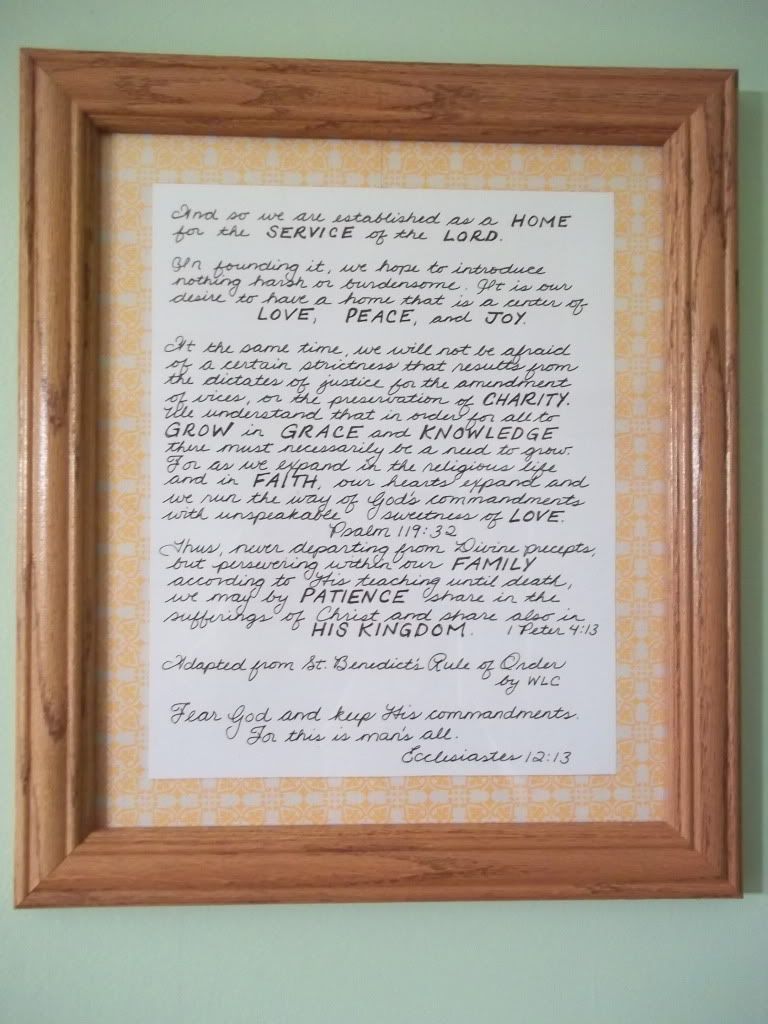
 This is our family mission statement (of a sort) adapted by my dear DHM from The Common Room from the sixth part of her series, "Benedict's Rules of Order for Housewives".


Nehemiah 8:10 - "The joy of the Lord is my strength"

I have also done the hymn, "Be Present At Our Table, Lord" for a friend's dining room.  I would like to do one for ours some day.

Another excellent resource is the free Bible Verse Printables made by April at The Flourishing Abode.  She has a wonderful modern style for her typography and I admire what she does.

What are the most important verses you have (or would like to have) on the wall?

Pin It

Saturday, December 3, 2011

A Frugal Cookie Recipe

It's Potluck Saturday!

My Grandma had these cookies around every time we went to her house. They are a little bit cakey, and I've never had anything quite like them elsewhere. I was making these recently and realized that they are pretty frugal as far as cookies go. The more expensive ingredients, such as eggs and butter only require amounts found in cookie doughs that make half the volume. Now these are not the most amazing cookies in the world, but they are nostalgic for me, and they are fun to make. They store really well, and even taste best a day old in my opinion. Enjoy!


Grandma’s Sugar Jumbles
5 c. flour
1 tsp. baking soda
1/2 tsp. salt
2 sticks softened butter
2 c. sugar
3 eggs
1 tsp. vanilla
1 c. buttermilk**
Mix the wet & dry ingredients separately, then together. Cover and refrigerate the dough for at least two hours. Drop by the spoonful onto a cookie sheet. Sprinkle some cinnamon & sugar on top. Bake for 15 min. at 375*
Makes 6 dozen

** I use either powdered buttermilk or regular whole milk with a splash of lemon juice in it. To make a dairy free version, I use unsweetened rice milk with a splash of lemon juice.

Pin It

Thursday, December 1, 2011

Trimming the Tree

During my childhood, I remember always having birds at the top of our Christmas tree. I've been feeling a bit wistful for those birds this year and wanted to re-create that a bit for our little family. Preacher Man gifted me half an hour child free at Michaels so I could satisfy my creative monsters as my friend April loves to say.

I fell in love with the glittery cardinals.

Tweet Tweet

They are flashier than what I typically buy, but it is Christmas, after all, and once on the tree, they are a perfect fit!

Here's what I did:

Tree Topper Materials

I bought:
  • 2 glittery cardinals
  • a package of cinnamon pinecones - some are painted gold and there are some pretty glittery red berries in the pack too
  • a small grapevine wreath for the foundation
  • a little pick with gold berries
  • a length of berry garland
  • I also used some hot glue and some heavier gauge beading wire that I had on hand. Green floral wire would be better, but I didn't have any, and the silver works just fine.
Wrapping the wreath

1. Wrap the berry garland around the grapevine wreath, tucking in the ends so they don't show.

Wiring It In

2. Preacher Man suggested that I wrap the garland with the wire because the branches of the garland were sticking out too much. I just tucked the ends of the wire deep into the wreath, and gently wrapped around the little branches to reign them in.

Ready to Hot Glue

3. Decorate!! I stuck the gold berry pick deep into the wreath, attached my little cardinals, and glued on the pinecones and glittery berries. Place things on the wreath strategically to cover bare spots and wire ends. Be sure to leave the middle of the wreath open so there is room for the top point of the tree to poke through.

Voila!

On the tree 1

I think they are just too sweet! The Littles love them too!

On the tree 2

This year's tree, all decked out. Last year, I got creative to make a babyproof Christmas tree, and I loved so many of the things I did, that I'm bringing them back again this year. These paper ball ornaments are absolute favorites! The Littles love hanging the pretty copper and silver cookie cutters on the tree as ornaments, and I still think the lace looks lovely as a garland.

I'm saving cards to make some of these ornaments this year, and I hope to bundle up the Littles to hunt for some acorns so I can make these lovelies to mix with my cinnamon pinecones.

What holiday crafts are you undertaking this year?

Pin It

Wednesday, November 30, 2011

Sweet Treats

Our family's favorite treat for a winter's evening is homemade popcorn and hot cocoa. I'll be honest, it's easier to convince myself to bundle everyone up in their snowsuits to play outside if there is the promise of warming up with hot cocoa after we come back in. It is also traditional holiday tree trimming fare.

Got Dairy Free Cocoa?

Church Mouse's Homemade Hot Cocoa Mix


Here's a recipe for a yummy and thrifty hot cocoa mix. You can make this in bulk to use with your family or to give away as a gift in a quart size mason jar with a ribbon on it.
  • 8 c. powdered dry milk
  • scant 3/4 c. cocoa powder
  • 2 1/2 c. sugar
  • 1/4 tsp. salt
Add 1/3 c. mix to 1 c. hot water and enjoy!

If you don't want to bother with making up a mix ahead of time, the easiest and best homemade cocoa is just 1 tablespoon of cocoa powder and 1 tablespoon of sugar in a mug. Add about 1 c. hot milk or for a dairy free version, hot soy/rice/coconut milk. (I prefer the coconut. I would advise using less sugar with the pre-sweetened milks.) Add a dash of cinnamon if it suits your fancy. Easy to remember, easy to make!
(Thanks to my friend, Stacey, for the suggestion!)

Now for the POPCORN!

Have you been making your popcorn in the microwave all these years? There is a better way!!! It is substantially cheaper to buy your popcorn in bulk and pop it on the stove. You really don't need to buy a fancy popcorn popper. We have tried several and while they do work well, they are usually very annoying to clean and they burn out after a few years of heavy use. We now use our big stock pot, the very same one that we use to make soup, iced tea, and any number of things. I'm happy to get rid of a bulky kitchen gadget in favor of using something as multipurpose as a good stock pot. Plus, the stockpot washes out so easily! Reducing dirty dishes is always a win in my book!

Popping Corn on the Stove, Step By Step:


1. Put a couple of tablespoons of oil in your pot and add two popcorn kernels. Use enough oil to cover the entire bottom of the pot. (We usually make a big batch in our stock pot, but you can make a small batch using a smaller saucepan just as well.) Turn your burner to medium-high heat.

Popcorn 1

2. When one of the popcorn kernels pops, add enough popcorn to cover the bottom of your pot, plus just a little bit more. Cover with a lid.

Popcorn 2

3. Shake the pot to evenly coat the kernels - just slide it back and forth on the stove a bit.

Popcorn 3

4. When the kernels start popping, continue shaking the pot to mix the kernels and to keep the popped pieces from burning. Vent out some of the steam by slightly lifting the lid if needed.

Popcorn 4

5. When the popping stops, pour the popped corn into a large bowl. Put the pot back on the stove and add your butter to the pot to melt it. Drizzle the melted butter on top of your popped corn and add seasonings to taste.

Popcorn 5

You can adjust this to your tastes, but these ratios are a good rule of thumb:
1 Tbs. oil + 1/3 c. popcorn kernels + 1 Tbs. butter

You can use any kind of oil, but our favorite is Nutiva coconut oil. Amazon runs amazing deals from time to time, and it is our top choice for healthy cooking oils.

Our favorite seasonings:
I definitely recommend popcorn salt. It is ground super fine so it sticks to the kernels.

** Note - I am not a Penzey's affiliate and I do not receive any compensation for my recommendation. I just love their spices so much that I wish everyone could enjoy them as we do.


What is your favorite popcorn flavor?

Pin It

Friday, November 25, 2011

Moving into the State of Contentment


Hebrews 13:5 - Make sure that your character is free from the love of money, being content with what you have


Continual Feast

Philippians 4:11 - For I have learned to be content in whatever circumstances I am.

Disclaimer: This is rather individualistic, so I write to share my own struggle, not to criticize those who may not share my thoughts. Personally, most of my gifts are homemade and what I do buy, I buy throughout the year so I can avoid shopping as much as possible this time of year. So if you are one of those "shop 'til you drop folks"... by all means enjoy and give the glory to God.

Thanksgiving is my favorite holiday. I love the warm, homey atmosphere of food, family, and joy and I love that the day remains rather noncommercial. I love simple traditions and I am not one to go all out with decorations and fuss. But I feel oppressed. Is it just me, or is the intensity of the shopping mania that is "Black Friday" reaching a whole new level? It goes beyond just one day. Stores are competing to open earlier and earlier with bigger sales, and now you can even start your Black Friday shopping on the evening of Thanksgiving at 10 pm! We've been inundated with glitzy sales fliers in our mailbox for weeks. No longer limited to "Cyber Monday", the internet is teeming with sales all week long as evidenced by my e-mail inbox and the advertising on the blogs I follow. I love a good deal as much as the next person. But this is too much. I am finding it oppressive. The hunt for a good deal is turning into a case of "stuffitis", that suffocating disease that chokes out my peace, joy and contentment. I feel it encroaching on Thanksgiving, and not just the holiday we celebrate, but upon the day-to-day giving of thanks.

I do not need more stuff.

I really, really, really don't need more stuff. Stuff can be nice, but stuff also means more things to clean and maintain. I am making the conscious choice, giving myself the gift, of moving into the state of contentment. We have already been in the process of downsizing, but now I am giving myself permission to toss all sales fliers directly into the recycling bin, delete all blogs in my feed or e-mails in my box no matter how tempting the sales. Instead, I will turn on my peaceful music and focus on the joys of the season with my family... making, doing, just BEING together.

In the state of contentment, there is peace, clarity, and serenity. God gives us everything we need.

1 Timothy 6:6-10
But godliness is a means of great gain when accompanied by contentment. For we have brought nothing into the world, so we cannot take anything out of it either. If we have food and covering, with these we shall be content. But those who want to get rich fall into temptation and a snare and many foolish and harmful desires which plunge men into ruin and destruction. For the love of money is a root of all sorts of evil, and some by longing for it have wandered away from the faith and pierced themselves with many griefs.
Ann Voskamp says it simply, but well, "turn the carols up louder and remember all His gifts — And happily become the gift!"

Pin It


Thursday, November 10, 2011

Cloth Diaper Tutorial 4 - Make A Pail Liner

Photobucket

Here are the details on how to make a waterproof diaper pail liner that fits in a standard, flip-top kitchen trash can. Making my own pail liners cost *at least* half the price of buying a new one similar to this. Mine turned out every bit as nice as the ones I bought over four years ago. (My old pail liners are no longer waterproof, but they make nice laundry bags!) I like to have two - one for the pail and one for the wash.

Supplies:
(Or buy half the amount of fabric to make just one. Joanne's carries this in many colors and prints. Look for their 40% off coupons for even more savings!)
  • thread to match
  • 1/4" wide elastic - you'll need a length about 24" long for each pail liner (so 4 feet total for 2 of them)
If you have never sewed with PUL before, this is a great starter project! It is very slippery and it's just plain tricky. See here for some great tips. (I did not use my walking foot, and it still turned out ok, but if I were going to do this again, I would use it because I had some issues with bunching fabric. If you don't have one, don't sweat it!)

1. Cutting it to Size:

Photobucket

With the fabric folded in half just like it came off the bolt, it was the perfect width at about 28" wide (or 56" if you unfold it). I cut the length of fabric in half, giving me two sections about 30" long.

Photobucket

Trim the extra laminate fabric from the selvages.

2. Sewing the Bottom and Side:

Photobucket

Sew the seam across the bottom of the pail liner first. As you can see, I had some significant bunching going on. Before sewing along the side, I trimmed the excess fabric. The second side is the fold, and doesn't need any sewing.

(If you want, you can turn your pail liner so the fold is along the bottom of the bag. I was a bit concerned about having a seam at the bottom of the pail, but after six+ months of use and no issues with leaking, I think it works just fine... still, up to you!)

3. Working on the Casing at the Top:

Photobucket

Before sewing the casing, I decided to do an overlock zig-zag stitch over the edge just to make things neater. PUL does not fray, so this step isn't completely necessary, but I think it looks much nicer.

Photobucket

Fold the fabric over (sticky sides together) about 3/4" and sew all the way around making a 1/2" casing. Make sure you open up the fabric at the side seam before you stitch. (See picture below.)

Photobucket

Use a seam ripper to loosen a few stitches at the side seam.

Photobucket

Safety pin one end of your length of elastic and work it through the casing until it goes all the way around. Tie a double knot to secure the elastic, even out the fabric, and tuck the knot into the casing.

Photobucket

Zig-zag stitch the casing shut.

Photobucket

Turn it right side out and you've got your first pail liner!

Other Cloth Diaper Tutorials:
1. How to Re-waterproof PUL on pocket diapers
2. How to your own Microfiber Inserts for pocket diapers
3. How to replace leg elastic

Pin It
Related Posts Plugin for WordPress, Blogger...