Showing posts with label In the Kitchen. Show all posts

Saturday, December 22, 2012

Comfort and Joy

This is a meal that never fails to leave a sense of satisfaction.  I had major tomato soup/grilled cheese cravings when I was pregnant with my second child.  I grew up eating Campbell's in a can but I finally took the plunge and tried a homemade version and I LOVE it!  It is so easy, I can't believe I didn't do this sooner!

Tomato Soup
  • 2 Tbs. butter
  • 1 small onion, diced
  • 1 clove of garlic, minced (or 1 tsp. garlic powder if I'm in a hurry)
  • 1/4 c. flour (or cornstarch or arrowroot powder)
  • 28 oz. can whole canned tomatoes
  • 1 c. chicken stock
  • 1 tsp. dried oregano
  • salt and pepper to taste
 Saute the onion in the butter over medium heat until it starts turning golden brown.  Add the garlic.  After about a minute, quickly stir in the flour and try to incorporate it all into the butter.  Cook and stir it for about a minute and dump in your canned tomatoes and chicken stock.  Season with the oregano, salt, and pepper.  Use a stick blender to puree your soup and let it cook on the stove to meld the flavors for 15 minutes or so. 

(I LOVE my stick blender for soups, but if you don't have one, you can transfer your tomatoes to a regular blender or food processor.  It's just much messier that way.)

Grilled Cheese
I fee like I hardly need to share a recipe, but I guess not everyone knows how to make it... I know I didn't when we first got married!  The first time I made it, I burned the outside and the cheese was still cold!  Butter the outside of two slices of bread and lay the butter side of one of them down on a heated griddle or skillet.  Quickly add your cheese - our favorite is good old cheddar or pepper jack.  Top with the second piece of bread, butter side up.  Once the bread turns golden brown, flip it over to toast the other side.  Once it is done, let it sit on a cutting board for a minute before cutting your sandwich into triangles. 

Also yummy when you add sliced lunch meat, or thinly sliced fresh tomato.  Really, the possibilities are endless.

Do you have a favorite comfort food? 

Pin It

Saturday, December 8, 2012

Tortilla Night

Mini Tacos

We've started a tradition of having "Tortilla Night" in our home (almost) every Friday night.  We have a Bible study as a family and open up our home to friends and neighbors to join us for dinner and the Bible study, and people are welcome to arrive whenever they can.  My husband sends out e-mail invitations/reminders every Tuesday and we don't ask for an RSVP.  Ever since we started, we've always had at least one other family join us, and sometimes up to four, though many just come for the Bible study.  I got the idea from a large family that did this back in our previous home congregation and we've been happy to carry on here in upstate New York.  (This family orders pizza for everyone, but we have a dairy allergy in our family that makes pizza complicated, so just do whatever floats your boat.)

I thought it might be helpful to explain some of how we make this work and perhaps you will get some ideas that will be useful in your efforts to "practice hospitality".

Logistics -
Doing the same routine every week is very helpful for me.  After a few weeks, my mind has gone to "autopilot" and Fridays fall into a predictable routine.  I keep a check list on a post-it note on the fridge for all of the foods and utensils I need to set out (I'll go into that in the next section).  Thursday is my "kitchen day" giving me a chance to do some extra food prep and Friday is my house cleaning day, which means I give the bathrooms a good cleaning and do some extra dusting/glass cleaning if I am able.  I am intentional about not making my house spotless... we are simply opening up our home and welcoming others to join our family, we are not hosting an "event".  I have the children clear away toys while I fix dinner, but I do not stress about the appearance of our home.

During the Study -
I keep a large basket of Bible books, notebooks, and pencils for the children to use while we have our study.  My children are expected to sit quietly while we study and get involved as they are old enough to do so.  My husband leads the study and usually does different Bible stories.  Right now we are spending a few weeks talking about King Saul and his character. 

The Food -
As food allergies, special diets, and plain old finickiness are on the rise, I find the food we serve for "Tortilla Night" to be the perfect solution.  I keep all of the ingredients in separate bowls served buffet style - hot foods on the stove and cold foods on a side table.  Everyone can chose what they like and ingredients are available for taco salads, bowls, soft tacos and burritos.  I haven't found another meal that better suits the wide variety of needs for our guests and because the food is fresh and tasty, everyone enjoys it too!  (It's also not an expensive meal, which is good since we are doing this regularly.  I can buy many of the ingredients at Aldi which saves a lot of money!)

This is what I generally serve:
  • Homemade Refried Beans (recipe follows) - though I use canned in a pinch
  • Taco Meat (1 lb. ground beef with 2 Tbs. homemade taco seasoning)
  • Shredded Cheese
  • Rice (recipe follows)
  • Avocado or Guacamole
  • Diced Tomato
  • Lettuce
  • Chipotle flavored Salad Dressing - I buy this, but have a homemade recipe I want to try soon
  • Diced Green Pepper
  • Diced Red Onion
  • Salsa and Hot Sauce
  • Tortilla Chips
  • Flour and Corn Tortillas
  • Sour Cream 
Do I have every ingredient every week?  No, but this is the list I go from when making a grocery list and getting things ready.  I often make the meat and/or rice in bulk and freeze it and this saves a lot of time.  I buy salad in the clamshell containers so I'm not prepping lettuce (plus it lasts so long this way!)... in other words, I look for ways to save time so Friday prep is not so overwhelming.  I also set out cups, a pitcher of water, cloth napkins, silverware and plates/bowls so people can feel free to help themselves.   I don't worry about fixing dessert, so if someone wants to bring something, I tell them they can bring something sweet to share.

Some recipes:
My old standby recipe for refried beans and Spanish rice is here and we still use this method sometimes.  The beans are not as smooth and the prep for both of these is more last-minute.  I've since found a new refried bean recipe that we really love and a friend gave me a rice cooker.  Try out the different recipes and decide what you like the best.

Refried Beans - all in one pot!
  • 3 c. dried pinto beans
  • 1 medium onion, diced
  • 3 garlic cloves, minced
  • 1 tsp. chipotle powder (Penzey's)
  • 1 tsp. chili powder (Penzey's) 
  • 1 1/2 tsp. salt
Sometime the day before you want to serve your beans, sort and soak the pinto beans in enough water to cover by a couple of inches.  In the afternoon before our meal, I drain the beans and rinse them in a colander, then put them right back in the pot.  Add the onion, garlic cloves, chipotle powder and chili powder.  Cover with water by about an inch and bring to a boil.  Once it is boiling, I put the lid on and lower the heat to about medium so the beans are gently bubbling.  Cook them for at least an hour - long enough for them to get nice and soft.

Now comes the tricky part... you want enough liquid to keep the beans moist, but don't want them too runny.  You might need to drain off some of the cooking liquid at this point and I recommend reserving it in case you want to add some back in.  Use a stick blender to puree the beans and once they are all nice and smooth, mix in the salt, and check for flavor and texture.  If they are too runny, you can just cook them on the stove for a while with the lid off and if they are too dry, you can add back some of your cooking liquid.  Keep warm until ready to serve.   

Cilantro Lime Rice in the Rice Cooker

  • 2 Tbs. butter
  • 2 tsp. garlic powder
  • 1/2 tsp. salt
  • 2 scoops of white or brown rice (the scoop that comes with the rice cooker)
  • 1/4 c. lime juice
  • water that comes up to the "2" line of your rice cooker
  • 1 Tbs. cilantro (I have also used the kind in the tube when I can't find nice fresh stuff and it works very well.)
Put all of the ingredients except the cilantro in your rice cooker and turn it on.  When the cook cycle is finished, stir in the cilantro and let your rice cooker keep everything warm until ready to serve.

For a stove top version see the original recipe here.

Do you have any regular ways that you open up your home to show hospitality?  What do you do to make things go smoothly?  Got any favorite foods your guests have enjoyed?

Pin It

Saturday, November 10, 2012

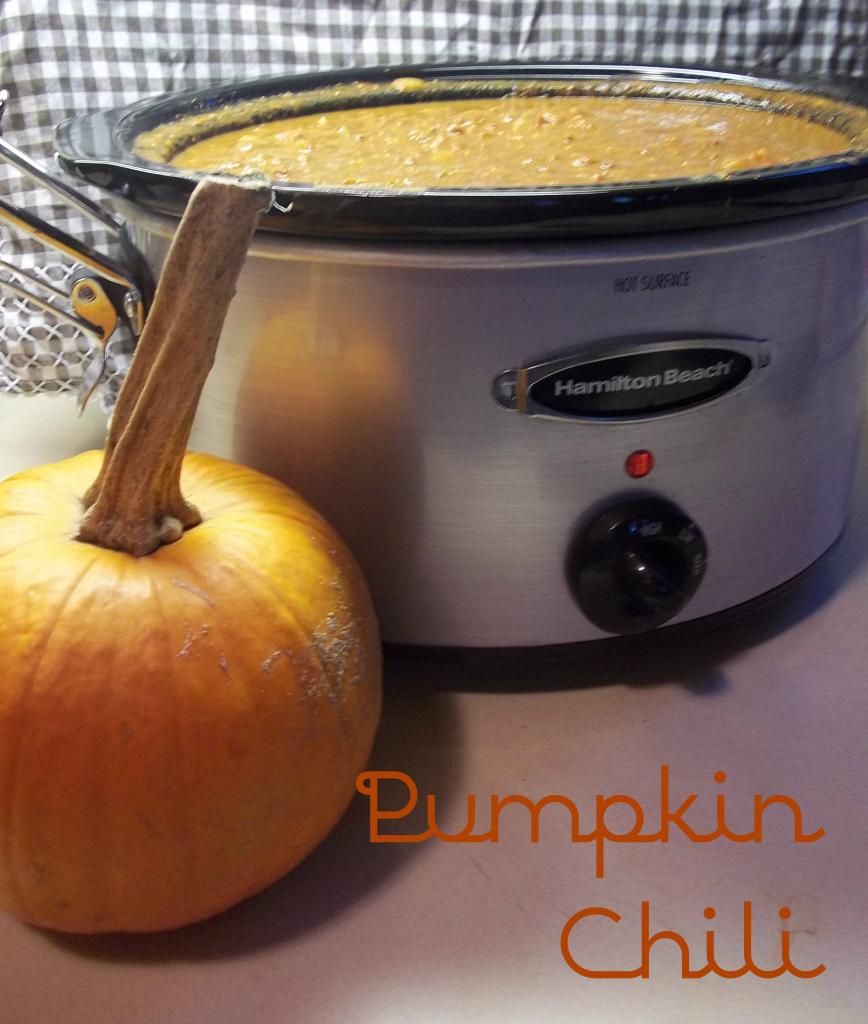
Potluck Saturday: Pumpkin Chili


This recipe is for pumpkin lovers and pumpkin haters alike!  And it is DEFINITELY for chili lovers!  This is a flavorful, medium hot chili with beans and meat. 
  • 1 lg. onion, diced
  • 1 lb. green pepper, diced (or use about a cup of frozen)
  • 5 cloves of garlic, minced
  • 1 lb. dry pinto beans, soaked, cooked, and salted to taste (see instructions here)
  • 28 oz. can diced tomato (or 1 qt. home canned)
  • 7 oz. can green chilis
  • 2 lbs. ground beef, cooked and drained
  • 2 Tbs. chili powder (use less if you like milder chili, more if you like it HOT!)
  • 1 tsp. ground chipotle powder
  • 2/3 c. buttermilk (or sour some milk with lemon juice)
  • a can of pumpkin (or an equal amount of pureed butternut squash)
Saute the onion and diced pepper in a little oil.  When the onions start to turn golden, add the garlic and saute until it starts turning color also.  Add the veggies and all of the rest of the ingredients to a crock pot and stir them up.  Cook for 8 hours on low.  (Make sure you have at least a 5 qt. crock pot because this recipe will fill it to the brim!)

If you use the entire can of pumpkin, you might notice some pumpkin flavor.  If you only use half, no one will even know it is there!  The pumpkin mellows out the spice while allowing the chili to have more flavor, as does the buttermilk.  While a bit unorthodox, these two ingredients make the recipe what it is, which is DELICIOUS!

As always, I highly recommend Penzey's Spices.  I use their medium hot chili powder and once you try it, you won't want to go back to the stuff in the grocery store that is full of salt and tastes like dirt!  Penzey's doesn't pay me to say this, I just love sharing the goodness.

Pin It

Saturday, October 27, 2012

Birthday Cupcakes

The recipe is from the famous Magnolia Bakery in New York City. These are REALLY good cupcakes! 
2 3/4 cups flour
2 tsp. baking powder
1/2 tsp. salt
1 cup (2 sticks) unsalted butter, softened
2 cups sugar
4 large eggs, at room temperature
1 cup milk
1 teaspoon vanilla extract

Icing:
Vanilla Buttercream, recipe follows

Preheat oven to 350*. Line 2 (1/2 cup-12 capacity) muffin tins with cupcake papers. In a small bowl, combine the flour, salt and baking powder. Set aside.

In a large bowl, cream the butter until smooth. Add the sugar gradually and beat until fluffy, about 3 minutes with an electric mixer. Add the eggs, 1 at a time, beating well after each addition. Add the dry ingredients in 3 parts, alternating with the milk and vanilla. With each addition, beat until the ingredients are incorporated but do not over beat. Using a rubber spatula, scrape down the batter in the bowl to make sure the ingredients are well blended. Spoon the batter into the cupcake liners (use a cookie scoop), filling them about 3/4 full. Bake for 20 to 25 minutes, or until a cake tester inserted into the center of the cupcake comes out clean.

Cool the cupcakes in tins for 15 minutes. Remove from the tins and cool completely on a wire rack before icing.

Vanilla Buttercream:
1 cup (2 sticks) butter, softened
6 to 8 cups confectioners' sugar (an entire two pound bag comes out just right for me)
1/2 cup milk
2 teaspoons vanilla extract

Place the butter in a large mixing bowl. Add 4 cups of the sugar and then the milk and vanilla. On the medium speed of an electric mixer, beat until smooth and creamy, about 3 to 5 minutes. Gradually add the remaining sugar, 1 cup at a time, beating well after each addition (about 2 minutes), until the icing is thick enough to be of good spreading consistency. You may not need to add all of the sugar (I always do!). If desired, add a few drops of food coloring and mix thoroughly. (Use and store the icing at room temperature because icing will set if chilled.) Icing can be stored in an airtight container for up to 3 days.

To make them look like Magnolia's, pipe on the icing in a swirl and top with sprinkles. I'm not so handy with the icing bag, so I just spread mine on top with a swirly flourish!

Yield: enough for 2 dozen cupcakes
Pin It

Wednesday, October 24, 2012

Just a Little Tip for the Kitchen


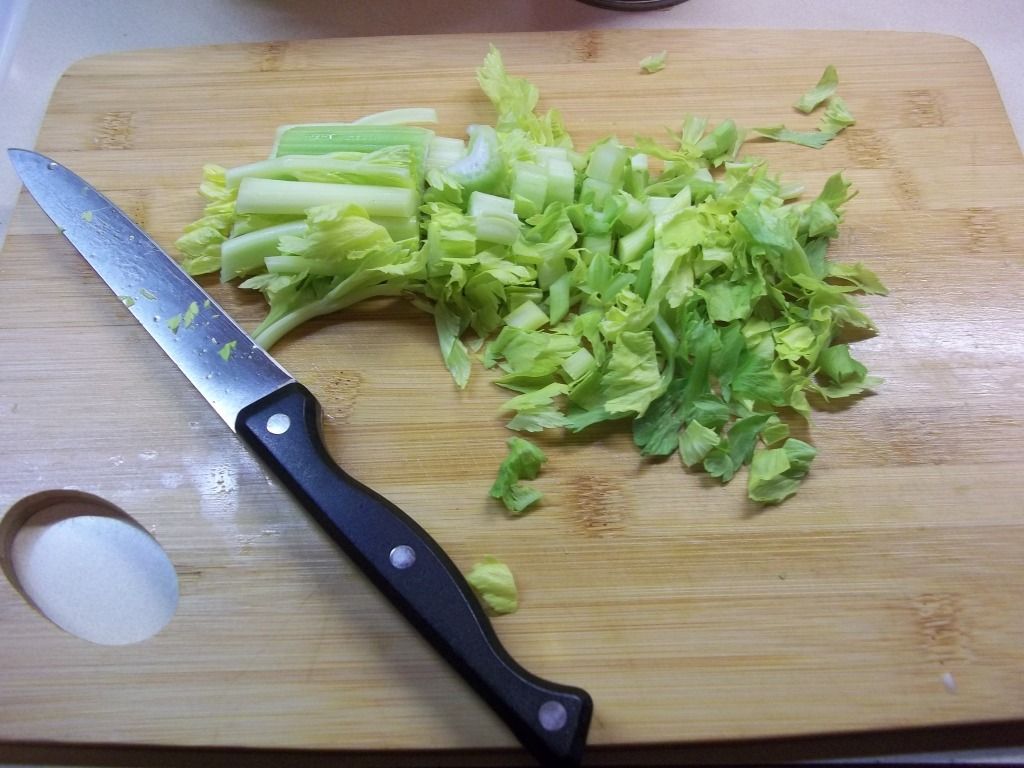
Do you cook with celery leaves?  It not, do give it a try!  I especially like to chop them up and add them to soup.

Here are three soups in particular where I use celery leaves when I add the celery:
Chicken Noodle, Minestrone, and Pasta Fagioli

Got any little tips for ways to cook with something that would otherwise be thrown away?

Pin It

Saturday, October 20, 2012

Baked Ziti for a Crowd


We recently hosted our largest crowd ever in our new home - about 30 people!  I didn't know how many people to expect that day, but I knew it would be a lot.  I wanted to be sure we had plenty of food for everyone.  We were also leaving for a big camping trip the next day, so I wanted to keep things as simple as possible!  (Hence the boxed brownie mixes!)  Things worked out so well, I wanted to record what I did for future gatherings.  If you haven't made baked ziti before, think lasagne, just 4x easier to prepare.

Baked Ziti for a Crowd
 In bowl #1 mix:
  •  2 lbs. cooked and drained ziti
  • 6 c. pasta sauce (homemade from 2, 28 oz. cans crushed tomatoes)
  • 2 lbs. of ground Italian Sausage (optional)
 In bowl #2 mix:
  • 2 lbs. ricotta cheese
  • 2 c. mozzarella cheese, grated
  • fresh basil to taste (I used several Tbs. from my plant)
  • 1 tsp. salt
  • 1/2 tsp. pepper
  • 1/4 c. grated parmesan 
**You will also need another 4 c. mozzarella.

Layer in this way in an extra large disposable pasta pan:  1/2 of the ziti mixture goes in the bottom.  Cover with all of the ricotta cheese mixture.  Put the remaining half of the ziti mixture on top of that, top with the 4 c. of mozzarella and cover with foil.  Bake in a 350* oven for 30 minutes, removing the foil during the last 10 minutes to let the cheese get a little brown and bubbly.

(I think my large roasting pan might also work well,  I'll try that next time.)

For our gathering, I served - 
  • this recipe for baked ziti that serves 24
  • a crock pot full of dairy free/gluten free meatballs in sauce
  • I also cooked 3 pounds of whole wheat linguine and some gluten free pasta, but I think next time I will only cook one pound.  There was TONS leftover!
  • 1 lb. of salad greens loaded up with yummy chopped veggies
  • for dessert, I prepared 15x10" pan of brownies, thawed a bag of frozen raspberries, and served a quart of vanilla ice cream.  

Pin It

Saturday, September 22, 2012

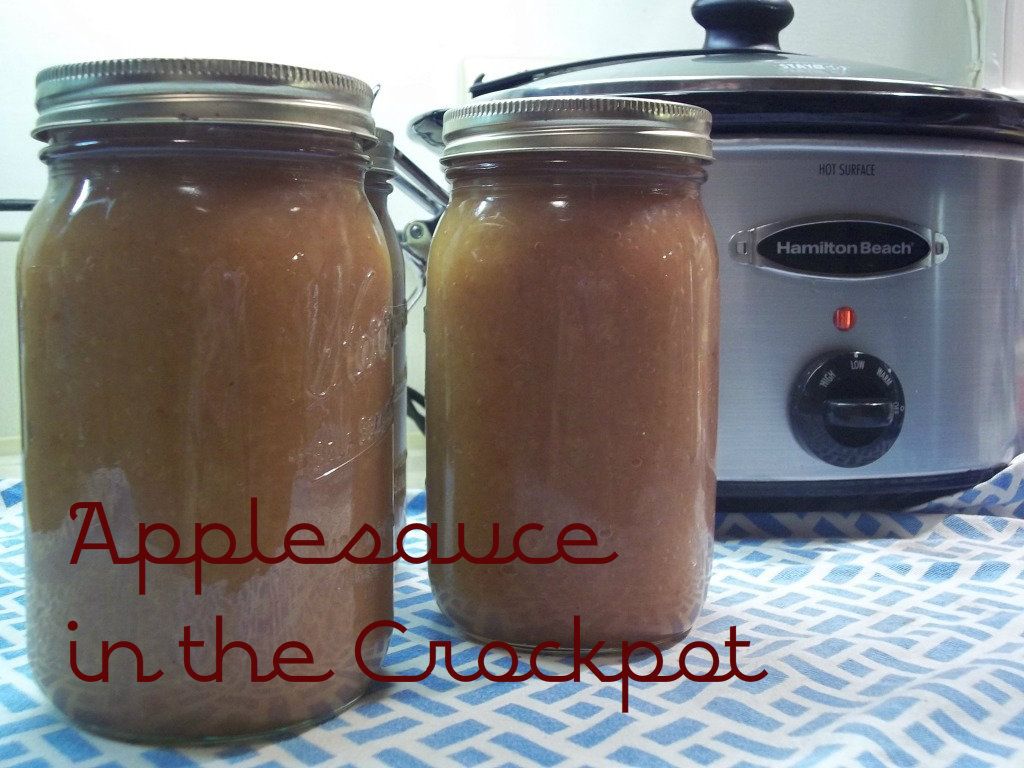
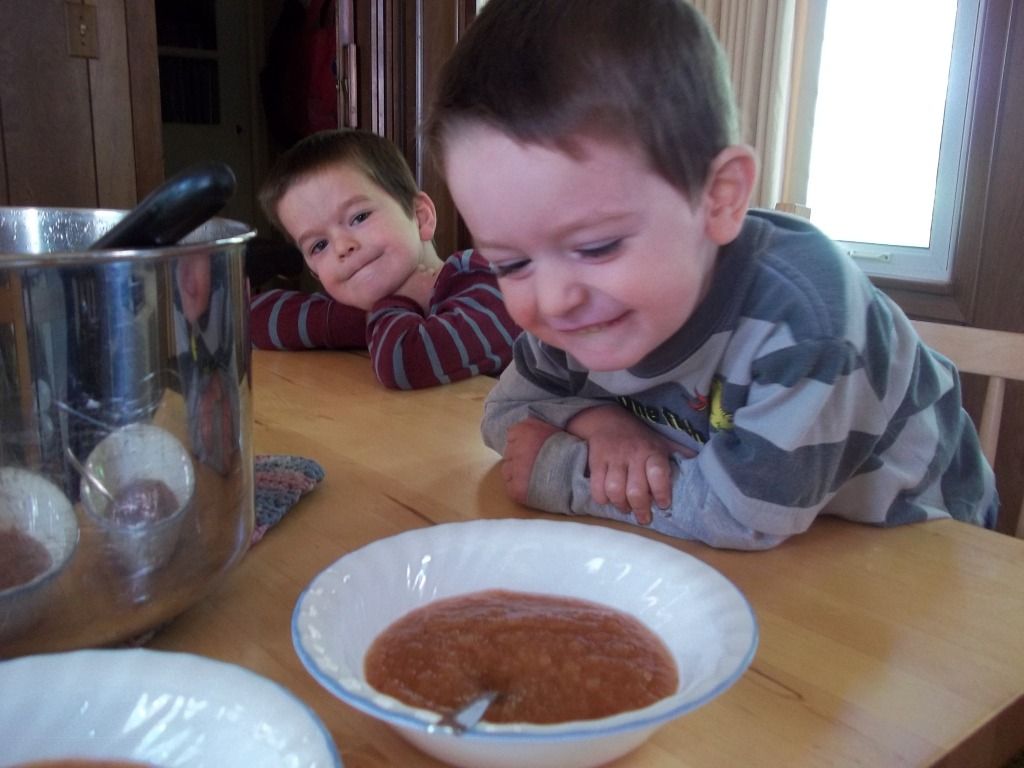
Homemade Applesauce


Fresh from the Orchard!


The (delicious) End Result
Ingredients:
24 large apples
1/2 c. water
2 tbs. bottled lemon juice
1/4 c. to 1 1/2 c. sugar
2 tsp. cinnamon
1/2 tsp. nutmeg
1 tsp. vanilla

Directions:
Peel, core, and thinly slice apples. Put apples into a large pot with water and lemon juice. Cook, covered with a lid until tender, about 20-25 min., stirring occasionally OR cook on high in a crock pot for about 4 hours. When apples are tender, chop coarsely with a metal spoon (or potato masher). Add sugar 1/4 c. at a time until you reach your preferred sweetness. (You may substitute light brown sugar for a rich maple-like flavor.) Add cinnamon, nutmeg, and vanilla and continue to cook until sugar dissolves. Spoon into hot jars (prepared according to directions) to within 1/2" of top. Release air bubbles, clean rims, and seal. Process in a water bath canner for 20 minutes for pints, and 30 minutes for quarts.
For more information about Home Canning, see this post.

Number of Servings: Makes about 5 pints.

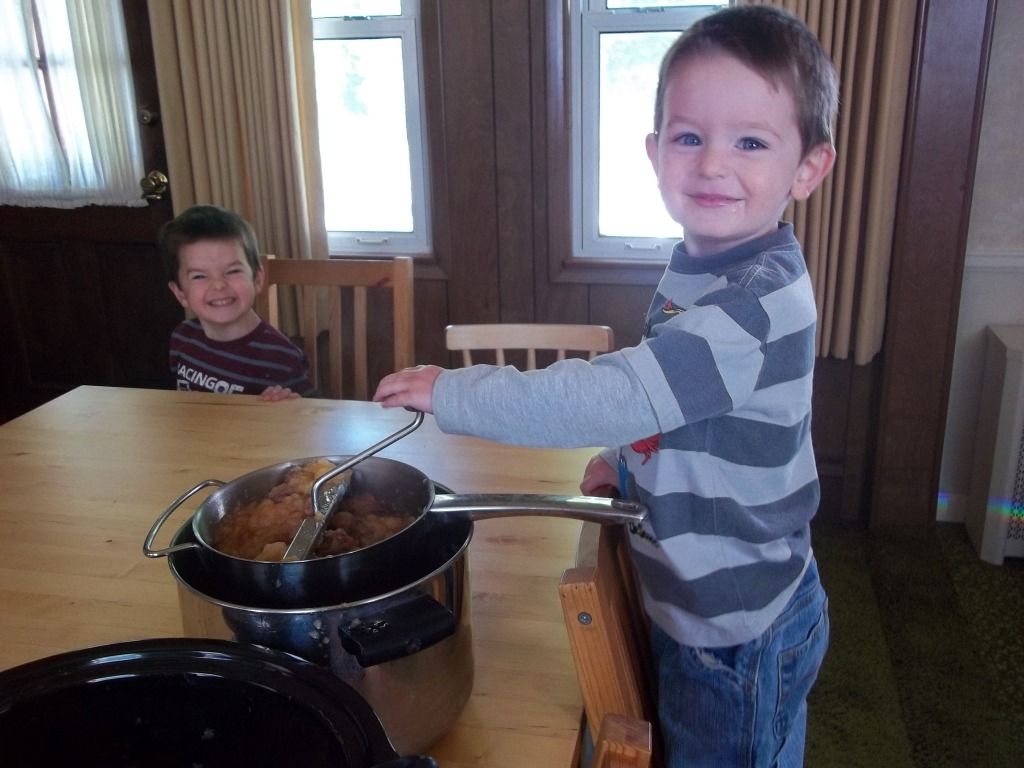
If you get a food mill, you will save loads of time, and the kids can help!  We make applesauce almost every year, so it has been a great investment.
Preparation Variation for Smooth Applesauce:
Fill a large crockpot with whole, small apples. Wash first, but no other prep is necessary for them. Add the water & lemon juice and cook on high for 4 hours, or low for 8. Run the apples through a food mill. Add the sugar, cinnamon, nutmeg & vanilla to the pulp and stir until it dissolves.

ENJOY!

- - - - - - - - - - - - - - - - - - - - - - - - - - - - - - - -

For Apple Butter:
Fill a large crockpot with whole, small apples. Wash first, but no other prep is necessary for them. Add 2 c. water and cook on high for 4 hours or low for 8. Run the apples through a food mill. Rinse out your crock pot. Measure 2 qts. apple pulp and put it back into the crock pot. Add 2 c. sugar, 2 tsp. cinnamon, and 1/4 tsp. cloves. Cook on high another 4 hours or low another 8, leaving the lid off for the last 2-3 hours. The mixture should thicken and reduce quite a bit. Ladle hot apple butter into hot jars, leaving 1/4" headspace. Remove air bubbles. Cap and process for 10 minutes in a water bath canner. (If the butter becomes too thick, add water or apple juice until you reach the desired consistency. This has never happened for me though.)

(I had a great system one year where every night I would put the apples in to cook. In the morning, I would run them through the food mill and put it back in the crock pot to cook.  I would process the jars each afternoon. It was a good system!)


Pin It

Wednesday, September 12, 2012

Perfect Biscuits

 biscuit
Remember my post on how to make perfect pancakes?   Well, I have a treat for you!  I'd also like to share how to make great biscuits.  Where can you find great biscuits?  www.greatbiscuits.com  The website for the Clinton St. Baking Company - a restaurant in New York City where the talented chef Neil Kleinberg has perfected the art of biscuit baking.

"I think Neil can be called the King of Biscuits."  - Martha Stewart

Can't get to New York City?  Make them at home!  Yes, even you, because if I can do it after about 8 years of failed biscuit making, you can too!  See, I could make beautiful, perfect pie crusts, buttery yeast rolls from scratch, but my biscuits were terrible.  When I was desperate, I would buy frozen ones and when I was even more desperate, I would buy the ones in the can.  But when I tried this recipe, carefully following the directions, voila!  They worked!  And they come out beautiful and fluffy every single time!  Split them with a fork or slice them with a serrated knife, they are always light and fluffy on the inside, with a nice crisp bite on the outside.  You can find this, and more of Neil Kleinberg's superb recipes in this cookbook -

(My copy was a gift from my mother-in-law.  It's one of my very favorite cookbooks.  My husband gets really excited when he sees that I have it out!)  Well, I felt like I really needed to give credit where credit was due, but now on to the recipe:

2 c. all purpose flour (plus more for dusting)
2 Tbs. baking powder
1 1/2 Tbs. sugar
1/4 tsp. salt
3 Tbs. unsalted butter, chilled and cubed
3 Tbs. vegetable shortening, chilled and cut into small chunks
3/4 c. buttermilk

Makes 6 biscuits
(I usually double or triple the recipe and it works out just fine in the mixer.)

Preheat the oven to 350*.  Place 2 c. flour and the other dry ingredients in the bowl of your KitchenAid (or other stand mixer).  Mix on low speed with the paddle attachment until combined.  Add the butter and shortening to the bowl and mix on low speed until the dough reaches a crumbly texture.  The butter and shortening should be the size of peas.  Add the buttermilk to the bowl all at once.  Mix very briefly on low speed until the dough just comes together.  (This should take less than 10 seconds.  Yes, I count.)

Turn the dough onto a floured surface and form it into a ball.  Lightly knead the dough two or three times until combined.  Pat out the dough to about 1" thickness.  Shape the dough into a rectangle, making the sides high.  Using a 2" round biscuit cutter, cut out your biscuits.  After you have cut them all out, gently gather the scraps to form a few more biscuits.  Place your biscuits on a sheet pan lined with parchment paper (I use a silpat).

Place the pan in the pre-heated oven for about 17 minutes or until they are golden brown and cooked through.  Serve warm with butter, honey, jam... whatever suits your fancy.

Notes:
  • When it comes to biscuit making, the general rule is that the less you handle the dough, the better.  Use a light hand, don't knead more than it takes to have the dough loosely come together, don't roll out too much, etc...
  • These biscuits can be prepared and then rested overnight for baking the next day.  Dust a sheet pan and the top of the dough with flour, cover with plastic wrap, and refrigerate overnight.  Bring the dough back to room temperature for baking.
  • You can mix these biscuits by hand, without a mixer. 
  • It is a common mistake to twist the biscuit cutter in the dough.  Cut by pushing the cutter directly into the dough and then lifting the cutter.  If you twist the cutter, the biscuits may not rise. 
  • My substitutions - I almost always use half whole wheat flour, and instead of shortening, I use only butter.  Due to a dairy allergy in the family, I have used rice milk with a splash of lemon juice instead of buttermilk and it works fine, but my current preference is slightly soured raw milk. 
Want to remember this one for later? 
Pin It

Thursday, July 19, 2012

Broiled Fish: Easier than you think!

Today we are going to learn how to use one of these:
This funny looking pan that came in the bottom of your oven is a broiler pan.  I'm amazed by how few people know what it is and how to use it.  If you know all about it already, then give yourself a gold star.  If not, keep reading.

Broiled fish is a very, very quick way to fix dinner.  It's also a bit of a treat for us when we find wild caught fish on sale.  This recipe and technique will work with any firm white fish filet like red snapper, haddock, tilapia, and my personal favorite, cod.

You will need:
  • 2-4 fish filets (1 1/2-2 lbs. total)
  • 6 Tbs. melted butter (divided)
  • 1 Tbs. flour
  • paprika
  • juice of 1 lemon
  • 1 Tbs. minced fresh parsley (or 1 tsp. dried)
  • 2 tsp. Worcestershire sauce
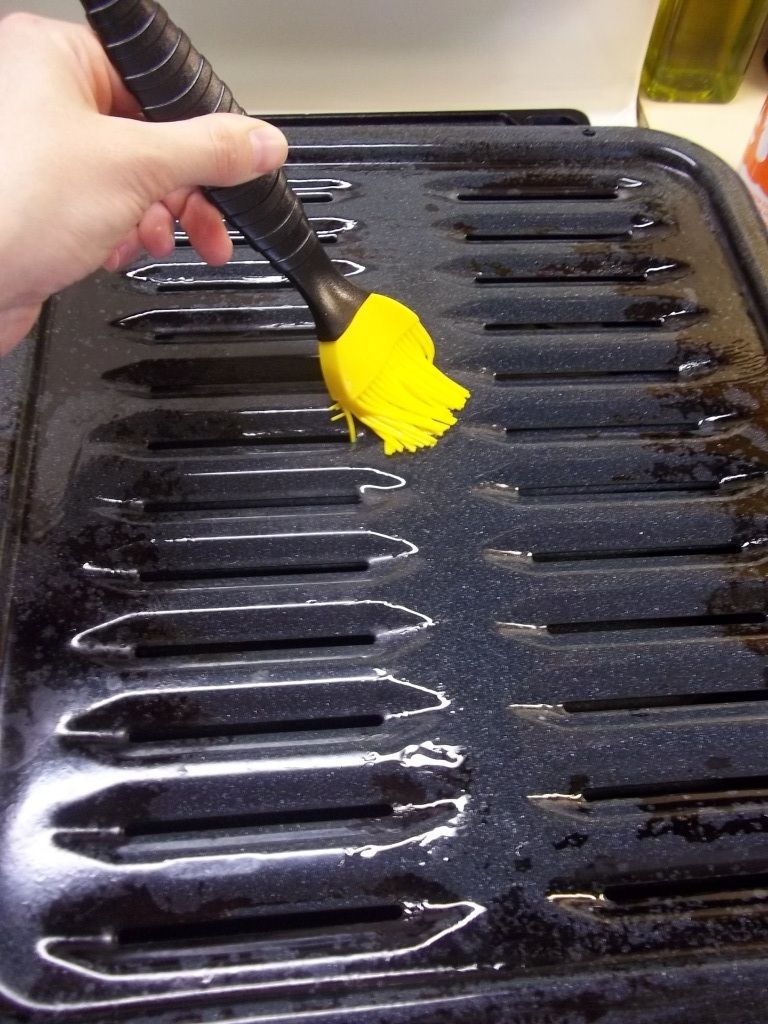
Coat your broiler pan with non stick spray or just brush it with butter (that is what I do).  Place your fish filets right on top.  Brush the tops of your fish with 3 Tbs. butter, dust with flour, and sprinkle with a bit of paprika.


Move one of your oven racks up to the top or next to the top - about 6 inches or so from the heating element.  Like this:

Turn your oven to the BROIL setting.  (Broiling means that only the top element will heat up, and it will automatically go on the highest heat.)

Pop your fish in the oven and set the timer for 5 minutes.  The fish should just begin browning in that time.

Meanwhile, gather the rest of your ingredients:

I use a coffee mug for the rest of the melted butter and just mix the lemon juice, parsley, and Worcestershire right in with my basting brush.  After the five minutes are up, your fish will look something like this:
Use your basting brush to spread the buttery goodness over the fish while you pour it as evenly as possible.  Broil for another 5 minutes or until the fish flakes easily with a fork.  It should look something like this:

This is the kind of food that nourishes your body and soul.  Mmmmmmm...
And the Littles loved it too.  Which is good because while they have no choice in the matter, they must eat what they are served, it is still nice for me when they truly enjoy dinner too.
Also nice with a green salad.  I just like to eat my salads last.  You know, I find that varies between cultures.  Do you like to eat salad before your meal or after?


PS - As soon as you are able, throw that icky pan into a sink full of soapy water and it will be MUCH easier to clean!  Trust me, you don't want to leave it sitting around.  Especially with the fishy/Worcestershire-y smell.  :P
Pin It

Wednesday, July 18, 2012

Homemade Vanilla

Why am I writing about making homemade vanilla in July?  Because if you want some amazing homemade vanilla ready for your holiday baking, you really need to start it now!

This has been one of our easiest and most successful ventures for gift-giving.  I highly recommend giving it a try.  I was amazed by the reactions, "YOU MADE THIS!?!?"  No one ever guessed how easy it was!

You just need two things:
* Vanilla beans
* Vodka  (or bourbon, but I really prefer the vodka and it is cheaper)

On the beans:
I made the vanilla in bulk because we were planning on giving it as a gift.  You can pay an outrageous price for vanilla beans at the grocery store, or you can order cheap, extract grade beans on e-bay.  I recommend the latter.  I had a wonderful experience with this seller, and the beans were just perfect for this use.  (Extract grade beans are just not "perfect looking" or are too short for regular sale.  The vanilla flavor is just as potent!)  I bought a 1/2 pound of beans that cost me less than $20 with shipping.   

On the vodka:
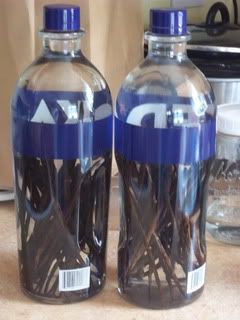
This was the most difficult part of the entire project for me... bringing myself to go into a liquor store!  Once I finally mustered the courage and lectured my children within an inch of their lives that they were not allowed to touch ANYTHING, I went in, found the nearest store employee and said, "I'm making vanilla extract and I need to buy a gallon of vodka."  The look she gave me was hilarious.  She said, "Weeeeell, it doesn't come in gallons, but I can show you what we have."  :)  So she pointed out the bottles you can see just below:  Cheap vodka in glass bottles so I can keep using the bottles for extract.  I bought two 1.75 liter bottles and they cost me $20 each.

Then came the easy part!  I poured out just a little bit of vodka... just enough to make some penne vodka, which ended up tasting pretty nasty.  Then I divided up the beans between the bottles.  Set it on a shelf in a cool dark room and let it sit for a few months.  (3 is the minimum for some good strong stuff.)  THAT IS IT!

Some instructions will tell you to cut up the beans, but you really don't need to do that.  Ina Garten (the “Barefoot Contessa”), makes her own vanilla, and doesn’t scrape her beans.  She leaves them whole to marinate, and once the vanilla is ready, she can scrape out the beans as desired to use for baking so they serve double duty.  I haven't done this yet myself. She also just refills her bottle with vodka as she uses it.  I keep a small bottle of my extract in my baking cabinet, and the large one in cool, dark storage.  When I need to refill my vodka, I can just buy some cheap vodka in a plastic jug to refill it and that only costs me about $14.  Maybe my beans will need replacing some time down the road, but they are still going strong for now.

For gift giving, we ordered a case of these glass bottles from Amazon.  With shipping, it came out to about another $20 for a dozen.


Now for some math:
$20 for the beans + $40 for the vodka + $40 for the glass bottles = $100 for 24 bottles of vanilla.
This equals $4.16 for each 4 oz. bottle of vanilla extract.  If you made a second round, the cost would go down as you would save the $20 for the beans and about $12 on the vodka, so each bottle would only cost you about $2.66 for a 4 oz. bottle. 

So we're talking about a pretty big upfront investment here, and I get that.  You can definitely do this project on a smaller scale, but it is surprisingly easy to find this many people that can use a nice gift of vanilla extract.  Think holiday gifts for friends, co-workers, family and neighbors, wedding gifts, housewarming gifts, thank-yous to the friends that let us stay in their home...  We only bought a dozen jars the first time and they went quickly.

And now for a funny, courtesy of Preacher Man...
In our old house, we kept the vanilla on my canning shelves in the basement.  The basement is also where our washer/dryer were located.  Preacher Man used to tease me endlessly about needing to go to the basement so often.  He would wink at me and say, "doing laundry, eh?  Are you sure you aren't taste testing the vanilla again?"  :P  

Pin It

Thursday, July 12, 2012

Homemade Kitchen Scrubbie

Easy...
Frugal...
Making something useful out of something you were going to throw away so you don't have to buy that thing you needed...


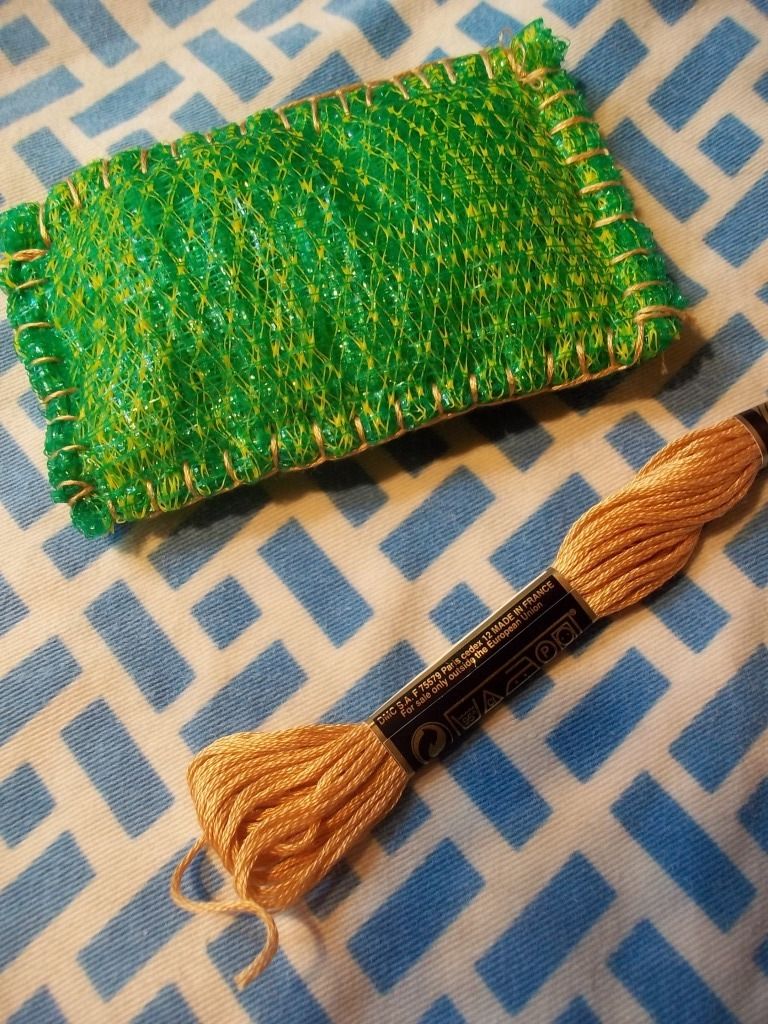
It's a dish scrubbie made out of those mesh plastic-y bags that onions, lemons, and limes come in.  Instead of throwing them away, you neatly fold them up, stitch the edges, and you have something useful!

It isn't every day that I see a frugal idea like this.  I thought it was a fabulous idea, but I wanted to test it out before I showed it to all of you.

I originally saw the idea on Pinterest, but if you go over to Mooberry Farm Homesteading, Julie will show you how to make one.  For all my crafty interests, I've never done crochet, so here is my take on her idea:
Instead of crocheting the edge, I just did a blanket stitch around the edge with some embroidery floss (all 6 strands with a large-eyed needle).  I already had scraps of floss, and it takes so little, this is truly a "something for nothing" project.  I used the floss because I thought the 6 strands would make it stronger than regular thread.  I also put in an extra stitch in each corner for strength.  So far, it is holding up quite well, and mine is getting heavily used at the kitchen sink.  I think these would also be great for scrubbing the sink/bathtub.  They have a nice, gentle scrubbing quality, and they won't scratch.  When it starts to fall apart, just throw it away and you have lost nothing more than a bit of your time.

Speaking of time, all in all, I spent about 15 minutes sewing up the edge while watching my children play.  15 interrupted minutes.  Probably would have taken less than 10 without, but the nice thing is that you don't have to think very hard, you just do.  I like mindless handwork for that reason.
 
Pin It

Wednesday, June 20, 2012

De-cluttering the Kitchen

or perhaps a more descriptive title:  Fewer Knives, More Coffee Cups

With our recent move, I did a LOT of de-cluttering in the kitchen.  I have slowly come to realize that I strongly prefer a high quality, multi-use tool to a specialized gadget that takes up space in my kitchen.  For the best example of that, you can read why I got rid of my garlic press.

De-cluttering in general is a good and needful thing.  We tend to accumulate too much stuff.  More stuff means more time spent trying to maintain and organize that stuff.  An uncluttered kitchen where everything has a place is a wonderfully freeing thing. I have also found that when I have less, I am forced to do a better job keeping up with washing the dishes and I can always use encouragement in that area!

Alton Brown recommends that any item you haven't used in 3 months goes into storage outside of your working kitchen (boxed and labeled in basement storage or a closet) and any item you haven't used in a year just goes.  Ouch!  But this is a rather good guideline and it will help you keep your sanity. It also allows for the odd items that are truly useful to you and your family.  For us, that means keeping a food processor, a tortilla press, and an egg cooker.  For others that may mean a blender, a waffle iron, or a rice cooker. 

In regards to knives, don't buy a set of knives because only 1/3 of them will be truly useful.  Don't buy fancy choppers that are a pain to clean when a knife will do the job just as well.  Buy only what you need.  You can cut anything with just four knives in your kitchen.  Get GOOD knives that you can easily sharpen, especially a good chef's knife.  Don't be scared of big knives.  Big knives are much easier to control than small, thin blades. 

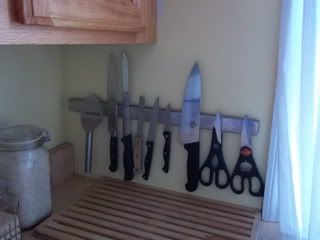
So here are a couple of knife storage options with my recommended knives:
From left to right:  cheese slicer, carving knife (for roasts and large cuts of meat), bread knife, tomato knife (now moved in with canning supplies), two paring knives, chef's knife and two pair of kitchen shears (GREAT for cutting up food for the Littles)

At first, I was a little scared to have my knives so exposed, but if you have an out-of-the-way place for a magnet strip like this, it's a wonderful system.

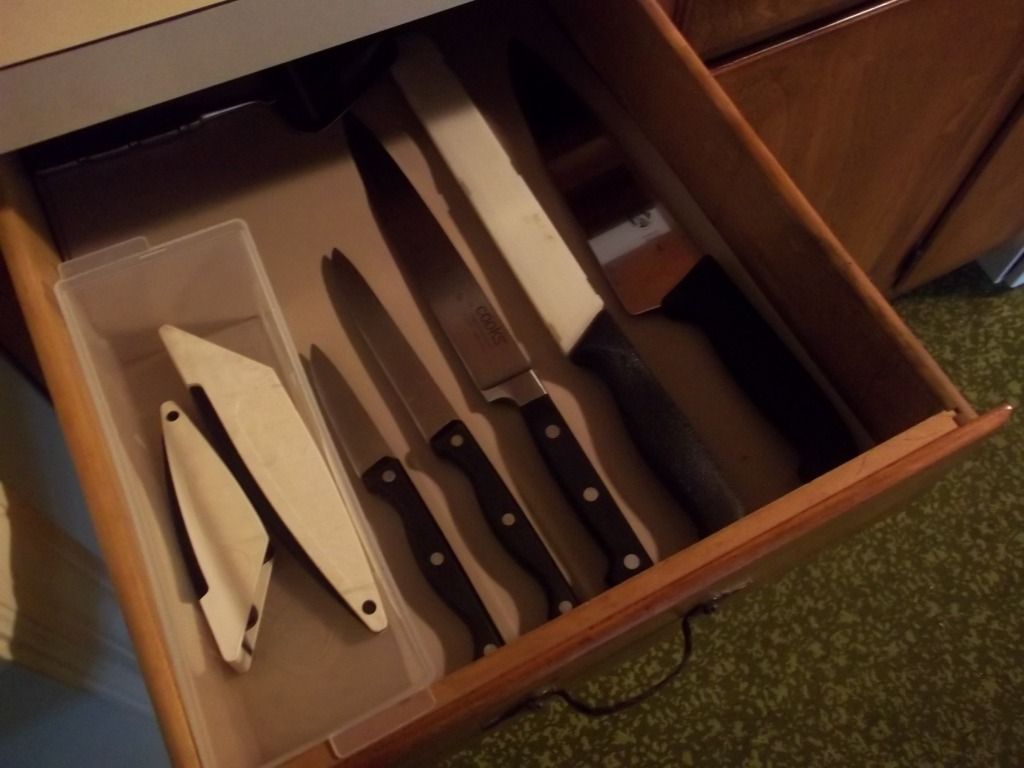
In our current house, we can't mount the magnet strip on the wall, so we're back to knives in a drawer.  I recommend that rubbery shelf liner to keep them from sliding around.  Having so few knives, I can easily lay my hands on what I want without fear of cutting myself.  Here we have -


Same knives, only the kitchen shears and the cheese slicer are in a different drawer.  I have also recently learned that you should not store your knives in a sheath or a knife block.  The sheaths are almost impossible to clean and will dull your knives much sooner.  I save the sheaths for when my knives need to travel.

I don't know about you, but the kitchen is my primary workspace in our home.  Tackle a cabinet or drawer at a time and determine if you need to do some weeding out.  Just make sure in your efforts to minimize, you keep hospitality in mind.  Get rid of the gadgets, or at least most of them.  Keep the coffee cups.  Haven't used those extra coffee cups in a year?  HAVE SOME PEOPLE OVER!  :)

Pin It

Wednesday, June 13, 2012

Hard Water

When we moved to our new house, my glassware came out of the dishwasher looking like this:

ACK!

I did some googling and discovered that my problem was either a filmy coating from hard water or etching from soft water.   Since this happened instantly and not gradually over time, my guess was that I had hard water.  Just to be sure, I did the vinegar test.  I simply sprayed some plain white vinegar on a rag and rubbed the cloudy film away.  This confirmed that I indeed had mineral buildup from hard water.

What is hard water? 
Hard water is water that has high mineral content.  It is generally not harmful to one's health.  A result of hard water is a lack of suds when soap is agitated in water, so the harder your water, the more soap you will generally need to use to get things clean - things like your hair, your laundry, and your dishes.

Next, I needed to know just how hard.  Often when you buy a dishwasher or washing machine, the manual will recommend how much soap to use based upon the hardness of your water.  Our landlord left the manual for the dishwasher with us... the manual from 1990!!! 

We have city water, so I googled the name of our city + "water quality report" and I looked for the most recent year.  It gave me a number of 161 mg/L.  I found a chart online that helped me translate this because my dishwasher manual only listed grains per gallon:

Water Hardness Scale
Grains per gallon
mg/L
Classification
less than 1.0less than 17.1soft
1.0 - 3.517.1-60slightly hard
3.5 - 7.060-120moderately hard
7.0 - 10.5120-180hard
over 10.5over 180very hard

So there you have it.  We have water on the higher end of the "hard" classification, so we would need quite a lot of soap to do the job.  According to my dishwasher manual, we need about 3 Tbs. of detergent.  I have found that I get the best results when I fill both the pod for the wash and the open pod for the pre-wash.

All of that detergent gets expensive, doesn't it?

Not thanks to a homemade detergent recipe I found on Pinterest!!  Hop on over to "Being Creative to Keep My Sanity" for a great dishwasher detergent recipe that works well for hard water.

I was amazed when I saw that I already had most of the ingredients and that is what encouraged me to just give it a try.  I already use many of these things for making my own laundry soap or other cleaners.  You will need:
  • Borax*
  • Washing Soda
  • Citric Acid (found with canning supplies)
  • Epsom Salts
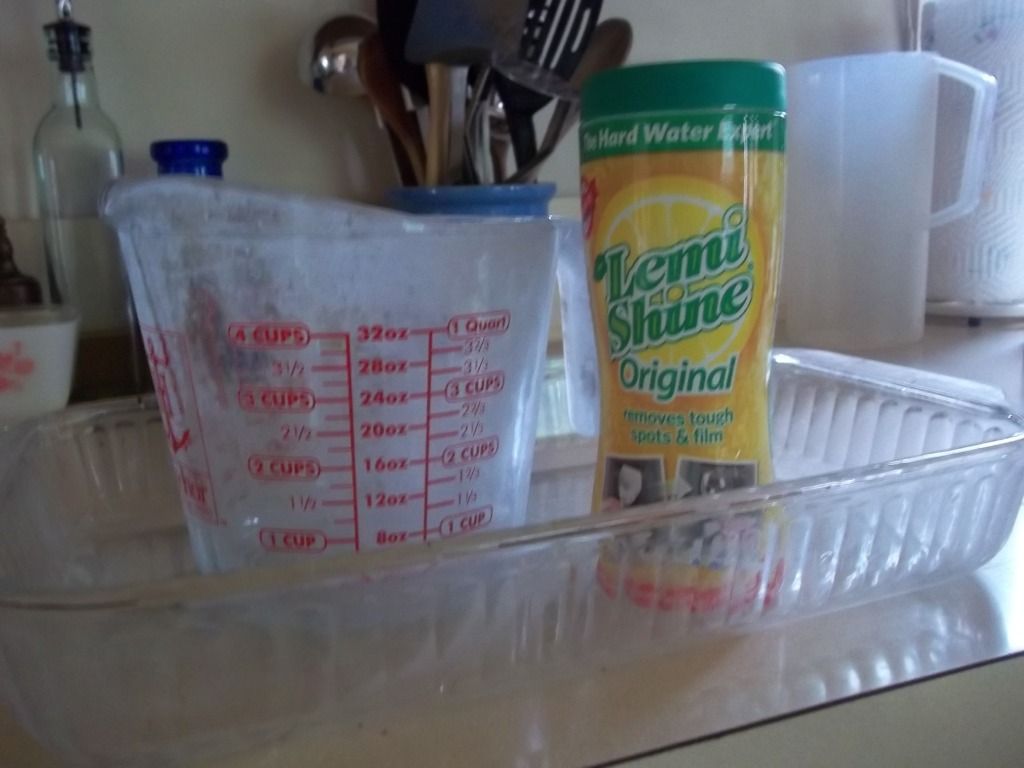
  • LemiShine rinse aid (in my picture above)
I cut the recipe in half to try it out and I think I will do that next time as well for a few reasons.  First, a full recipe won't fit in my storage container.  Second, once mixed, moisture will get into the powder and it will become very hard.  I pull out a table knife each time to chip away what I need.  I don't mind it too much as I'm spending my time, not my money, and it doesn't cost much of my time.  Third, it lasts a long time, so even cut in half, I don't need to make it very often.  I don't know how long because I've only been doing this for about two months, but I still have well over half left and as I said, I have to use a lot of detergent for each wash.

In order to cut the recipe in half I used a kitchen scale because I have one.  I think you could successfully eyeball it if you need to do so.  If you are unsure of the amount of citric acid, I did the math and a half recipe = about a quarter of a 7.5 oz. container. = 12 Kool Aid packets.
Because of the level of hardness of our water, I used the entire container of LemiShine in my recipe, so adapt for your water accordingly.

So I was a little skeptical at first, but my dishes are coming out wonderfully clean and the soap is all dissolving well.  (It didn't always when I used store bought dishwasher detergent.)

If you have soft water, the DHM of The Common Room has been using this recipe with success for quite some time.

*A note on Borax - Borax is a wonderful all natural cleaner, but that does not mean it is safe for children!  It is toxic if ingested and can burn eyes and skin, so you will want to keep your borax and your dishwasher powder stored safely away.  Store bought dishwasher powders are also toxic, so hopefully you have been doing this anyway. 

Pin It

Saturday, February 25, 2012

Spaghetti Sundays Part II

I like to share things on this blog that are tried and true so you, my readers, can depend upon the fact that the things I share work well for at least one person, leaving it up to you to decide if they will work for you too. I will tell you that what works for me is having Sunday's lunch ready with only 4 minutes of work that morning!

Want to know how? Read on...

Photobucket

Spaghetti Sundays have been a tradition in our home for the past 18 months or so and it works for us. It works so well, that I think if I live to be 100 years old like dear old "Ma", I will still be serving spaghetti for whatever family and friends I am blessed to entertain each Sunday afternoon.

Our favorite sauce includes these meatballs which I make gluten free and dairy free. I pick up about 4 lbs. total of ground beef, turkey and pork each month and make them in a big batch. I freeze the meatballs in quart size containers ready to add to the sauce on Sunday morning.

Here is how I have Sunday's lunch ready with only four minutes of work that day:
(I do this while I am fixing breakfast and I timed myself!)
  • Open 2, 28 oz. cans of crushed tomatoes with a hand crank can opener
  • Dump these two cans in the crock pot
  • Stir in a palmful each of Italian Seasoning and dehydrated onions
  • Add about a teaspoon of garlic powder (I just guesstimate the amount in my palm)
  • Dump in a quart of frozen meatballs
  • Give it a stir, put on the lid, and turn the crock pot to low so it can simmer for a couple of hours while you are away
  • Fill a stock pot with water, put the lid on and set it on the stove

Now, when you get back to the house after an uplifting assembly, the first thing you need to do is turn the burner with the stock pot on it on high. I recommend having the stock pot filled and ready on the stove because if your Littles are like mine, they will be whiny and starving and are not going to be happy if you have to put them down to fill a pot with water and carry it to the stove. If it is already sitting on the stove, you can cuddle your sweet ones and simply turn on the burner with a free hand.

Hopefully you have made the most of preparing on Saturday, so pulling a ready made salad out of the fridge will be a breeze. If not, it's ok to skip the salad. We often do. Honestly, we usually only do salad and bread for company.

Something else that will make life with Littles simpler is to keep a "spaghetti shirt" handy. Bibs have been such a bother. It seems like they always manage to get their food on their clothes anyway, so I just go with a full t-shirt that is dark colored (preferably even red!) and a size too big, and we use these as our bibs when extra messy food is on the menu, and spaghetti is definitely messy!

Lastly, I've added a page under the Sunday tab of my Home Management Notebook with some benchmarks so I can be sure I am on track on Sunday mornings as far as time goes. Mine goes:

  • Up by 7:15 am
  • Spaghetti Sauce in the crock pot by 8 am
  • Start cooking breakfast by 8 am
  • Be dressed by 8:45 am
  • Have the Littles dressed by 9 am

I also condensed my Preparing for The Lord's Day post into a simple checklist for my notebook for Saturday night:

  • baths for everyone
  • diapers washed
  • bags packed
  • clothes selected/ironed
  • salad prepped
  • breakfast: muffins, sausage, boiled eggs?

Referring to these lists keeps me on track and it's just another thing I've been doing for a while that works for me. What tips do you have for making Sundays go more smoothly?

Pin It

Monday, February 20, 2012

Happy Pancake Month!

Photobucket

Would you like to try the best blueberry pancakes in New York City?

You can! Right at home! The recipe is right here!

Or here:


(That is an Amazon affiliate link by the way.)

My wonderful MIL got me this cookbook for my birthday last year and it is full of delicious brunch recipes. Following the directions in this book, I have finally learned how to make the most perfect roll out biscuits AND the best pancakes in New York City!

What is the secret to perfect pancakes?

Separating the egg whites and whipping them into medium peaks before folding them into the batter.

Yep. That's the secret. In full disclosure, the one drawback to this method is that it makes me wash three large bowls when all is said and done instead of one. But it is sooooo worth it! Most pancake recipes call for a large amount of baking powder to make them fluffy, but baking powder leaves a metallic flavor. This recipe by Neil Kleinberg uses a fraction of the baking powder and relies upon the egg whites to give the pancakes their fluff. The result is oh-so-delicious!

Here's a picture of the batter with the egg whites gently folded in like puffy little clouds:

pancake batter

Some other tips to help you achieve pancake perfection:
  • Don't over mix the batter. According to The Pancake Master (aka - Mr. Kleinberg), too much mixing makes them tough. Lumpy batter is good. Really!
  • Get your griddle nice and hot!
  • Flip them when the edges start to look a little dry and you can see all the way through the bubbles that form in the middle of the pancake like so:
ready to flip

See? Perfectly golden brown!

perfect puffy pancakes
  • If you have something you want to mix into your pancakes like blueberries, nuts, or chocolate chips, don't mix them into your batter! As you spoon your batter onto the griddle, sprinkle your goodies right on top of each pancake. Trust me on this one, you will get perfect little pockets for the maple syrup to ooze in.
  • Speaking of... Use REAL maple syrup!! I can usually find it for a good price on Amazon when we are running low. We like B grade the best.


Now, the recipe:
  • 4 cups all-purpose flour
  • 1 tablespoon baking powder, plus 1 teaspoon
  • ¾ cup sugar
  • 1 teaspoon salt
  • 6 large eggs, separated
  • 3 cups whole milk
  • ¾ cup (12 tablespoons) unsalted butter, melted, plus 2 teaspoons unmelted for the griddle
  • 1 teaspoon vanilla extract
  1. Combine the dry ingredients into a large mixing bowl: flour, baking powder, sugar, salt.
  2. In another bowl, whisk together the yolks, milk, melted butter, and vanilla until combined. Whisk the wet mixture into the dry mixture. The result should be slightly lumpy, yet combined to form a batter.
  3. Whip the egg whites in a medium mixing bowl until they reach medium peaks. (I use a KitchenAid stand mixer and beat them until they are good and foamy, but still soft in the middle.)
  4. Gently mix the egg whites into the batter with a large rubber spatula. Remember: this batter should be slightly lumpy and have large parts of egg whites not fully incorporated; it should look like whitecaps in the ocean with foam on top. (The batter will last a few hours in the fridge without deflating too much.)
  5. Heat a griddle — either an electric griddle, a stovetop griddle, or a big flat pan — to 350 to 375°F. Grease the hot griddle with the remaining butter. Drop about 1/3 cup of pancake batter on the griddle and cook to set.
  6. When the pancake is golden brown on both sides, remove with a spatula. Repeat with the remaining batter and filling, cooking several pancakes at a time.
Now the fun part: Garnish with confectioners’ sugar, cinnamon sugar, warm Maple Butter (mix equal parts melted butter and maple syrup), fruit, or whatever brings delight into your sweetheart's heart. February is "Pancake Month" at The Clinton Street Bakery and they feature special gourmet toppings every day. Their most popular topping? Carmelized pineapple, roasted macadamia nuts and toasted coconut.

Sign me up for a short stack of those, please!!!


Pin It

Garlic: It's good for you!

Garlic

It's cold season... time to break out the GARLIC!

Garlic is an AMAZING plant! It is one of the best antibacterial plants out there! Garlic not only builds your immune system, but your body doesn't become immune to its antibiotic qualities, so you can take as much of it as you want! It's also effective against viruses, while antibiotics are not. Next time, try garlic at the first sign of a cold or infection! It just might save you a doctor's visit!

Other qualities of garlic: antibacterial, antiviral, antiseptic, antiparasitic, antifungal, immune stimulating, antispasmodic (think coughs), expectorant, lowers blood pressure and cholesterol, lowers fevers, improves circulation

I'm not going to cover the ins and outs of how to take garlic medicinally, but I thought I'd encourage you to get the most out of cooking with garlic.
  • Cook with fresh cloves!
    Garlic powder and jarred minced garlic is convenient, but the more processed it is, the less your body will benefit from it.
  • The entire garlic family carry the benefits of garlic to a some degree, so try increasing the amount of garlic, onions, and leeks in your cooking. I throw garlic into almost everything now and I usually triple the amount a recipe calls for. If the power and pungency of garlic is a bit much for you to take, just start slowly. You'll be feeling like an Italian in no time!
  • I highly recommend chopping it up by hand into a small mince. Your skin will absorb the oils and benefit from it. I don't recommend using a garlic press. It is less convenient than you would think. Have you ever tried cleaning one out!? You lose many of the good qualities of garlic with the press. Invest in a heavy, sharp knife instead.

This is a great knife! It's the one in the photo above.

A yummy way to get some raw garlic in you: Hummus!
- 2 c. canned chickpeas, drained
- 1 1/2 tsp. salt
- 4 minced garlic cloves
- 1/3 c. tahini (sesame paste)
- 6 tbs. lemon juice (or juice from 2 lemons)
- 8 dashes tabasco sauce

Zip through the food processor until nicely pureed. Good chilled or at room temp. The longer it sits in the fridge, the stronger the garlic smell/taste becomes! It will last up to a week refrigerated.

What is your favorite way to eat garlic?

Pin It

Saturday, February 18, 2012

Soffritto... soffratto...

Potato... Po-tah-to...

We're gonna learn a useful cooking skill today on Potluck Saturday... How to make a "soffritto".

What is a soffritto?

A soffritto is a combination of aromatic ingredients which have been cut in very small pieces, and slowly sauteed in cooking oil for 15-30 minutes.

Soffrito

I find it fascinating that variations of this technique is used in so many cultures as the start of something wonderful.

Soffritto = Italian = olive oil + onion (red or yellow) + garlic
Sofrito = Spanish = olive oil + onion + carrots + tomatoes
Mirepoix = French = butter + celery + onions + carrots
"The Holy Trinity" = Cajun = butter + green pepper + onions + celery

And many, many more, being most common in Mediterranean, Latin American, Caribbean, and European countries.

The basic technique is to get out a heavy-bottomed saute pan, swirl a few tablespoons of oil around the pan and turn it up to medium heat. Then you toss in the veggies as you chop them. I always start with onions because they only taste better if they burn a little. (It's called caramelizing!) Next, I add the larger, harder veggies I plan to use because they take longer to soften. This would be bell pepper or carrots. Add whatever else, and do the minced garlic last because it is so tiny. Let it all hang out in the pan for about 15 minutes until everything is soft, giving it a shake and a stir from time to time.

The soffritto is the flavor base, and you can go anywhere with it! Add whatever herbs and spices suit your fancy. Start with a soffritto for some incredible sauces for meat or pasta, flavorful beans, rice, vegetables, soups, and stews, or just a delicious veggie saute to go with quinoa or couscous.

And If your family is anything like mine, starting on a soffritto is a great way to have the kitchen all to yourself for a little while. ;) Big Littles always runs away when he hears I'm cooking onions. (I love cooking with my Littles, really I do!)


Get this awesome print by April Starr from The Flourish Cafe on Etsy.

Does this technique seem familiar to you? I think learning basic techniques such as this, is how to gain freedom in the kitchen and will help you learn how to cook without a recipe.

Pin It
Related Posts Plugin for WordPress, Blogger...