Showing posts with label Home Decorating. Show all posts

Monday, December 24, 2012

Martha, Martha


 If Thanksgiving is a holiday where I work like a slave in the kitchen for days, I'm trying to not let Christmas become that and it would be so easy to do.  My favorite Christmas memory with my children is from a couple of years ago when I collapsed on the floor in exhaustion and my two boys who were still just babies, laughed and cuddled and crawled all over me.  That moment was pure happiness.  And so I try to keep that image in my mind as my goal for the big holiday.  THAT is what I am trying to achieve, not culinary perfection or a home straight out of Pinterest.  It is hard for me, but here is what I am doing to let go of my Martha tendencies and just enjoy the holiday.

my cardinal tree topper that I just love
We eat more junk food.  We just do and I don't stress about it.  For breakfast Christmas morning, we still need protein, so I buy those Little Smokies sausages and crescent rolls in the tube and make pigs in a blanket for us to munch on while we exchange gifts. 

I try to also have some tempting fruit available.  This year, we are doing our big dinner on Christmas Eve, so lunch on Christmas Day will just be leftovers.  I'm liking this arrangement more and more.

For dinner, we are having frozen pizza. 

Frozen pizza came about because we have Bible study that evening and we will be leaving at about 2 am the day after Christmas for a big road trip.  We very rarely have frozen pizza, so this will be a rare treat that everyone will love.  And you know, Trader Joes has cheaper and healthier frozen pizza, so it is easier to let go of the guilt.  I think this might be a new tradition. 


Be blessed, my friends.  Enjoy your day with your family, no matter where you are and no matter how you celebrate. 

Pin It

Thursday, July 5, 2012

Making a Tea Wreath

my new tea wreath
I wanted to share a simple project that can help you in your efforts to create a hospitable home.  I originally saw this idea on Pinterest, and immediately thought of making it for my mother-in-law.  It was a big hit, and it is in use nearly every Sunday when they have a home full of guests and tea drinkers.  It is a pretty way to display the teas you have available, and I find it helps guests feel more comfortable fixing a cuppa for themselves, especially if you leave some teacups nearby and a kettle ready on the stove.

There is a very helpful tutorial from kojo designs here that can walk you through the very simple process of making a wreath for yourself or for a gift.  
my MIL's tea wreath
This was a very fast project and required few materials.  You'll need some large pieces of cardboard, glue, hot glue, about 16 wooden clothespins, and some pretty paper.  You can hang it from a ribbon or just hang it by the hole in the middle. 

When I have babies that need lots of nursing and diaper changing, it is a challenge to be able to be able to meet all of the needs of my guests myself.  It's also a bigger challenge with a large group.  I like to have things out and available as much as possible and encourage my guests to help themselves to whatever they like, and having my teas on display helps in that way.

Thank you Pinterest

Pin It

Thursday, May 10, 2012

If Walls Could Talk...


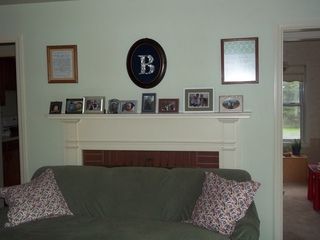
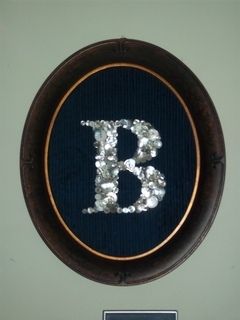
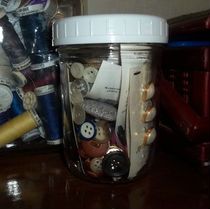
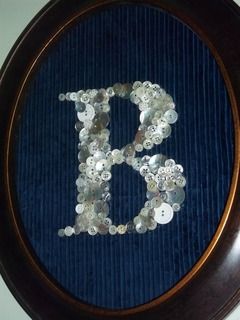
I wanted to share some more ideas for frugal decorating.  On Tuesday, I shared the 
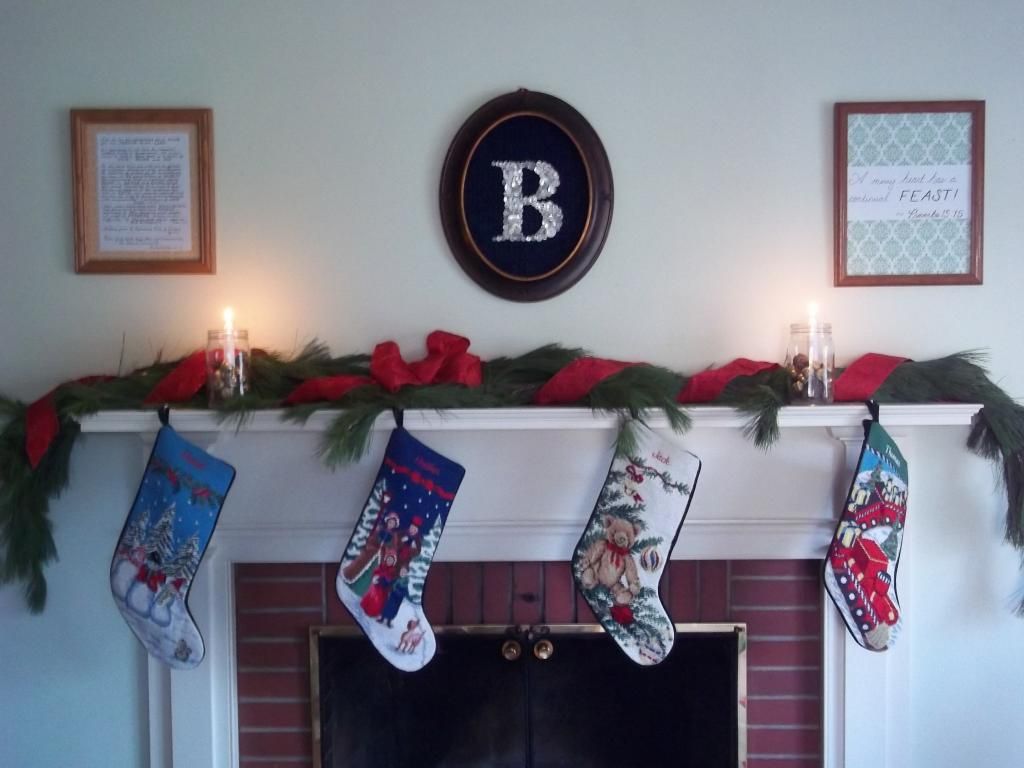
monogram with buttons that I made, and today I'm sharing an inexpensive, personalized, yet beautiful way I create wall art with a very important message for our family.

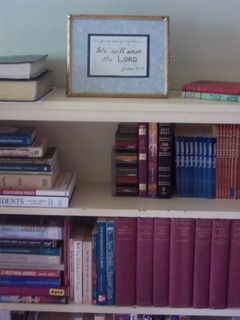
It all started when I wanted to put some Bible verses up on our walls, and I looked into custom vinyl wall clings, but was rather daunted by the price and was disappointed by the limited selection.  I started collecting old frames at garage sales to create my own scripture art and I have enjoyed making these for our home and for gifts.  Each of these finished pieces costs me about $1.25 - $1 for the frame is the going garage sale price around here and about $.25 for the scrapbook paper.  I watch for when the paper goes on sale for about $.25 per sheet, and I almost never use an entire sheet.  The extra paper is useful for making homemade cards or for other framing projects.    

Now I am picky, but I am not a perfectionist.  But part of the beauty is having these verses on the walls in Mama's handwriting.  I practiced my handwriting for fun as a child, so I can write with a pretty steady hand, but if you don't like your handwriting, you can use your computer and printer.  I still think scrawled handwriting is much more charming than the computer though, so don't worry if it doesn't look just perfect.

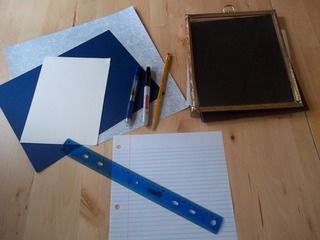
1.  Gather your supplies:


  • scrapbook papers 
  • white or cream printer or stationary paper
  • lined notebook paper
  • sharpies
  • pencil
  • frame
  • ruler
  • pink pearl eraser (not shown)
  • rubber cement (not shown)


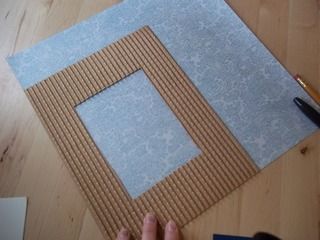
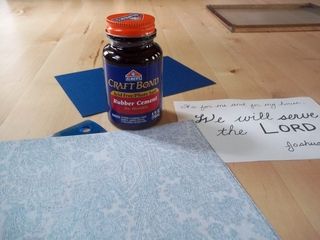
 2.  Using the glass of the frame or another insert for a guide, trace the size you will need for your frame on the scrapbook paper.


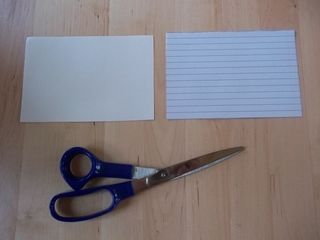
3.  (I eyeball everything, but measure if this drives you crazy!)  Cut out a piece of white or cream thin paper for your quote.  While you are at it, you may as well cut out two because chances are good you will mess up at least once.


4.  Eyeballing it again... sometimes I like to have an extra layer to make the borders "pop".  I used my cream colored paper to measure... I decided how much border I wanted and then doubled it before tracing the lines.  This made it so when I re-centered the cream paper, I would have the original amount of border I wanted.


5.  Lay everything out so you can see if it looks the way you like it.  Don't glue anything yet!!


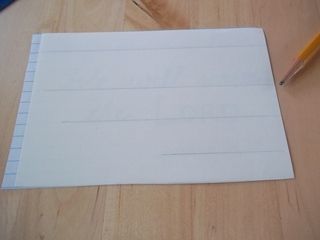
6.  Now cut out several sheets of lined notebook paper the same size as your cream colored paper.  Make sure the lines are nice and straight because these will be your guide. 


7.  Use the lined paper to sketch out some ideas.  You can see that it took me a while to settle on what I liked.  I even had to do some extra practice on my W.


8.  When you settle on one that you like, copy over the words with a sharpie and this time try to get everything lined up just the way you like it.  *Using a ruler* (it's very important), draw a line through where the bottom of the letters will hit.


9.  Put your cream paper over top and using your pencil and a ruler, lightly draw those lines.


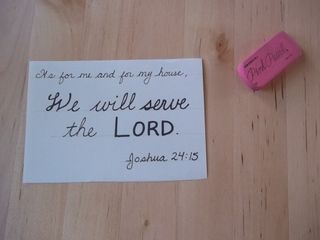
10.  Now you can finally write out the final product.  When you are satisfied, and you are sure the ink is dry, use your pink pearl eraser to erase those pencil lines.  (Don't use an inferior eraser!!  It will ruin your work with eraser streaks!  If you don't have a pink pearl, test your eraser on scrap paper before you use it!)


11.  Now you can glue the layers on.  Rubber cement is my favorite!


There you go!
Joshua 24:15 - "As for me and my house, we will serve the Lord"

A few more examples I've done:


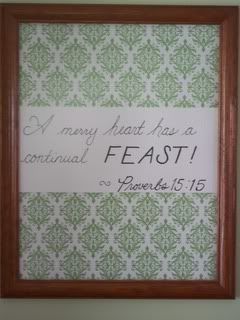
Proverbs 15:15 - "A merry heart has a continual FEAST!"


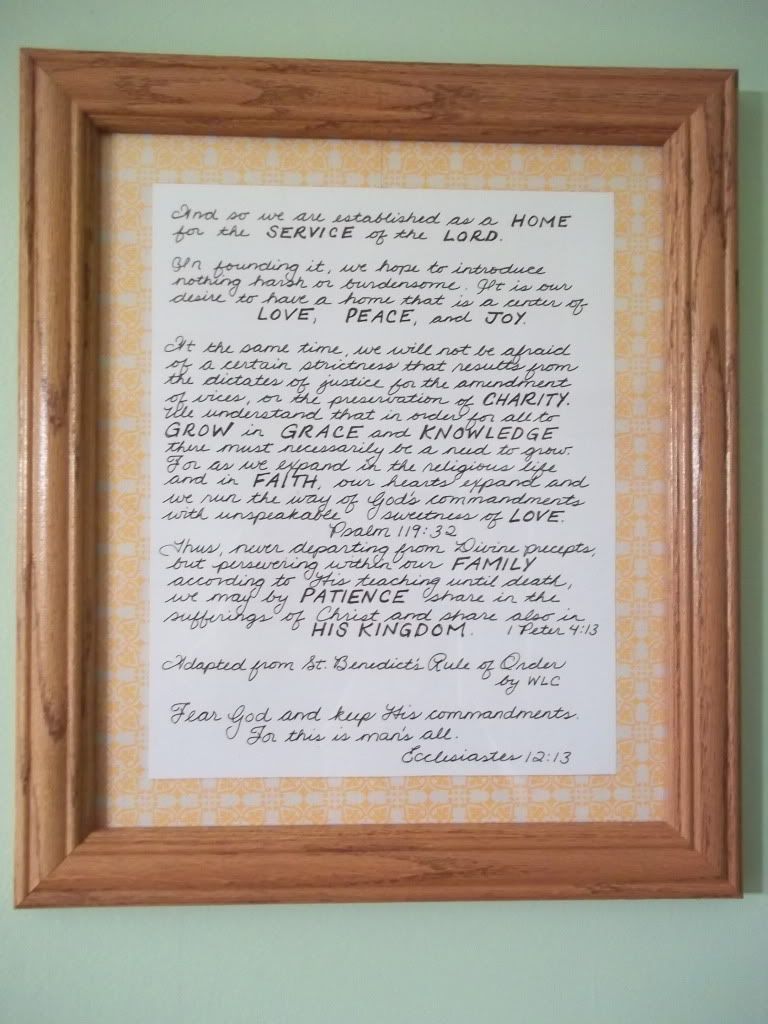
 This is our family mission statement (of a sort) adapted by my dear DHM from The Common Room from the sixth part of her series, "Benedict's Rules of Order for Housewives".


Nehemiah 8:10 - "The joy of the Lord is my strength"

I have also done the hymn, "Be Present At Our Table, Lord" for a friend's dining room.  I would like to do one for ours some day.

Another excellent resource is the free Bible Verse Printables made by April at The Flourishing Abode.  She has a wonderful modern style for her typography and I admire what she does.

What are the most important verses you have (or would like to have) on the wall?

Pin It

Tuesday, May 8, 2012

B is for Button

Did you notice the "B" on our mantel during the House Tour?  Here it is again:


I'm just really tickled over my B.   It was inspired by a pin on pinterest with a monogrammed E.  The link was a dud, so I had to just wing it.  I have since found a wonderful tutorial for a similar project here, you would just want to substitute the letter of your choice.  I considered taking pictures and doing a tutorial myself, but I was doing this project at night while the Littles slept and the lighting was terrible.  Plus, the first one I made really looked awful, so I was just figuring it out as I went along.  I'll try to give you some tips so if you want to make one it will be a much smoother process.


  • I chose the font I liked best for the letter B and enlarged it to 700 pt.  I printed it, cut it out, and traced it on the fabric with a white fabric pencil.  Worked just fine.  
  • Instead of gluing the fabric to the glass, I used the glass as a pattern to cut out the oval shape from heavy cardboard, and I hot glued the fabric to the cardboard... just around the edges.  The glass really wouldn't work with the layers of buttons, so now there is an extra piece of oval shaped glass on my husband's workbench.  I wonder if it will ever find a use?  
  •  I dug around in my scrap fabric stash and found a lovely light blue cotton with a feathery print to use and soon discovered that the white buttons just didn't show up on the pretty print at all.  So I dug around some more and found this heavy whaled corduroy in deep navy.  It almost looks like velvet.  It is PERFECT!  So, bottom line, use dark fabric with white or light buttons, and light fabric with dark buttons for the best results.
  • On the original pin, the buttons were all lying flat and even, but I found that I much preferred the look of layering the buttons to create an interesting texture and a look that was more filled in.   

  • My buttons were all collected over the years.  Many of them were ripped off of my husband's old dress shirts.  I also had a number of mother-of-pearl buttons that I bought in a package for a dress that I made.  These have a gorgeous iridescent sheen, and greatly add to the look.  You definitely want buttons of all shapes and sizes, and having a number of tiny buttons is very useful to enhance the level of detail.
  • My frame was half price at Hobby Lobby, and was the only purchase I made for this project.  It cost me $12.  I had my heart set on an oval frame for this spot in the living room, and after scouring thrift stores and garage sales for a while, I decided to just go buy what I really wanted, and this was it.  I could have made this project for $1 if I'd broken down and used a yard sale frame.  Well, such is life.  I don't think I'd be as enraptured with my B if I had used a rectangular frame.  
Up close...
When Big Littles saw this on the wall he said, "Oh look... B for button!"  Well... ehmmmm... not exactly!  If you know me, you know what the B is for.  ;)

Pin It

Thursday, December 1, 2011

Trimming the Tree

During my childhood, I remember always having birds at the top of our Christmas tree. I've been feeling a bit wistful for those birds this year and wanted to re-create that a bit for our little family. Preacher Man gifted me half an hour child free at Michaels so I could satisfy my creative monsters as my friend April loves to say.

I fell in love with the glittery cardinals.

Tweet Tweet

They are flashier than what I typically buy, but it is Christmas, after all, and once on the tree, they are a perfect fit!

Here's what I did:

Tree Topper Materials

I bought:
  • 2 glittery cardinals
  • a package of cinnamon pinecones - some are painted gold and there are some pretty glittery red berries in the pack too
  • a small grapevine wreath for the foundation
  • a little pick with gold berries
  • a length of berry garland
  • I also used some hot glue and some heavier gauge beading wire that I had on hand. Green floral wire would be better, but I didn't have any, and the silver works just fine.
Wrapping the wreath

1. Wrap the berry garland around the grapevine wreath, tucking in the ends so they don't show.

Wiring It In

2. Preacher Man suggested that I wrap the garland with the wire because the branches of the garland were sticking out too much. I just tucked the ends of the wire deep into the wreath, and gently wrapped around the little branches to reign them in.

Ready to Hot Glue

3. Decorate!! I stuck the gold berry pick deep into the wreath, attached my little cardinals, and glued on the pinecones and glittery berries. Place things on the wreath strategically to cover bare spots and wire ends. Be sure to leave the middle of the wreath open so there is room for the top point of the tree to poke through.

Voila!

On the tree 1

I think they are just too sweet! The Littles love them too!

On the tree 2

This year's tree, all decked out. Last year, I got creative to make a babyproof Christmas tree, and I loved so many of the things I did, that I'm bringing them back again this year. These paper ball ornaments are absolute favorites! The Littles love hanging the pretty copper and silver cookie cutters on the tree as ornaments, and I still think the lace looks lovely as a garland.

I'm saving cards to make some of these ornaments this year, and I hope to bundle up the Littles to hunt for some acorns so I can make these lovelies to mix with my cinnamon pinecones.

What holiday crafts are you undertaking this year?

Pin It

Wednesday, April 13, 2011

How HGTV and the Food Network Have Killed Hospitality

Ok, I admit my title is a bit of an exaggeration, but I believe it because I am seeing a general decline in hospitality among Christians. What would modern culture have us believe about hospitality?
  • Gourmet food
  • Multiple courses - serving fancy drinks and hors d'oeuvres as your guests come in the door with swanky music playing, of course!
  • Perfectly clean home
  • A home with modern styles and decoration
  • Beautiful table set with lovely china, place cards, centerpiece, tablecloth...
  • Candles and flower arrangements strewn throughout
  • Pretty, new furniture
Isn't that what is on TV, in cookbooks, and magazines? Now, there is nothing inherently wrong with a dinner party with all of these lovely amenities and comforts. The problem comes in when we think that the only way we can extend hospitality is if we first have all of them.

I have littles. Our furniture will be stained and scratched. Candles everywhere would be dangerous. Unless I lock my children in a closet for half of the day, there will be toys strewn in the living room, and the meal is going to need to be simple. Also, we choose not to live like the proverbial Joneses, laden with debt so we can have the latest and greatest furnishings and decorations. We live in our home. All four of us work, play, eat, sleep, and learn in our home nearly all of the time. We keep our home mostly neat and clean, and I think it is rather comfortable, but I don't think anyone would say it is magazine worthy. I do not apologize for this, and I hope that you won't apologize for your home either.

I actually had a woman say to me once that she really wanted to have us over, but they needed to replace the carpets first. We still haven't been invited over, and that was years ago. I have eaten in homes with dirt floors where the children sat on the floor next to the table to eat and everyone was happy and comfortable. I really don't care about the state of the carpets.

When we allow materialism to encroach and let personal hangups and perfectionism to prevent us from practicing hospitality, Satan wins. Does that sound rather extreme? I don't think that it is.

Hospitality is not just a good idea or a suggestion, it is a command. It is a requirement for elders (Titus 1:8, 1 Timothy 3:2), widows indeed (1 Timothy 5:10), is a command to all (Romans 12:13, Hebrews 13:2), and must be done with the proper attitude (1 Peter 4:9). In my Bible dictionary, it gives the following definition:

Hospitality: act of entertaining guests with warmth and generosity

Having people into our homes, friends and strangers alike, is a part of being a Christian, and it's something we all need to practice. As women, and the keepers of the home, it will primarily fall into our domain. I didn't do a lot of studying or research for this post, mostly I'm just spouting off the top of my head. I write to encourage myself to keep on working and doing better, seizing each opportunity that I see.

Four things come not back: the spoken word, the sped arrow, time past, the neglected opportunity.
Omer ign al-Halif

Opportunities are like sunrises. If you wait too long, you miss them.
William Arthur Ward

Tuesday, February 22, 2011

Collections

Collections can be fun. As a child, I enjoyed collecting postage stamps, rocks, fabric scraps, etc... As an adult, I tend to collect more useful items, though I still have quite the collection of fabric scraps. :) Personally, I'm not a collector of knick-knacks, but I know some people enjoy that. Adding to a person's collection can be a wonderful gift, especially when you know it is just the thing that will make them happy.

When it comes to our personal collections though, I recently had a breakthrough in my own mind. A couple of years ago, I happened upon the entire collection of hardcover Beatrix Potter books (20+ little volumes) in perfect condition for $5 at a garage sale. I knew this set was worth about $100, so I was very happy to snatch it up. The Littles and I have been enjoying reading the charming stories. Still, that one missing book kind of gnawed away at me for a while. I thought perhaps I should look into buying the missing volume so we could have a complete set. I looked online and priced the book. It would cost about as much for the one book as I paid for the whole set. Now, $5 is really not too bad of a price, and $10 for over 20 books is still a wonderful deal. But I hesitated.

And I'm glad I hesitated because it became a good learning opportunity for me. Why did I really need that last book? If I were honest with myself, it wasn't because of the merits of that particular volume. The reason I wanted it was so I could have the complete set, and that is a rather vain reason. I did NOT need that last book. We did not enjoy the Beatrix Potter books any less just because one book was lacking. The one book meant very little in the grand scheme of things, and my mind was finally perfectly satisfied not to have it.

Do you have any collections? Can you be happy and content with an incomplete collection of something? If not, perhaps it is time to take a good look at your heart. Letting a collection stay incomplete is a way to save money, but more importantly, it disentangles you from becoming too deeply attached to the things in this world. Things are things. I can understand feeling some sentimental ties to a family heirloom or photographs because those things remind us of people whom we love dearly. But if you are so deeply tied down to you stuff that you couldn't just leave it all tomorrow if you really had to, maybe you need to re-evaluate your relationship with your stuff.

People are more important than things.

God is more important than things.
Matthew 6: 19-20 - Do not lay up for yourselves treasures on earth, where moth and rust destroy and where thieves break in and steal, but lay up for yourselves treasures in heaven, where neither moth nor rust destroys and where thieves do not break in and steal. For where your treasure is, there your heart will be also. (ESV)

Monday, November 29, 2010

Deck the Halls

Christmas Tree

Trimming our tree this year is a little extra challenging because we have a very mobile little one, who is not quite old enough to be reliably obedient on what is "no touch". I'm all for house-proofing your child, but I am hesitant to leave temptations so easily available that could send a tiny one to the emergency room for a moment of disobedience. So for this year, we have kept the breakable glass and ceramic ornaments boxed up, as well as all of the metal ornament hooks. We have set our tree "in the midst of the garden", and it is the ideal "forbidden fruit" to work on some extra training. So far, preeeeeeetty good. :)

I'm not a big fan of tinsel, and while I like the idea of stringing popcorn and cranberries, it gets messy, and is a bit of a pain. I had a moment of pure genius though when I remembered that I have yards and yards of crocheted lace trim in one of my boxes of sewing supplies. I don't even remember when or where I got it, but it is PERFECT garland for our tree! The flat kind (not ruffled) works the best. The effect looks like a gentle flocking of snowflakes, and it is baby-friendly.

In an effort to fill in where the rest of the ornaments usually go, I pulled out a metal christmas cookie cutters and they look pretty nice up there. I will be looking for some crafty ideas to try my hand at making some ornaments with the littles.

For now... enjoy your holiday soundtracks and hot cocoa!

Here's a recipe for a yummy and thrifty hot cocoa mix:
  • 16 c. powdered dry milk
  • 1 1/4 c. cocoa powder
  • 5 c. sugar
  • 1/2 t. salt
Add 1/3 c. mix to 1 c. hot water and enjoy!


"It's the hap-happiest season of all!"
Related Posts Plugin for WordPress, Blogger...