Today I'm posting two casserole recipes with dairy free options - Chicken Spaghetti and Broccoli, Rice, Chicken & Cheese Casserole.
Casseroles are comfort food for me. I remember begging my mom to make a broccoli rice casserole when I was a teenager. I'm sure she was a little astonished by my request! After being forced to eliminate all forms of dairy from my diet for over a year for a dairy intolerant nursling, casseroles were left out of our dinner repertoire. All of my casserole recipes were full of cream of ____, cheese, more cheese, and sour cream, which are all no-nos.
I recently started experimenting a little and found that casseroles do not have to be utterly eliminated, I just have to tweak them a little so everyone in my family can eat them. I'll share some of the results, with both the regular recipe and the dairy free options.
(Dairy free options are in orange.)Chicken Spaghetti CasseroleI combined two recipes -
PW's Chicken Spaghetti +
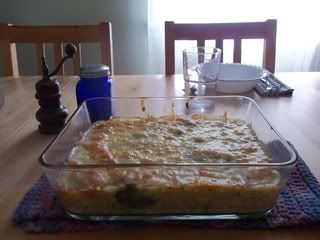
the Gluten Free Goddess' Best Cheesy Uncheese Sauce = dairy free Chicken Spaghetti Cassesrole
Not too bad if I say so myself!
Keep in mind that I had not eaten cheese or any type of casserole in over 16 months. Wow, that is a long time! And I really don't think a good substitute for cheese exists. I've tried many and you just can't duplicate cheese. But this was pretty good! It helps if you don't think of the cheese sauce as cheese, but rather a white sauce with some extra flavoring. (At least to me.)
the recipe:
*2 c. cooked and shredded chicken
*1 lb. box cut spaghetti cooked and drained (I can buy it in a box pre-cut, if you can't find it that way, just cut it up before dropping it in to boil.)
*2 cans cream of mushroom
(1 recipe of the cheesy uncheese sauce.)*2 c. grated cheddar
(if dairy free, leave this out)*1 finely diced green pepper
*1 finely chopped onion
*2 cans chopped green chilis
*2 c. chicken broth
(1 1/2 c. if using the uncheese sauce as it is slightly runnier than the cream soup)*1 tsp. seasoned salt
*1/4 tsp. cayenne pepper
*salt & pepper to taste
*1 c. grated cheddar
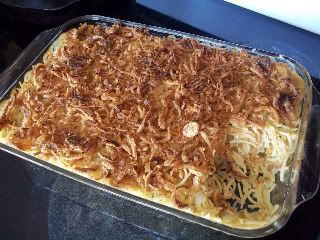
(french fried onions)Combine all ingredients except your choice of topping. Dump it into a greased casserole pan. Bake for 350* for 45 minutes.
For the french fried onion option, cover your casserole with foil and bake for 30 minutes. Remove from the oven, take off the foil and top with the french fried onions. Bake another 15 minutes. 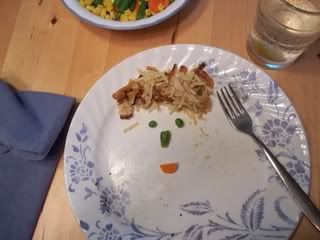
Sometimes we play with our food!
Broccoli, Cheese, Chicken & Rice CasseroleI adapted this from the
Hillbilly Housewife's recipe. Note that it can also be gluten free if you use cornstarch instead of plain flour.
* 1/4 cup butter
(my nursling handles butter just fine now - If needed, substitute Fleishmann's unsalted margarine. Look for the "parve" marking on the box to indicate dairy free.)* 1/3 cup flour
* 1/4 teaspoon pepper
* 1/2 teaspoon salt
* 1-1/2 cups chicken broth
* 1-1/2 cups milk OR 12 ounce can evaporated milk
(or 1-1/2 c. rice milk)* 2 heaping Tbs. nutritional yeast - optional* 3 cups frozen or fresh broccoli
* 4 ounce can of mushrooms, undrained (I often leave these out.)
* 3 cups cooked rice
* 2 cups cooked, chopped chicken
* 2 cups shredded cheese
(I can now eat raw cheddar, so that is what I used. For another dairy free option, top the casserole with french fried onions during the last 15 minutes of baking. Another option is to set aside a couple of portions of the casserole without the cheese topping in its own little baking dish or bowl.)In a large sauce pan, melt the butter. (Sometimes I'll add chopped onions and garlic and saute it in the butter here.) Stir in the flour, making a smooth paste. Add the pepper and salt and stir to combine. Gradually whisk in the chicken broth and milk. Stir it so there aren't any lumps. Bring the mixture to a boil over medium heat. Cook and stir until the sauce is nicely thickened. Add the broccoli and simmer it for a few minutes to cook it briefly. Stir in the mushrooms, rice, and chicken. Turn the mixture into a large oiled casserole dish, at least 2 quarts-size or slightly larger. Sprinkle the cheese on top of the dish, and bake at 400° for about 25 minutes, or until the cheese is melted.
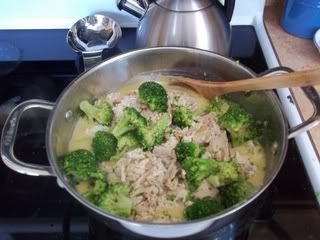
Broccoli Rice Chicken & Cheese Casserole before turning it out into a baking dish. You really could eat it just like this!
Besides the french fried onions, I have found stuffing to make a pretty good casserole topping. I like cornbread stuffing and you just spread it over the top of the casserole and pour a stick of melted butter (or margarine) on top of that. It will get nice and crispy in the oven. I've also heard of people using tater tots and even potato chips as casserole toppings, though I can't vouch for these personally. It helps to think outside the (cheese) box!
I'm happy to have a few casseroles in my life again. Both of these casseroles are freezable. Having one-dish dinner options that are easy to make ahead really save a busy mama's sanity!
What is your favorite casserole?


