Showing posts with label Hungry Mama Food. Show all posts

Saturday, December 22, 2012

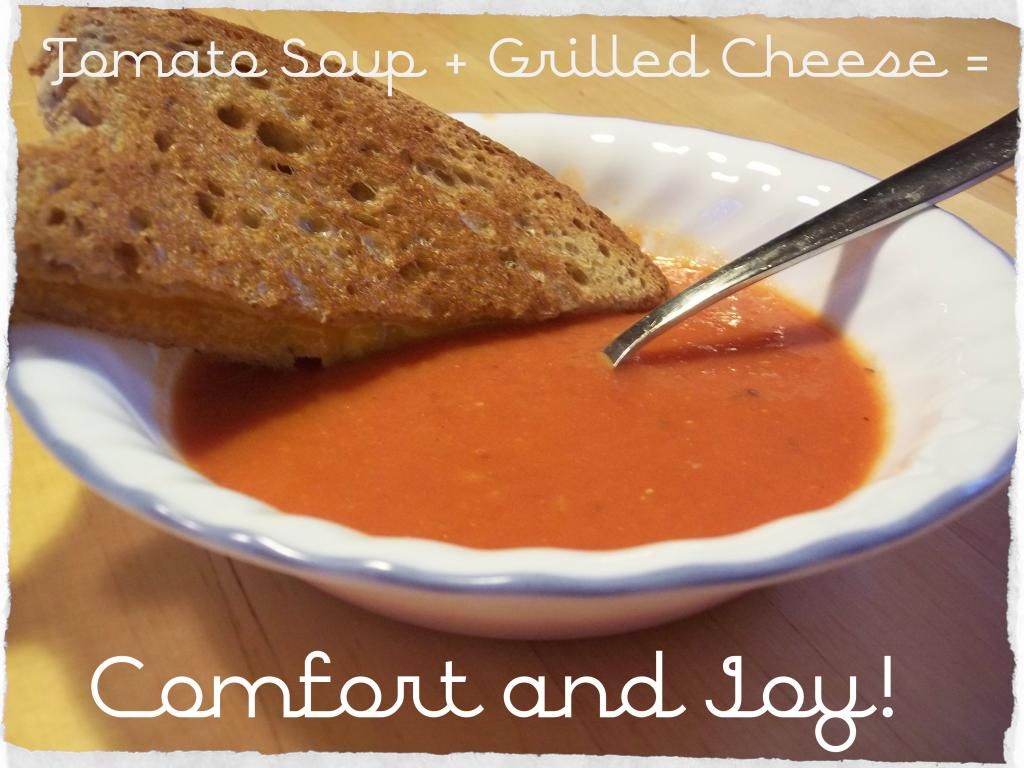
Comfort and Joy

This is a meal that never fails to leave a sense of satisfaction.  I had major tomato soup/grilled cheese cravings when I was pregnant with my second child.  I grew up eating Campbell's in a can but I finally took the plunge and tried a homemade version and I LOVE it!  It is so easy, I can't believe I didn't do this sooner!

Tomato Soup
  • 2 Tbs. butter
  • 1 small onion, diced
  • 1 clove of garlic, minced (or 1 tsp. garlic powder if I'm in a hurry)
  • 1/4 c. flour (or cornstarch or arrowroot powder)
  • 28 oz. can whole canned tomatoes
  • 1 c. chicken stock
  • 1 tsp. dried oregano
  • salt and pepper to taste
 Saute the onion in the butter over medium heat until it starts turning golden brown.  Add the garlic.  After about a minute, quickly stir in the flour and try to incorporate it all into the butter.  Cook and stir it for about a minute and dump in your canned tomatoes and chicken stock.  Season with the oregano, salt, and pepper.  Use a stick blender to puree your soup and let it cook on the stove to meld the flavors for 15 minutes or so. 

(I LOVE my stick blender for soups, but if you don't have one, you can transfer your tomatoes to a regular blender or food processor.  It's just much messier that way.)

Grilled Cheese
I fee like I hardly need to share a recipe, but I guess not everyone knows how to make it... I know I didn't when we first got married!  The first time I made it, I burned the outside and the cheese was still cold!  Butter the outside of two slices of bread and lay the butter side of one of them down on a heated griddle or skillet.  Quickly add your cheese - our favorite is good old cheddar or pepper jack.  Top with the second piece of bread, butter side up.  Once the bread turns golden brown, flip it over to toast the other side.  Once it is done, let it sit on a cutting board for a minute before cutting your sandwich into triangles. 

Also yummy when you add sliced lunch meat, or thinly sliced fresh tomato.  Really, the possibilities are endless.

Do you have a favorite comfort food? 

Pin It

Tuesday, May 17, 2011

The Other White Meat

Standing over the meat case, staring down at a pile of these babies...

Photobucket

Boneless pork loin was marked down to $1.69/lb and I was looking for a moderately sized one, while the woman next to me was doing the same. She had her coupons in hand and was muttering, wondering what on earth would she do with such a massive piece of meat?

Church Mouse comes to the rescue!!!

I showed her how to play butcher at home and divide up the meat into smaller, more useful pieces for everyday eating. She went away happy with her bargain and I did too.

Here's how you do it:

Divide the meat into thirds.

Photobucket

Now you have two roasts and you can use the middle for pork chops. Slice the middle section into 1" thick chops like so.

Photobucket

I ended up with NINE, beautiful, thick pork chops! These are MUCH nicer than what I buy pre-packaged in the store.

Then I took one of the roasts and cut it up into chunks to BBQ in the crock pot.

I packaged up the meat in freezer bags, labeled them, and this is what I got:

Photobucket

Now, let's do the math and see just how much of a bargain we got!

For a nine pound roast at $1.69/lb., I paid $15.21, which I'm rounding down to $15 to make things easier. Dividing the roast into three parts, makes each third $5.

$5 = a large pork roast that I plan to stuff and serve with sauerkraut. This will make either 3 meals for us or 1 large company meal.

$5 = 9 pork chops, which will be three meals for us, which will cost $1.69/meal.

$5 = shredded BBQ pork. I didn't measure, but it was about 5 cups when I was done. The BBQ pork can go on baked potatoes and sandwiches. We have eaten it for 2 meals and have at least half of it left.

Here's my recipe for BBQ pork in the Crockpot
  • 3 lbs. pork, cubed
  • 2 c. chopped onions
  • 3 green peppers, chopped (I used a 12 oz. pkg. of frozen ones.)
  • 1/2 c. brown sugar
  • 1/4 c. apple cider vinegar
  • 6 oz. can tomato paste
  • 1 1/2 Tbs. chili powder
  • 1 tsp. dry mustard
  • 2 tsp. Worcestershire sauce
  • 2 tsp. salt
Combine all ingredients in the crock pot. Cook on low for 12 hours or so. Shred the meat with a fork and mix into the sauce. If the sauce needs to thicken some more, cook on high with the lid off until it cooks down.
(Adapted from "Fix It and Forget It")

Enjoy!

Saturday, April 30, 2011

Fried Chicken

Potluck Saturday

Photobucket

Making one of Preacher Man's all-time favorites... Fried Chicken! Seems like nearly every potluck has someone bringing a bucket of chicken. There is no way I have the time during this season of my life, but someday when I'm a little more free with my time or have more slaves... errrr... children to help out around here, I would love to be the person that brings fried chicken to every potluck. Only my bucket will be HOMEMADE! :) The chicken that is... not the bucket. Well, maybe the bucket too... I digress.

I watched my grandmother make fried chicken, fried okra, mashed potatoes and homemade gravy countless times. It is truly an art. I'll do my very best to tell you how I do it, but this is one of those things where I don't measure ingredients and I just do without thinking, because I've done it since I was a child. I can certainly give tips and suggestions, but frying and gravy making just takes some practice. And indeed, it is one of those things that you may not really want to practice too much for the sake of your health, and that is understandable. Our family is extremely active, we don't eat out, and we don't eat much junk, so we can afford the calories every once in a while as a treat. And to be honest, I only deep fry a couple of times a year just because of the work it takes and the mess it makes in the kitchen. :)

So put on your apron and let's get started!

You'll need some chicken. A whole chicken cut up, or whatever assortment of pieces you and your family like amounting to 3-4 pounds. I like to cut boneless skinless chicken breasts into strips or little nugget chunks, but you pick out what you like.

Buttermilk Marinade:
2 c. buttermilk*
2 tsp. salt
1 tsp. cayenne
1 tsp. onion powder
1 tsp. ground pepper
1 tsp. garlic powder
1 tsp. dried thyme
(This seasoning combo is from the Clinton St. Baking Company Cookbook and is my very favorite.)

Flour Coating:
3 c. flour
2 Tbs. salt
2 tsp. pepper

Oil for frying. I usually use canola.

*for the dairy sensitive, we substitute goat milk for all milk in this recipe

1) Whisk together the marinade ingredients in a large bowl. Add the chicken pieces. Cover with a lid and store in the fridge for 3-4 hours.

If you are going to take the time and trouble to make fried chicken, you really must do the marinade. It is totally worth it!

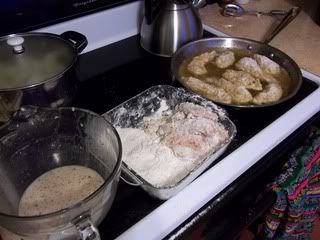
2) Mix the flour coating and set up your "frying station". Here's mine:
Photobucket

From left to right you will see the marinade, the flour coating, and the frying pan. The left hand is used to work with the marinade and the flour (the club hand, I call it, you'll see why if you do this!) and it will get really, really nasty. The right hand is used to work with the utensils.

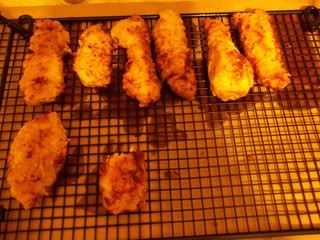
You cannot see it, but to the left of the "frying station" is the "draining station". I use a big brown paper bag with a cooling rack on top. This will allow the grease to drain, but the chicken itself won't sit in the grease. Looks like this:
Photobucket

3) Now you'll want to heat the oil over medium heat. I add oil to the pan until it is about 1" deep. I use my All-Clad fry pan or my cast iron skillet. The larger the pan, the better. It will take a while for the oil to heat up all the way. You can start preparing some chicken while it heats up.

BATTER UP!

4) Coating the chicken: I recommend the method of double coating. You will get a much better crispy crust this way, and isn't that what fried chicken is all about? With your left hand, remove each piece of chicken from the marinade. Roll it in the flour mixture, coating lightly. Dip briefly back into the marinade, and then coat thoroughly in the flour mixture. Let the chicken rest on a separate plate until it is ready to go into the oil.

5) Check the oil to see if it is hot enough. I run my hand in the sink and flick a little water into the pan. If you hear a deep, hollow popping sound, it is ready. If you don't hear that sound, keep waiting until you do. Using some tongs, add the chicken pieces one at a time. Don't crowd them too much, you want to be able to turn them.
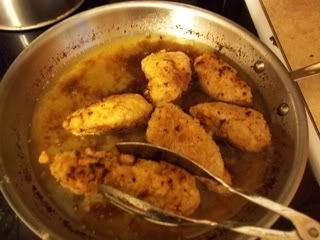
Photobucket

6) Turn the pieces as they are done on each side, but try not to handle them too much so the delicate coating stays intact. Remove from the oil when the meat is done and set the pieces out in a single layer to drain. The coating will be golden brown and crispy, but you cannot strictly rely upon the outside appearance. This is where I go by intuition and experience... If you are a novice, use a meat thermometer or cut open a piece to be sure it is done.

7) Munch on a piece or two while you fry the rest. But don't eat too much, because you want to enjoy eating it with that yummy gravy!

Now, on the gravy... I've made a lot of gravy and I still get very stressed out when I do it. I love cooking with my littles, but I shoo everyone out of the kitchen when it is time to whisk the gravy! I'm not going to tell you how to make it step by step because it's something I mostly do by intuition. I can't take pictures while I'm doing it because I'm usually too busy tossing in more milk or flour and whisking like a mad woman. So I'll give you some links to a couple of ladies who CAN show you how to make gravy and I will give you my tips.

Making gravy is both an art and a science. In a nutshell, all gravy making is:
1) warming up fat (butter, meat drippings or oil usually) - as much as you can, use those tasty meat drippings to get the best flavor! For this fried chicken recipe, I drain out all but about 1/4 c. of the oil to make the gravy, taking care to leave as much of the good crispy bits in the oil.
2) whisking in an equal amount of flour
3) lightly cooking that fat/flour mixture, whisking all the while
4) thinning it out with milk, still whisking away
5) re-warming the gravy and allowing it to thicken some more, but not too much because it will thicken even more at the table as it cools. Are you still whisking? Don't stop!
6) seasoning the gravy with salt/pepper, more whisking...
7) transfer to the table, you're done!

It's all about the fat to flour ratio - you want the same amount of each. Too much fat = oily gravy. Yuck. Too much flour = lumpy gravy. Yuck. Use equal parts. If you are a novice, do measure. If you are brave, just wing it like I do. ;)

And now, a lesson from the pros:
Mrs. Connie of Smockity Frocks - see the link on her main page where she is making gravy while getting her 8 kids ready for church. WHAT A WOMAN!

Pioneer Woman - This is her biscuits and gravy recipe, but it's all about the technique.

Don't forget to sip some southern sweet tea with your meal.

This post is a part of the Four Moms Go-on-a-Picnic linky.

Saturday, April 9, 2011

Happy Beef-day

Photobucket
ground beef and stew meat browning on the stove

A major time saver for me is having pre-cooked meats in my freezer, ready to add to a meal like lasagna, chili mac, chili, pasta fagioli, etc.... When our grocery store has ground beef on sale, I always buy the limit. I take it home, and cook it up for the freezer while I am washing the dishes. (Yay for multitasking mamas!) I like to make the following:
I used to cook the ground beef in 1 lb. batches in a skillet, but that really takes a long time! Now, I just put it all in my big stock pot, turn the heat on medium low, and stir it occasionally until it is done. Then I drain it, rinse it, and divide it into one pound portions in my labeled freezer bags. Press out the extra air and freeze them flat to be efficient with freezer space.

Now this may seem pretty elementary, but I did not know that you could freeze cooked ground beef like this when I first got married until my friend told me her mom did this. I thought this was brilliant! It saved me so much time and even money since I bought the meat on sale in bulk. Batch cooking - I love it!

I just heard of someone cooking the ground beef overnight in their crockpot, which would eliminate the need to stir and attend to the pot, but I haven't tried it yet. Sounds like a great idea though!

Meatballs
Meatballs -
cooked on the left, uncooked on the right

Potluck Saturday - Meatballs
  • 4 lbs. ground meat (I like to use a combination of whatever is cheap - beef, turkey, or pork)
  • 2 c. bread crumbs*
  • 2 Tbs. Italian Seasoning**
  • 4 Tbs. chopped fresh flat leaf parsley
  • 1/2 c. grated Parmesan***
  • 1 onion, minced in the food processor
  • 4 cloves garlic, minced in the food processor
  • 2 tsp. salt
  • 1 tsp. pepper
  • 3 eggs, beaten
  • 1 1/2 c. water
* for a gluten free version, substitute crushed Rice Chex cereal or whirl some gluten free oats in the food processor
** we like Penzeys Pasta Sprinkle - if you are making sweet & sour meatballs, leave this out. Note - I am not affiliated with Penzeys and they don't give me money. I just love their spices. :)
*** leave this out if you need them to be dairy free - I usually substitute extra breadcrumbs

Combine all of the ingredients in a very large bowl. Mix well with your hands. Form into 1-2" meatballs, packing them so they will hold together. Try to be consistent in their sizes. (A medium cookie scoop helps with this.) Decide whether you will fry them or bake them and follow the directions below.

Frying them: Heat equal parts vegetable oil and olive oil about 1/4" deep in a skillet over medium heat. When the oil is hot, add the meatballs in batches being careful not to crowd them too much. Keep turning them so they brown evenly. As each meatball is cooked through, remove it to a plate covered with a couple of paper towels to drain.

Baking them: Preheat your oven to 350*. Arrange the meatballs on a cookie sheet. (I always use a silpat. If you don't have one, try parchment paper to prevent sticking.) Depending on how large you made your meatballs, they will take between 40 minutes and 1 hour to cook. Just check them from time to time, give them a shake to keep them from sticking, and see if they are done.

Serve right away, or put in a gallon size ziploc for the freezer.

My meatball recipe is based upon the one in this cookbook by Ina Garten:


This cookbook is beautiful and is filled with recipes for tasty food.

These meatballs are delicious on spaghetti, and are also yummy in escarole soup.

Thursday, April 7, 2011

HMF - Dairy Free Ice Cream

HMF = Hungry Mama Food
This is more of a Hungry Mama Snack, but ironically, is also a Lite Mama Snack depending on how you make it. I got the idea from Annessa at Flourish. She got the idea from a Whole Foods Recipe, so this is one of those recipes that has been passed around and tweaked, but it's because the idea is brilliant! It's ice cream without the "cream". Frozen bananas stand in for the creamy part and you can flavor it however you like. For me, I needed a dairy free protein/fat boost every day, and this shake is the vehicle! You may just want a healthier substitute for your nightly bowl of ice cream or you might want a frugal treat. This is all of those.

You will need:
  • freeze one ripe (but not mushy) banana in chunks in a small ziploc baggie to have ready when you want it*
  • 2 tsp. peanut butter or almond butter (to add protein, I add more like 2 Tbs., but I confess it tastes more like a health shake and less like ice cream when I do this)
  • 2 tsp. cocoa powder (don't add more, trust me! It will not taste more chocolaty)
  • about 1/3 c. liquid - I use rice milk, but use any kind of milk or milk substitute you have
  • 2 Tbs. melted coconut oil (optional - I add this for the extra fats, if you don't want extra fats, no matter how healthy, just don't add it!)**
  • Add sweeteners if you wish. I don't need it, but you can make it sweeter with liquid stevia, sweetened rice milk, sweetened peanut butter or just plain old sugar.
Now, I don't have a blender. I've burned out three cheap ones now, and I don't care to invest three digits for a fancy one, so I just use my KitchenAid food processor. A blender would probably work better though. So, throw the banana chunks, the peanut butter and the cocoa powder into your blender or food processor and whirl it around until it breaks up the banana chunks. Add the liquid through the hole in the top, adding just enough to make it smooth. If you add too much, it tastes more like a Wendy's Frosty, which, to me, is not a bad thing!! :)

Then spoon it out into your bowl, and enjoy guilt free!


* the spartan among us will wash out and reuse those baggies, so I recommend the heavier weight freezer bags to withstand repeated washings
** if you add the coconut oil in as a solid, it will make your ice cream taste grainy, and who wants grainy ice cream? Melting it solves that problem. Even though it is a bit counter-intuitive to add warm liquid to make ice cream, it works. :)

Friday, April 1, 2011

HMF - Meatloaf

HMF = Hungry Mama Food
You need HMF if you are a nursing and milk pumping mother with littles that barely sits down all day. Quick carbs and sugary stuff just makes mama cranky, so there are certain criteria for HMF.
  • Best if you can eat it with one hand.
The other day, Preacher Man asked, "Why don't you fix yourself beans and rice?" I gave a sort of mean laugh (feeling badly about that one, actually) and said, "Because I have to sit down and use utensils to eat that."
  • Must have protein and LOTS of it!
I snack on meat. Backwards in a lot of ways, but I NEED it, especially since I have a dairy sensitive nursling. No cheese for me. :( I have not always been such a carnivore, but it is essential for survival right now.
  • Must leave mama satisfied for 2 hours minimum.
This is rather tough criteria, and is especially challenging on a limited grocery budget. But it's important to keep mama healthy and happy. And since I get a little tired of almonds and peanut butter sandwiches, I'm looking for creative ideas.

Of course, it could also be HTBF = Hungry Teenage Boy Food if you have some of those.
I honestly fear for the state of our food budget in about 12 years when we will be buying both HMF AND HTBF! Yikes!

Anyway, one of my favorite HMF meals is MEATLOAF! Specifically, the meatloaf sandwich!

Meatloaf

I think meatloaf has a little bit of a bad rap. For starters, the name isn't the most appealing in the world. I didn't grow up eating it, and only had it once that I remember while visiting some distant relative. And I was surprised that I liked it! It's also a very versatile dish and is a good one for hiding extra veggies. My version is different than many. For one, it's not a loaf. I like to make it in a 9x13 pan because it makes it easier to drain the grease, and because it gives more crispy edges, which I like. I also try to always batch cook with meatloaf. I mix up 4 lbs. at a time and freeze half in a ziploc bag for later. Very handy! I also like to use ground turkey for a portion of the meat. So here is my recipe for 2, 13x9 pans of meatloaf, just the way I like it!:
  • 4 lbs. ground beef (the leaner the meat, the better)
  • 4 slices of bread
  • 4 small onions
  • 4 cloves garlic
  • 1/3 c. dehydrated bell pepper (optional, but I LOVE the taste!)
  • 1/2 tsp. black pepper
  • 1 c. milk (for dairy free, substitute plain rice milk or goat milk)
  • 8 tsp. Worcestershire sauce
  • 1 tsp. dried sage
  • 1 tsp. ground mustard (I have used prepared mustard and it works well too.)
  • 4 eggs, beaten
  • 1 1/3 c. ketchup, chili sauce, or BBQ sauce + more for serving
Preheat oven to 350*. Break up the ground meat into smaller pieces in a very large bowl. (Seriously, you will probably need to use the largest bowl you own, or plan to divide it and mix it in two bowls.) Run the bread slices through the food processor until chopped finely and add to the meat. Quarter the onions and finely mince the onions and the garlic in the food processor too. Mix in the onions and garlic, as well as the rest of the ingredients. When thoroughly mixed, divide the mixture in pat down into two ungreased 13x9 pans. Drizzle ketchup on top. Bake for 50 minutes, then drain off the grease. Bake 1o more minutes, or until the center is no longer pink. Enjoy!

Serves 16

And for the leftovers:
Photobucket

Saturday, February 26, 2011

Potluck Saturdays: Chili Mac

Photobucket

How many changes must you make to a recipe before it becomes your own?

I got this recipe from The Common Room. And then I did what I can't help but do to a recipe... I tweaked it. I tweaked it a lot. And then I renamed it because "Chili Mac" seemed much more fitting. According to the DHM, this recipe comes from the much recommended More With Less cookbook, but it seems that they have tweaked it a bit too.

So here is my own much-loved version of chili mac, so very much loved that this good-sized recipe doesn't last a day in our house! Big Littles and I each ate 4 bowls of it last time! Preacher Man ate 3! And then I dove into the leftovers a couple hours later. ;)

Chili Mac
1 pound ground beef - browned
1 large diced onion
1 diced bell pepper (or about 1 c. frozen)
2 cloves minced garlic
28 oz. can crushed tomatoes (I use 2 pints of home canned)
1/4 c. sour cream or mayo
2 TBSP Worcestershire Sauce
2 tsp chili powder*
salt to taste
1 lb. elbow macaroni (or your preferred shape - I like to use whole wheat pasta in this recipe)

(I always have ground beef ready and browned because I buy it in bulk and brown it all at once. If you haven't done this, brown the meat first.) Saute the onions and bell pepper and when they are nearly brown, add the garlic. Stir in tomatoes.
Add sour cream or mayo, W. sauce, chili powder, and salt. Stir. Add pasta. Add enough water to almost cover noodles but not quite - it's less than 2 c. in my experience. Bring to a boil. Cover, reduce heat. Simmer for about 15 minutes, or 'til noodles are tender and water is cooked down.

This simple, fast one pot meal is a staple around here now!

*Now, a note about the chili powder... I am a really big fan of Penzey's spices. They are not paying me for an endorsement, I just love them so much, I wish everyone could experience the amazingness of their high quality, ultra fresh spices. Penzey's chili powder is partly what makes this dish taste so good. If you have a store near you, prepare yourself for a sensory overload. Make sure you check out their cinnamon and curry powder too! Oh and the pasta sprinkle! We really love that stuff!

You can use the coupon code 00002C in the "Express Ordering" section of their online store to get $5 off an order of $10 or more. Offer expires May 29, 20011. I recommend buying the spices in bags to get the best deal.
Related Posts Plugin for WordPress, Blogger...