Beautiful, flaky pie crust is an art. Like any great art, you will perfect your skills over time. This means, to get really good, you will need to practice making a lot of pies! (= Happy Husband!!) As a new bride, I spent about a year making pies for every occasion, so after a few dozen, I finally perfected pie crust!
BUT, practice does not
always make perfect! If you practice making pie crust with a bad recipe and poor techniques, you may still not have success.
Perfect practice makes perfect, and my tried and true recipe and tips should help you achieve pie crust success. One unique thing about my recipe is the Paste Technique. Your dough will mix together much more easily, reducing how much you work the dough, and this will make your crust more tender.
Second, work with COLD ingredients for the best results. You don't want your dough to just mush together like cookie dough, you want the butter to be cut in and just blended, leaving nice little flaky butter globs. If you are an accomplished biscuit maker, the technique is quite similar!
Here is a condensed recipe, so if you are already skilled with pastry, you can just look at the short version:
Church Mouse's Pie Crust
(makes two 9" pie crusts)
3 c. flour
1 tsp. salt
1 1/3 c. butter
6 Tbs. ice water
1 egg, slightly beaten
1 tsp. vinegar
Mix 2 1/2 c. flour and salt together. Dice the butter into small chunks and toss them into the flour mixture. Using a pastry cutter, cut in the butter until fluffy. In a separate bowl, mix 1/2 c. flour with the ice water, beaten egg, and vinegar to make a paste. Add this paste to the flour/butter mix and lightly combine - I always finish it off with my hands. If it feels to dry, you can add more water a teaspoon at a time. Roll into a ball and halve it. Wrap the halves in plastic wrap & refrigerate for about 20 minutes. (Pie crust may also be frozen at this point.) Roll out - makes two crusts (top and bottom).
Continue reading for more detailed instructions and tips.
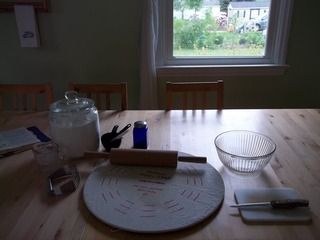 Gather your supplies:
- An apron is an absolute necessity in my opinion. ;)
One of the major obstacles for pie crust success is not having the right tools. These specialty tools will make your work much, much easier and will give more consistent results.
A pie board creates a non-stick surface where you roll out the dough. Basically, it's just a lightweight piece of particle board in a circular shape. It has rubber knobs on the underside so it doesn't slide off the counter, and there is a piece of thick muslin that stretches over the board and cinches up around the edge. It would be pretty simple to make one. Flour the muslin on the board heavily. If you don't have a pie board, you can use a clean wooden table or counter top, floured heavily. You may still have issues with sticking though. I find a real wood surface that doesn't have a lacquer or polyurethane finish works the best next to the pie board.
Use a nice wooden rolling pin - the supposedly non-stick ones do not work AT ALL! Better yet, a rolling pin with a
"sock" that cinches over it - flour it well and your rolling pin will never stick
Don't overwork the dough!! Use a pastry cutter, mix just until fluffy. The pieces of butter should be about the size of peas.
Pies tend to need about an hour to bake in the oven just so the middle is set, but the long baking time can burn the edges of the crust. A re-usable pie shield will protect your crust from burning and will be much easier than fiddling with strips of foil.
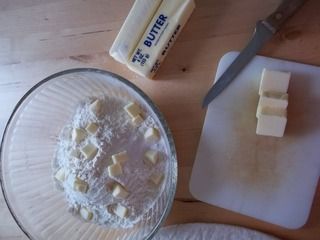 Ingredients:
BUTTER - I use real butter in my pie crust. Personally, I avoid hydrogenated anything, so butter is the way to go. Some people use lard or shortening and it can be substituted 1:1 in this recipe if that is your choice.
FLOUR - I do much of my baking with whole wheat flour, but I do NOT recommend it for pie crust. Get a good unbleached white flour for the best results with your crust. It's not as healthy, but it's PIE, you know?!
Freezing Pie Crust:It's handy to make up your pie crust ahead of time, especially when doing lots of holiday cooking. After you have your dough mixed and in two balls, you can flatten them slightly, wrap carefully in plastic wrap, and then seal in a ziploc freezer bag. Thaw completely before rolling it out, but do so in the fridge so it stays cold.
 Technique for Rolling Out the Crust:
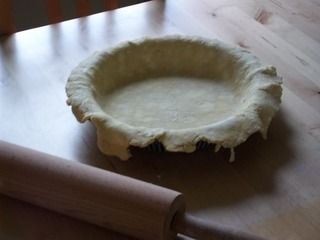
Rolling pie crust works best with light pressure and it helps to flip the crust over frequently as you roll. If the crust begins to stick to the rolling pin or your pie board, sprinkle some more flour on the surface before you keep rolling. When you roll out the bottom crust, make it just a bit larger than your pie plate so it hangs slightly over the edges. (Can you see the light yellow smudges of butter in there? That is the way it ought to look.) Gently transfer your crust from the pie board to the pan, using your hands or by laying it across the rolling pin. Center it and gently shape the sides so they are flush against the pie pan.
Trimming, Filling, and Topping Your Pie:Your recipe should tell you the best way to fix up the crust. For example, if you are making a pumpkin or pecan pie, you will only need the bottom crust, so you can just trim and flute the edges right now. With a sharp knife, gently cut around the
outside of the pie pan to trim the edges of the crust. (You don't want to cut off too much because the crust will shrink a bit as it bakes.) You can flute the edges with your fingers, scallop them with a teaspoon, mark them with fork tines, or use any other creative technique you come up with. If you want to make the middle of the pie pretty, you can use a cookie cutter to cut a shape or two out of the scraps of the crust to lay on top. (When adding shapes to a pumpkin pie, bake it until it is set, add the shapes to the top, and continue baking.)
Rolling out a top crust:
First, trim the edges for your bottom crust. With a sharp knife, gently cut around the
outside of the pie pan. (You don't want to cut off too much because the crust will shrink a bit as it bakes.) Roll out a circle slightly larger than your pie pan. Gently transfer your crust from the pie board to the pan, using your hands or by laying it across the rolling pin. Center it on your pie and trim the edges for the top crust, cutting the top crust so that it is about 1 cm larger than the bottom crust all the way around. Fold the edge of the top crust over the edge of the bottom, sandwiching the bottom crust inside the folded over top crust. (Wish I had a picture of this, but I hope that description makes sense!) Gently press the edges together all the way around to seal them and then flute them, mark with fork tines, etc... If you are making a berry pie, you will probably need to vent it by cutting some slits in the top, and if you have one, use a
pie bird. A pie bird will prevent the juices from bubbling over. Sprinkling some sugar or cinnamon/sugar on top is a nice touch. You can also do cookie cutter cut-outs on the top crust if you want to get really fancy.
Making a lattice top:
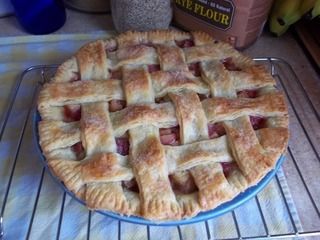
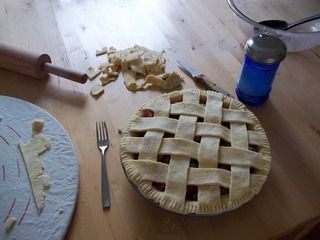
A lattice top looks pretty with a fruit pie - especially cherry, apple or rhubarb. When I plan to make a lattice top, I leave the edges of the bottom crust hanging over the edge and do not trim them until the top is on.
To make a lattice, simple roll out your circle a little larger than your pie pan and cut the circle into long strips. To weave the lattice, I lay the longest two pieces down the middle first. I take the next two longest pieces and lay them perpendicular to the first two, gently lifting and tucking the strips over and under when they need to be for a neat basket weave. Weave in a final strip on each of the four sides and let the edges drape over the pie pan.
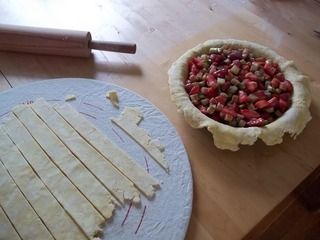
With a sharp knife, gently cut around the
outside of the pie pan to trim the edges of the crust. (You don't want to cut off too much because the crust will shrink a bit as it bakes.) Gently press the lattice into the bottom crust dough smoothing it together. To seal the crusts together, you can make a fluted edge or as I show below, just a simple edge with the tines of a fork.
Now you should be ready to bake!
 Pin It

